"People who feel the need to control others, don’t have control over themselves." - Unknown
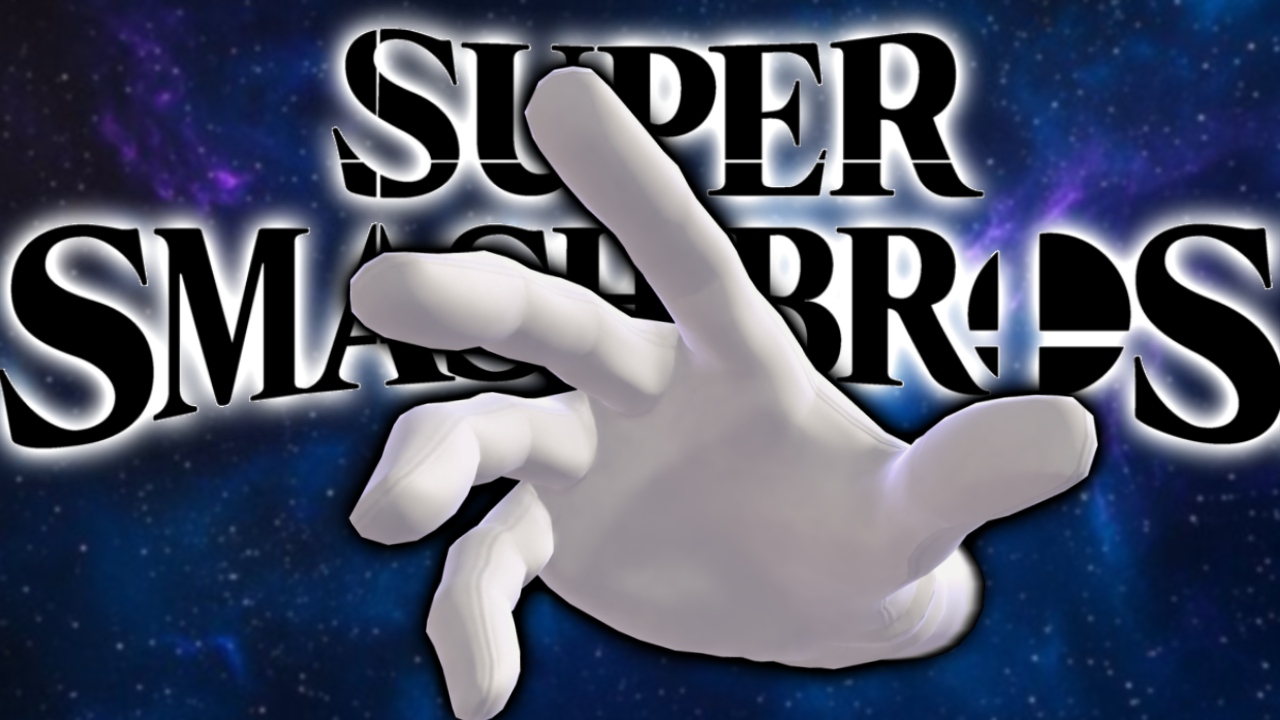
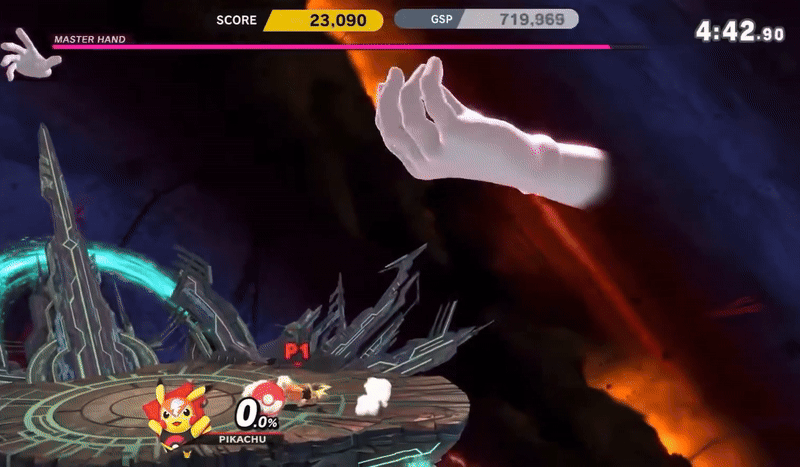
Master Hand, the master of all creation from Super Smash Bros.
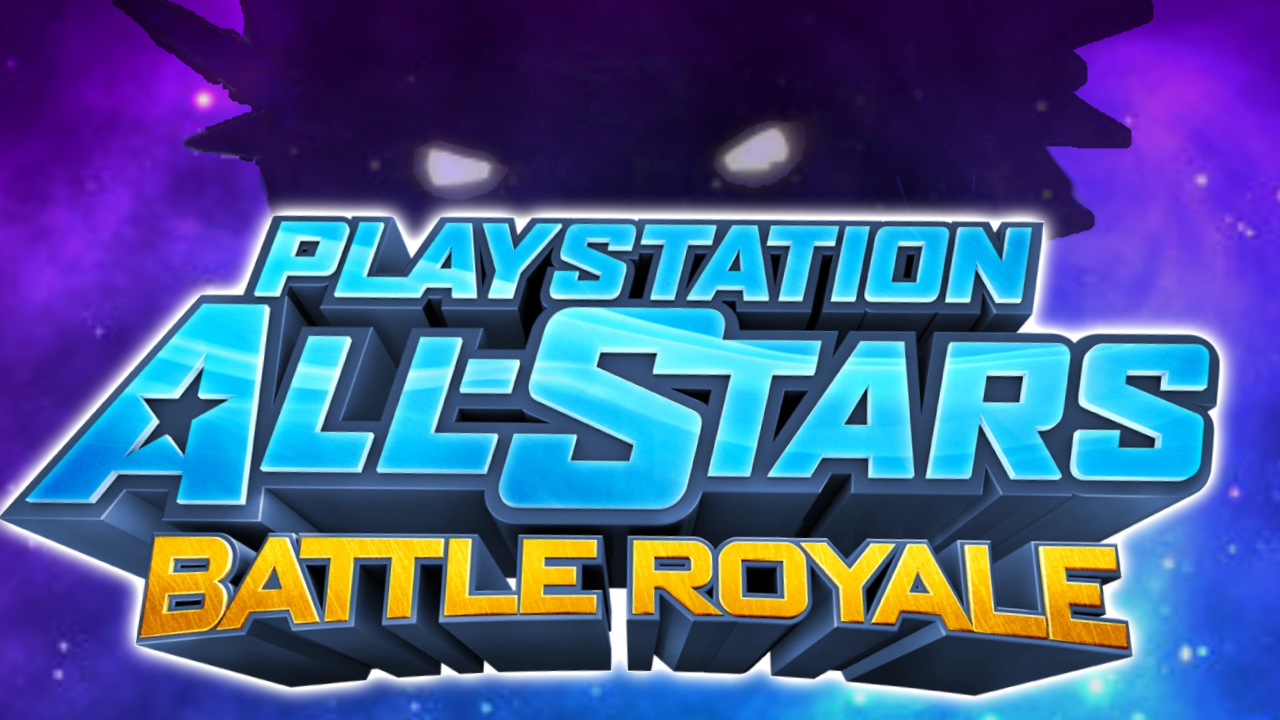
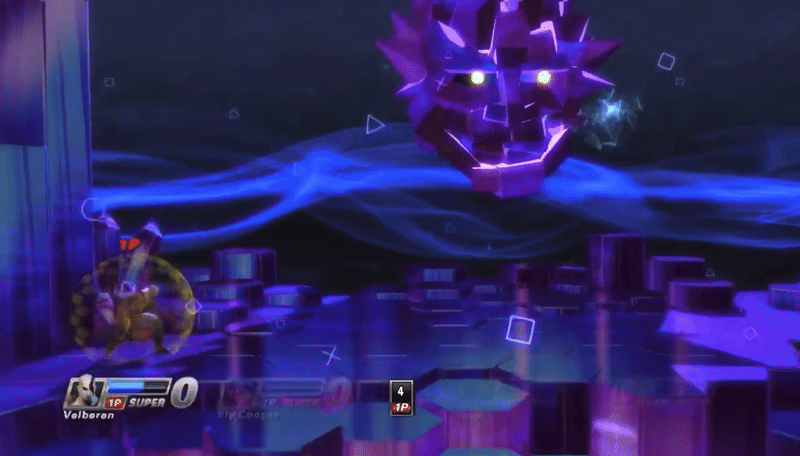
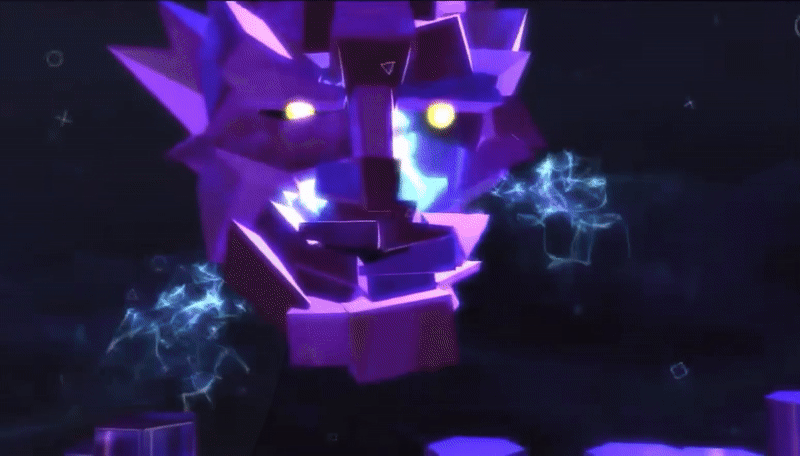
Polygon Man, the rejected mascot and overlord of PlayStation All Stars Battle Royale.
Nintendo and PlayStation have been some of the biggest dogs when it comes to making games these past few decades. So what happens when you take the gods of their crossover fighting games and make them and their fighters duel?
Before We Begin
This blog is very simple in the media used. The blog will ONLY FOCUS ON THE FIGHTING GAMES FOR BOTH. This means no Kirby scaling for Master Hand, no Astro Bot for Polygon Man and most importantly we will not be scaling either character to feats performed from the crossover franchise's home series. We will just be using feats from the various Smash Bros titles and PlayStation All-Stars Battle Royale.
Shoutout to the various Smash and PlayStation All-Stars VSBW pages for scans and calcs. As well as Cryotechnics’ Miis VS Minifigures Blog.
Background
Master Hand
“Mwa-ha-ha-haaaa!”
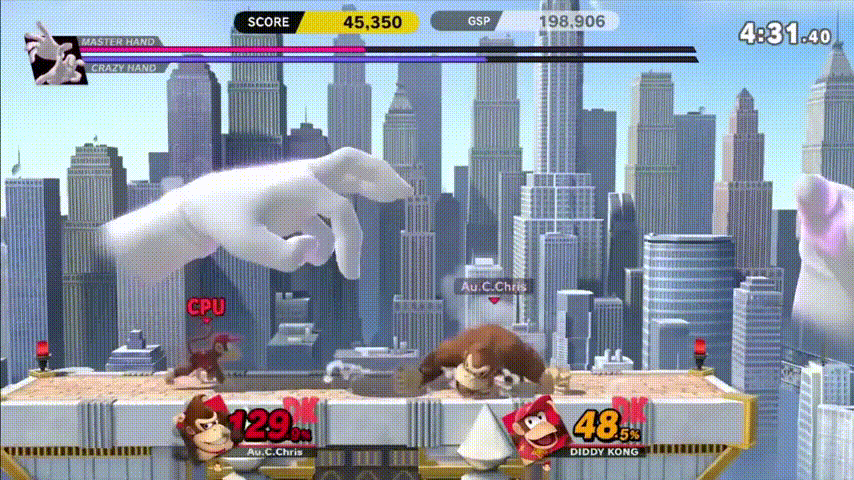
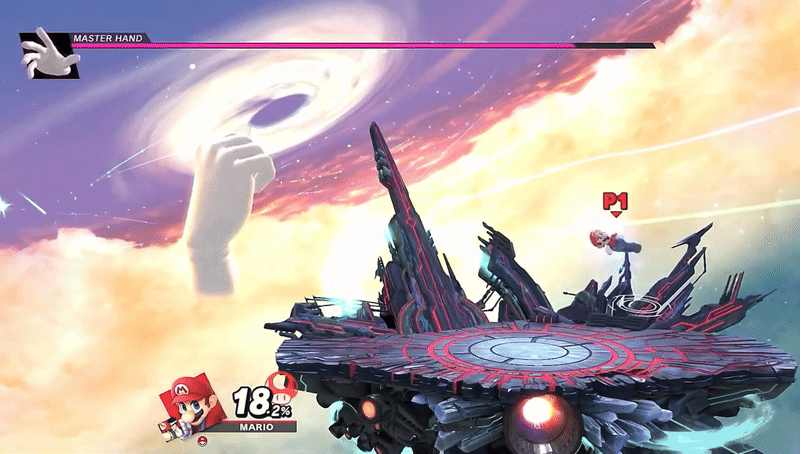
The worlds of Nintendo, far and wide, are some of the definitive examples of bringing fun and joy into the realm of digital entertainment. They are the company you have to thank for saving the west from the Video Game Crash of 1983, enabling the many other companies and properties we have today to even just exist. They’re the root of our modern gaming world, and with their incredible roster of heroes, villains, and general wacky characters, it only stands to reason that seeing all of these remarkable casts come together would be nothing short of genre-defining. Well, in this world, they do. As trophies, living to fight, these incredible warriors come together to pit their abilities one against another, all under the imaginative guidance of one mysterious being. This anomaly is the very personification of creation and usually the last challenge that awaits fighters, the one, the only, Master Hand.
As popular and well-known as this great big glove is, the fact of the matter is that we actually know very little about Master Hand. He hides himself largely in mystery, to the point that we don’t even know if this is the full extent of his abilities. But what we do know is that Master Hand is the creator of Super Smash Bros., and he actually cares quite a bit about his creations and enjoys monitoring their battles. Yes, while Master Hand is the final boss in a lot of cases, it wouldn’t really be true to say that he’s evil. He just greatly enjoys taking on the mightiest warriors he can come across, even if he is always holding back. In fact, Master Hand has even directly taken part in fighting against the forces of evil on a few occasions, even beating down an army of dark (or light we suppose) copies of fighters created by Galeem and Dharkon.
But while we can pretty safely put together that Master Hand is no villain and just enjoys the thrill of battle as much as any of his creations, there’s really only so much we can truly figure out about him. Have we ever truly seen the full extent of this creator’s power? Does he have any deeper motivations for creating such a grand and sprawling world as the one of Smash Bros.? Is he really just a great big glove, or is he something else entirely? The fact of the matter is we’ll probably never know, no matter how much we may speculate. But no matter who Master Hand is and what his ultimate motivations may be, we can at least be confident that the world of Smash rests (relatively) safely under the might of its creator. And whenever a fighter clears their way through the gauntlet of their adversaries, Master Hand will always be ready and waiting at their Final Destination, eager to truly put their abilities to the test.
Polygon Man
“I consider this a role-playing game. Today, you’ll be playing the part of a piñata!”
Playstation. A household name creating some of the most beloved memories and games for the past three decades. May it be the ever creative LittleBigPlanet, the action packed God Of War, or the moral questions of Infamous, almost every game on Playstation consoles has brought a fulfilling experience to the people. Of course, every good brand needs a face, and Playstation was no exception. The year was 1995, the groundbreaking Playstation had finally reached North America. To help advertise this product, Sony would place a small mascot in papers advertising the console. The very first and unfortunately rejected face of the Playstation brand was the very face that hovers before us today: Polygon Man.
Unfortunately, before Polygon Man could be deemed the face of a system, he was rejected by Playstation head, Ken Kutaragi. Polygon Man would soon fade into the realm of obscurity for decades. Fast forward to the tail end of the PS3 generation, Polygon Man would be revealed to be the main villain of Playstation All Stars Battle Royale. Not much is known of Polygon Man’s actual origin within PS All Stars or what his reason is for why he brought all of these Playstation characters together to fight each other. But what we do know is that Polygon Man considers himself a god and that none have bested him before.
From what we can gather, he does live up to what he claims, considering how much he enjoys control over others. Polygon Man also seems to possess a powerful essence called All-Star Power, or AP for short, which we see form him before his fight. This seems to be the most likely source to his godly power and how he’s gained control over many powerful fighters. At the end of the day, while not a whole lot may be known about Polygon Man, all that matters is that he’s an evil god that wants to prove his superiority to everyone in the Playstation universe. No matter which fighter it is, Polygon Man awaits at his arena to grant them a challenge.
Experience/Skill/IQ/Other
Master Hand
Truth be told, the full extent of Master Hand’s skill and capability in combat is not something we can get a complete lock on. You see, while Master Hand is someone who is fought on a frequent number of occasions throughout the Super Smash Bros. series, there’s just one ever-so-minor thing worth pointing out with these fights. He’s always holding back. Yes, even if he is the final boss most of the time, even if he is one of the greatest challenges to face in the games, that’s just Master Hand messing about and having some fun. Even Master Core we can’t say for certain is his full strength, it just might be. Well, if we’ve never seen Master Hand going all out, what can we say about his capabilities?
Taking into account what we do know, it does appear that Master Hand is an extremely skilled, devastating fighter. Master Hand stands as the final and greatest challenge that players face at the end of Classic Mode (for most fighters anyway), eclipsing the threats that are other fighters by a significant degree. In the World of Light mode, Master Hand was even capable of cleaning out an entire army of doppelgangers created by Galeem and Dharkon, all by himself and with no amplifications or backup. If taking out a whole army of fighters doesn’t convince you this hand has skills, not much will. His experience is also quite impressive as well, doing battle against so many fighters time and time again would naturally rack up quite an impressive number of battles, and Master Hand has done battle with pretty much every fighter on the roster at least once.
While slightly less known, Master Hand also appears to be rather intelligent as well. Of course, being able to create a functional universe like Master Hand did already takes some incredible knowledge, and he also generally seems to be a pretty smart fighter. He and Crazy Hand were also able to figure out how to swiftly bypass Galeem and Dharkon’s defenses with a portal and beat up their army, so he seems to be skilled in figuring out such problems and how to mess with reality however he pleases. Of course, the full extent of all of this is hard to actually quantify, given Master Hand’s full ability has never been revealed. But it is quite clear that he is one of, if not the most capable fighter in the world of Smash, and he’s been in likely hundreds of duels, testing his might against the very best of the best.
Polygon Man
Almost nothing is known about Polygon Man and his prowess and battle. However we do know has fought before the events of PSASBR and that he has not lost until the Arcade Mode showing he has some talent. Polygon Man’s main strategy is sitting back and using transformations to overwhelm his opponents from afar while his summons and corrupted fighters do the main dirty work. Polygon Man is sure of his power allowing him to be a decisive leader who can quickly handle threats to his rule. His variety of fighters and transformations allow him to keep opponents on their toes, forcing them to get creative when combating Polygon Man.
Abilities
Master Hand
Creation
Master Hand is regarded as the ”source of creation”/”manifestation of the creative spirit” within the Smash Brothers universe. As such he can create pretty much anything he desires in battle. For example he can create spikes by dragging his finger across the ground. For a more extreme example, Master Hand created the Peach’s Castle stage with just a snap of his fingers (shown above).
Flight
Master Hand is a perpetually levitating hand in a constant state of flight. However, he can boost his flight speed via hand-slot rocket propulsion.
Finger Bullets
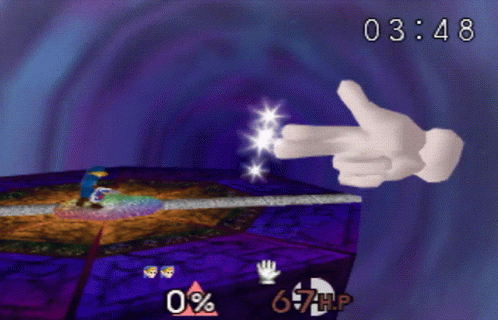
The Fraudulent One and Fraudkima ain't got shit on these finger guns. By making the shape of finger guns Master Hand’s can shoot bullets from his fingers.
Fire Manipulation
Master Hand can create a ball of fire that he crushes in his hands. This ball then breaks apart and sends the pieces onto the stage to scorch foes. Master Hand can also set enemies on fire by kicking them with his fingers.
Electricity Manipulation

Master Hand can control electricity to shock his enemies. Usually this is manifested in the form of orbs that can home in on enemies. Electricity can also be found inside most of Master Core’s forms.
Finger Drill
Master Hand can bury foes in the ground, making it impossible for them to move.
Icy Wind
By waving himself up and down, Master Hand can create a large gust of wind that moves enemies back. On higher difficulties, Master Hand can form a blizzard that shoots ice blocks.
Energy Manipulation
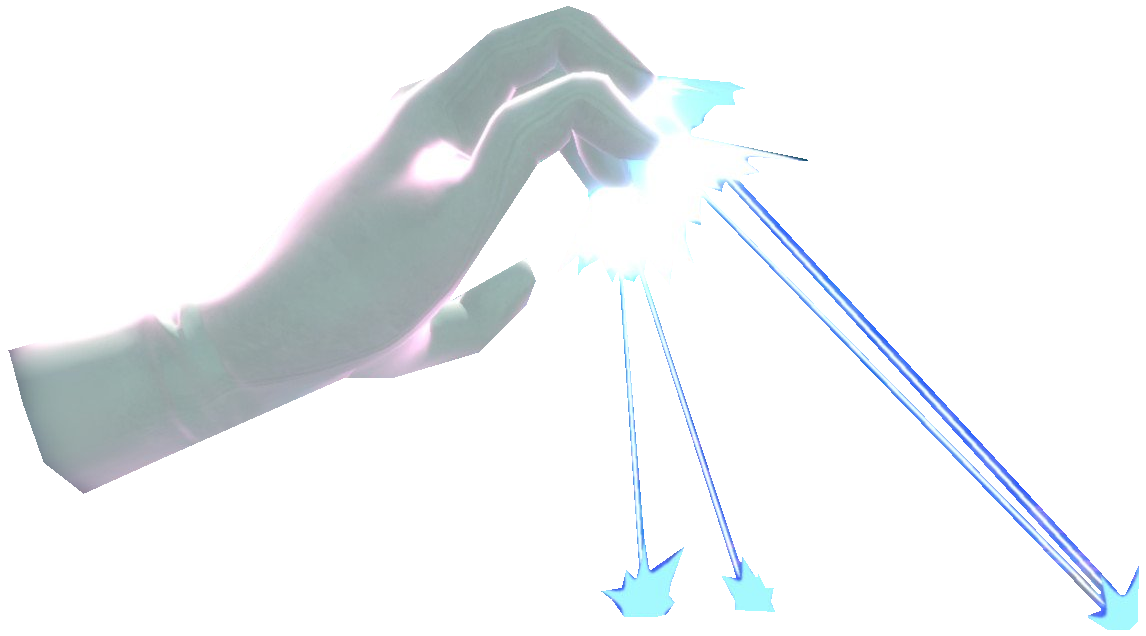
Master Hand can fire energy based attacks such as his famous Laser Nails. He can also throw balls of energy out that he uses to play ping pong with Crazy Hand.
Sleeper Grab

When it’s past your bedtime he forces you to go to bed by crushing you.
Snapper
With a snap of his fingers, Master Hand can inflict a stun on you.
Duplication
In either Classic Mode or Master Orders, you can challenge a “horde”, essentially multiples of the same character created by Master Hand.
Size Manipulation
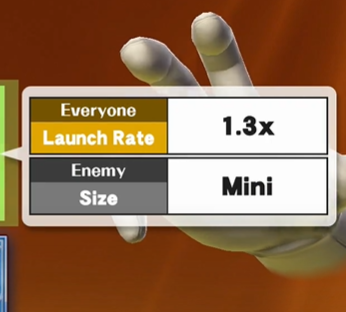
Master Hand can change the size of combatants in Master Orders. This can be done at mini or mega sizes. He can also do this in Classic Mode.
Speed Manipulation
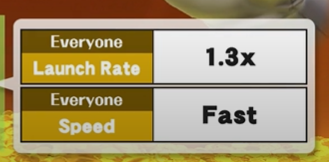
Master Hand is able to change the speed of combatants in Master Orders.
Weight Manipulation
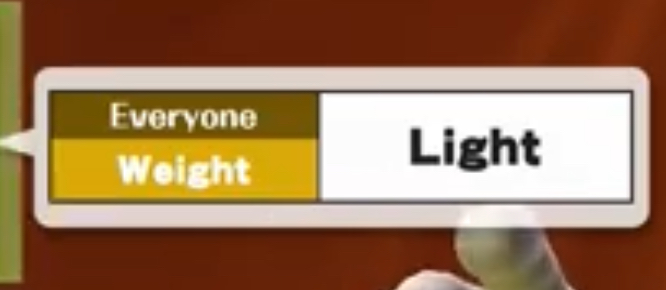
Master Hand can affect the weight of any fighter he desires. This includes making them lighter or heavier
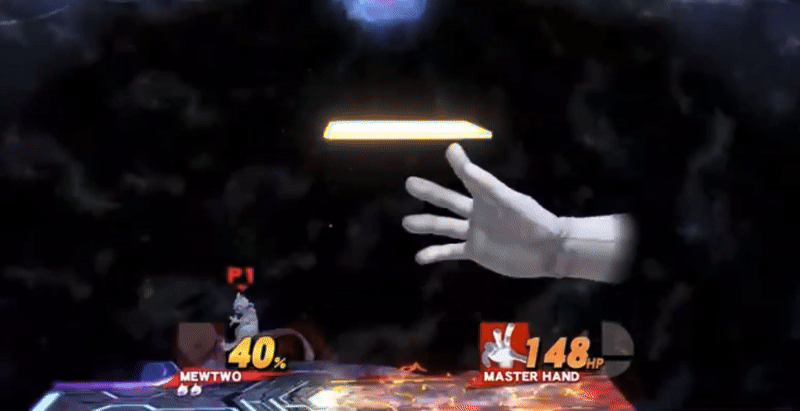
Launch Rate Manipulation
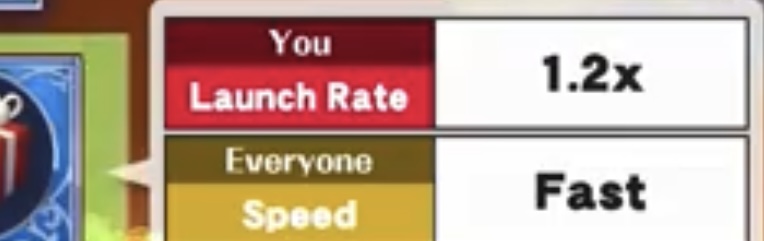
As shown above Master Hand can affect the launch rate of combatants in Master Orders. Launch rate determines how far a fighter will be knocked back after being hit. This can also be targeted as shown above
Damage Manipulation
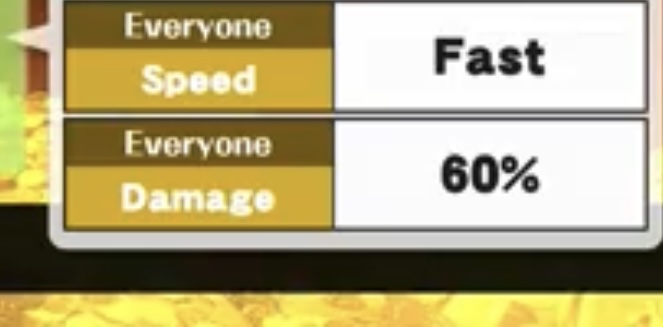
Master Hand can cause automatic damage to someone while sending them into Master Orders.
Teleportation
Master Hand can instantly move from one place to another. He can even teleport others as shown in Master Orders, teleporting any chosen character into a battlefield of his creation.
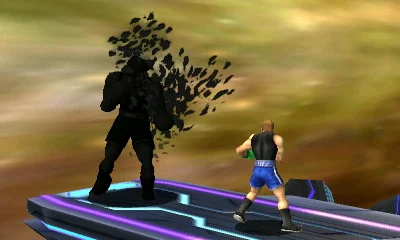
Regeneration
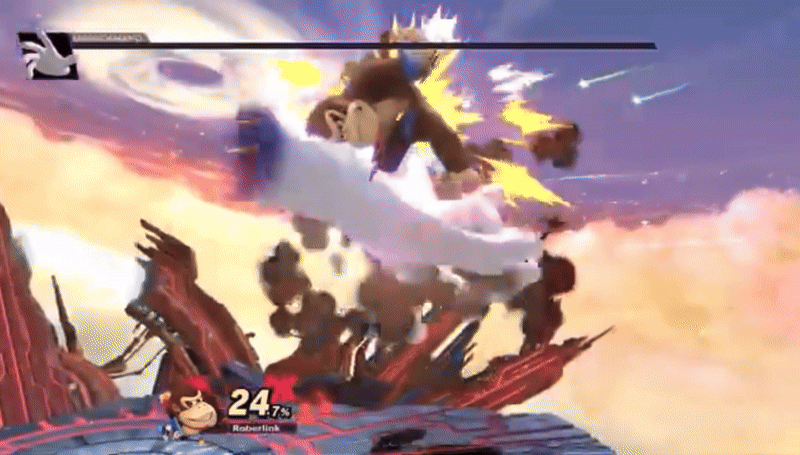
Looking at the above GIF one may be confused how Master Hand getting exploded into nothingness counts for regeneration. However if you cut to the next scene he’s clearly alive and freed from Galeem’s control, meaning he must have regenerated from getting turned into nothing.
Spatial Manipulation
In World of Light, Master Hand can create a crack in space that leads to Galeem and Dharkon. This becomes a full on hole in space people can travel through when given the help of Crazy Hand.
Polygon Man
Flight
He’s a floating head. Not much else to say.
Body Control/Polygon Physiology
Due to the fact Polygon Man is just a bunch of polygons stuck together he can rearrange his make up at any given moment. This unique control over his body allows Polygon Man to change too and from many different forms. This also means he can even function when pieces of his head are broken off.
Reality Warping
While not directly stated, it’s clear Polygon Man caused the merging of many universes. This allowed elements from these worlds to be warped together for PSASBR’s stage transitions. For example, Polygon Man caused a whole city from Metal Gear to merge with Franzea which is shown above.
Summoning
At a moment's notice, Polygon Man can summon Polygonal All-Stars to his side.
Power Bestowal
Polygon Man’s core is capable of powering up anyone who defeats him with an immense power boost. This boost also applies to vehicles that an All Star is making contact with.
Corruption
Polygon Man is capable of turning those he defeats into Polygonal All Stars under his full control.
Arsenal
Master Hand
Iron Balls
He's got balls to huck and balls to chuck.
Discs
Boomerang-like discs that hit foes on the way forward and back.
Platforms
Master Hand can create small platforms that carry the opponent into the blast zone.
Paint Balls
And you thought he was out of balls…
Master Hand can summon and throw large blobs of paint that explode when they hit the ground. These balls cover the target in paint meaning they take more damage and they become partially blinded.
Reflective Panels
Master Hand can create a series of small panels before shooting a laser that bounces off of them.
Smash Items
While you may not associate items with Master Hand due to his boss fights not having them appear, items can appear during Master Orders. Since these scenarios are controlled and devised by Master Hand he must have put the items into the battle and at minimum his summons can use the items. He can also give fighters items to start the battle with.
Smash Ball | The Smash ball needs no introduction. It’s an energy like ball that once hit enough times ingraines itself into the last person who hitted it and gave them they’re Final Smashes. |
Dragoon | Three items are scattered across the battlefield, once all of the items are picked up they’re formed into the Dragoon and crash into the opponents off stage. |
Daybreak | Similarly obtained like Dragoon, Daybreak once put together fires a massive laser directed towards the foe. |
Containers (and many items similar to it) | Containers like Barrels, Crates, Grass, Party balls and Rolling crates all hold items inside and will drop them if broken. Unfortunately, This can backfire and will be blown up by bombs being inside! |
Capsules | Capsules are usually found in the crates themselves, They blow up when opened, that's basically it. |
Bomber | A living bomb that lives to blow itself up, Once held by someone it’ll create a gigantic explosion. Although the bomb can blow up by themselves if they fall off a platform. |
Blast Box | An explosive crate that blows up, no way. |
Fraud Smash Ball
| It’s an very obviously fake ass Smash ball that’s fucking stupid. |
Sandbag | A punching bag that punched really hard gives the abuser a capsule, something that can be used as an explosive. The sandbag is also alive so... |
Maxim Tomatoes
| Tomatoes that fully heal you to full health. |
Heart Container | Hearts that replenish your health to max… Like a…. Like a tomato….. |
Fairy Bottle | It heals someone who has taken more than 100% of damage. |
Healing Sprout | The Item slowly heals whoever picked it up. It can be transferred to another person through contact. |
Healing Field | The item creates a healing field (No way) onto the ground. Whoever stands on it slowly heals. |
Mushroom | Touching it makes you giant and increases the user's attack power. |
Toxic Mushroom | Kinned to in real life mushroom. These mushrooms make you smaller like a little bitch. |
Super Star | Star’s work how they normally work and make you invincible…. Say that again? |
Warp Star | Shoots right up, then back down for a brutal attack. The user can aim where the star goes. |
Metal Box | Turns the user into metal (No way). Light attacks done won’t make the user flinch and tougher to kill. |
Bunny Hood | Despite not being a hood at all, The hood boosts your speed and jumps GREATLY. |
Superspicy Curry | A dish so spicy you’ll constantly have fire shot out of your mouth. |
Timer | The item slows everyone down except for the user, unless it backfires which then slows you down too. |
Lightning | When grab it’ll make the other combatants shrink down-expect when it backfires. |
Bullet Bill | You turn into the real bullet bill and charge forward right through everyone. |
Beam Sword | Any strong attacks from this hot blade will make the blade longer. Might be a hellraiser reference??? |
Star Rod | Side smash attacks and side tilts from the user will fire stars. |
Home-Run Bat | Use a side smash to send your foes flying! It’s hard to land but has a lot of attack power to it. |
Hammer | Once you start, You can never stop swinging away, landing instant kills. Unless it backfires and the head comes off lmao. |
Golden Hammer | You do the exact same thing over and over and over and over and over again, jumping makes you float for a bit, too! |
Lip’s Stick | When hit by it, an energy sapping flower blooms onto your head, slowly sucking your life away! |
Fire Bar | An item with a long reach but gets shorter the more hits you land with it. |
Ore Club | Swinging creates an incredibly strong attack. Side smashes adds a whirlwind effect. |
Killing Edge | The sword glows when land, damage and launch will be doubled. |
Death’s Scythe | A tilt or a smash attack will brutally KO foes who have high damage instantly. |
Ray Gun | Fast moving shots that can knock foes backwards and into the air. Land more blows to really be more annoying. |
Fire Flower | Bathe your foes in the heat of the fire flower! The inferno bath doesn’t last long though. |
Super Scope | Fire quickly or hold the trigger for it to charge up a powerful shot! |
Gust Bellows | This item is picked up and fires annoying ass strong wind. |
Steel Diver | Give it a second and it’ll fire at high speeds. |
Drill | Fire this to send a drill across the stage and push off poor fools who get in the firing range! Throw the base too if you feel like an even bigger dick! |
Banana Gun | The inside of the Banana becomes a bullet in one shot. The item becomes a banana peel after it gets thrown onto the ground for someone to slip on. |
Rage Blaster | Every damage done to you makes this gun stronger with its rage blasts. |
Ramblin’s Evil Mushroom | Hit opponents with evil spores and a mushroom will grow and reverse the movement of others |
Staff | An weapon that fires a laser that would deal more damage if the foe is farther away |
Bob-Omb | The bomb packs a serious blast. Left alone and it tends to get bored walking around…. |
Motion-Sensor Bomb | You can read, I hope. |
Green Shell | A shell you grab and throw causing it to rapidly spin towards the foe, the shell also has a red shell variant. |
Bumper | A bumper is placed in the air or onto the ground, when touched it'll… well… bounce them away like a bumper. A variant also exists called the flipper.. |
Freezie | It slides across the ground. When thrown, anyone hit will be frozen in ice for a while. |
Mr. Saturn | Throwing him won’t do much damage, but the damage will instead annihilate any shields he hits. |
Gooey Bomb | When stuck to something or someone. It sticks onto that area until it blows up… Until you rub it onto someone else. |
Smart Bomb | Bomb that creates an explosion hurting anyone caught in the blast. Unless it backfires and decides not to work. |
Deku Nut
| A little nut that dazes fighters on the ground and launches those who are in the air. |
Smoke Ball | This item will roll when thrown to the ground or stick to people. The Smoke makes it hard to see the battle. |
Pitfall | Creates a hidden pitfall, trapping anyone who steps in it. |
Hothead | When hit, the fireball grows. It moves around the area. Rapidly. Grows bigger when fire and electricity lands on them. |
Unira | Spikes will pop out after being placed. It sticks to walls, too! |
Soccer Ball | One good kick and watch the ball burst into flames! You can’t pick it up via it being a foul. |
Bombchu | This zippy bomb crawls across the floor and ceilings. It’ll go off when it hits someone or the fuse runs out. |
X-Bomb
| The Blast is an X. |
Hocotate Bomb
| Not actually a bomb, It’s just a ship that flies into the air and crashes down instantly on poor people who got in its way. |
POW Block | Hit or throw the block to cause a shockwave across the ground and launch everyone into the air! Can only be used three times. |
Spiny Shell | Or the “Blue Shell” is thrown and seeks out a combatant, then slams down and explodes! |
Boomerang | It’s a boomerang. |
Beetle | This item is thrown towards someone and will grab you and drag you into the kill zone. The higher the damage the harder it is to break out. |
Cucco | It’s a chicken! If you attack it, the entire flock of chickens will jump you, chipping damage onto you. |
Beehive | A Swarm of bees will emerge and surround a fighter dealing damage onto them bit by bit. |
Killer Eye | It’s a Turret. |
Boss Galaga | Basically acts like the Beetle but if it wasn’t annoying and sucked. |
Beastball | Throw it, and it’ll disappear in the air then reappear near someone, covered in flames. |
Black Hole | No way… |
Franklin’s Badge | Wearing this will reflect all projectile attacks from foes. |
Screw Attack | Picking it up will be able to do screw attacks when you jump without ending. |
Back Shield | Picking it up and you’ll be protected from the back. High amounts of damage will destroy it. |
Super Leaf | Jumping and holding that jump while wearing this makes you hover with the help of the tail. |
Rocket Belt | Not a belt but instead a jetpack! It’ll refuel automatically on the ground. |
Super Launch Star | Create a star-shaped gate and it’ll launch anyone who steps in it. |
Special Flag
| Hold this high into the air and you’ll gain +1 stock. |
Fan | Comically large fan that’s insanely weak but has high attack speed along with being well at trapping opponents and breaking shields. |
Parasol | An Umbrella that travels extremely far when thrown and drifts slowly forward. It sucks though so whatever. |
Cracker Launcher | Ignoring the very funny name, The weapon fires fireworks which bounce off the walls and explode on impact with the floors or onto someone. |
Spring | It’s a jump pad, you bounce on it to gain height. |
Team Healer | Team Healer cannot heal the user who picks it up but instead can only heal teammates. It can also hit other opponents. |
Barrel Cannon | Rare and quickly vanishes, It’s a heavy throwing item you can throw, You can get trapped inside and fire out of it. |
Assist Trophies
These are being given to Master Hand for the exact same reason as the smash items, Despite Master hand never being shown to use these summons himself.
Hammer Bro
| These annoying dicks jump in the air throwing hammers at you. |
Lakitu and Spinnies
| The Lakitu drops spinnies from the sky to the ground as he flies left and right. |
Chain Chomp
| It Jumps and takes massive chomps out of people but is chained to a stake. |
Thwomp | Hovers above you and if you walk underneath he drops downwards and crushes you between his weight. |
Waluigi | See! He got an invite! He stomps on you and can kick you very hard or hit you with his tennis racket! Very awesome moveset thanks Mr. Sakurai! |
Flies and Hand | Fly swatter lore |
Klaptrap | Little gremlin lunges across the screen and latches to foes. |
Tingle | Randomly activates strange effects and random items. Unfortunately when he spawns It backfires as Assist Trophies take longer to spawn back. |
Ghirahim | Attacks with sword and throwing knives and teleports. But he can still be KO’d. |
Midna | Using her long hair, she grabs foes and throws them while dealing darkness damage. |
Skull Kid | Skull kid is a little shit so he decides to flip the screen, reverse all movement and make everyone invisible. |
The Moon | THE MOON HAUNTS YOU BY CRASHING DOWN AND DEALING MASSIVE DAMAGE. |
Metroid | Latches onto the fighter and sucks away your life slowly, but can be shaken off. |
Mother Brain
| She uses her trademark laser attack when summoned and has Rinka enemies guarding her. Can be slayed. |
Dark Samus | Despite being an echo fighter to Samus, Dark Samus was able to be summoned by the assist trophy (going to have a lot of characters like that). Dark Samus rapidly fires gunfire and blasts of Phazon. |
Knuckle Joe | Delivering a series of Jabs to unlucky combatants who get in his path and finishes with a smash punch or an uppercut attack named rising break. |
Chef Kawasaki | Puts the enemy in a pot, cooking them up. |
Nightmare | Makes the screen go black temporarily. |
Andross | Appears in the back and fires cereal towards you. |
Krystal | Wanders around and freezes foes with her staff. |
Jeff (the killer) | Fires five 5 homing rockets (4 small 1 large) towards opponents. |
Starman | Teleports around and fires bolts of lightning, can be SMAAAAAAAAAAAASHED off stage |
Samurai Goroh | Swings his sword around while haunting enemies down. |
Lyn | The screen goes black as Lyn focuses and then dramatically appears in front of foes with a powerful slash focused on the nearest opponent. |
Tiki | Turns into a dragon and attacks those with fire power, |
Black Knight | Walks around slowly, attacking any nearby enemies with his sword. Appears to be very resistant to most attacks. |
Magnus | Leaps around and swings his club, He can be flinched when attacked and killed. |
Phosphora | Bolts around quickly and shoots lightning bolts. She can be flinched and killed too. |
Kat & Ana | Both twins fly in different paths slashing at anybody in front of them, but always cross in the same spot. |
Ashley | Creates a cloud which basically drugs you (Not cool Ashley). |
Grey Fox | Runs around and swings his blade, Can reflect projectiles. |
Shadow the Hedgehog | Using Chaos Control, Shadow slows down time for 7 seconds which affects everyone except for the tamer. In ultimate, after 7 seconds are up. All foes affected are then frozen for 3 seconds. |
Knuckles
| Buries himself underground before rising up with a furious uppercut! Can combo with punches, or do an homing attack similar to Sonic’s entire moveset. |
Burrowing Snagret | Emerges from the ground and pecks at opponents wildly, then hides underground before reappearing at another location in a loop. |
Mr. Resetti | Might be the funniest assist here because he just starts yapping, if you decide to hit him he fucking blows up. |
Kapp’n | Drives a bus across the stage. Any troopers he makes contact with will be trapped, dragging them towards hell. |
Isabelle | She heals the one who summoned her by throwing fruit towards them, if she has shit aim other fighters can pick it up and heal themselves. She can be stunned…. Man it’d be so awesome if she threw hands…. |
Elec Man | Unlike his free will, Elec Man moves freely and attacks characters with his thunder beam, Can be killed like the bum he is. |
Zero | Zero attacks with his Z-Saber, and uses special techniques acquired from mavericks. |
Wily’s Capsule | Wily warps around the arena and fires elemental projectiles. |
Little Mac | Runs and jumps (Bad idea Mac) attacking with jabs and “powerful” uppercuts. Little Mac would kinda be fire to see as a fighter lowkey. |
The Pac-Man Ghosts | The four ghosts make their way across the stage, moving in a pattern akin to a maze while pushing and hurting opponents. |
Riki | Using different arts, including Happy Happy, Bedtime, You Can Do It, Roly-Poly, Freezinate, and Yoink. |
Guile | Guile crouches in place and fires Sonic Booms and any physical attacks towards him. Intercepts nearby enemies with a Flash Kick. |
Rodin | Attacks with big arms and attacks mirroring Bayonetta’s moves. Before leaving, he spawns a random item and throws it towards the summoner. |
The Squid Sisters | They perform a concert live in the middle of the fight. And the camera loves it so much it kills you by zooming in |
Alucard | Wields his blade and attacks with it. He can also transform into a bat and fly to another portion of the arena. |
Spring Man | Jumps around and attacks with elongated punches. He can also rush you down with his pummels. |
Nintendog | Get blind sided by how cute this dog is. It’s so cute it becomes a kaiju and blocks the screen! |
Color TV- Game 15 | So you know what Pong is right? |
Sheriff | Ignores the laws of gravity and shoots at opponents with a pistol. Can be killed. |
Devil | He moves the screen really poorly. |
Excitebike | Multiple racers will fall down and run over literally anyone from any side of the arena. |
Takamaru
| Throws his pinwheel knife around opponents racking up damage. Can be ko’d though. |
Infantry and Tanks | The entire US force spawns in to gun down the fighter. It follows who summoned them. |
Prince of Sable | He gets a cloud of dust to trap you, before turning into a frog and a snake. Can be killed. |
Sukapon | Throws his head at people, throwing said people or tossing himself. |
Saki Amamiya | Slashes and guns you down. |
Helirin | Literally a platform dawg he is USELESS. |
Isaac | Moves you off stage with his own Master hands. |
Starfy | Spins and hurts people. |
Barbara | She plays the guitar creating shockwaves (She isn’t universal) but it has lesser range then the Konga beats lmao. |
Dr. Kawashima | Flings numbers foes that can be attacked and knocked, When they add up to 10 or more they explode causing damage to foes near it. |
Jill | The drill item if it fucking sucked. |
Ray MK lll | Files around and shoots missiles or green bullets. |
Vince | Vince doodles various drawings to block a player's view and damage them. |
Nikki | She too also doodles but instead of blocking you, she creates obstacles on the stage. |
Dillon | Rolls around the stage including a quick charge. Can be killed like many other roaming assists. |
Arcade Bunny | Summons a claw and tries to drag fighters to the top of the screen. |
Bomberman | Literally just plays Bomberman, he can even get hurt by his own bombs. |
Akira | Runs around and attacks foes with many various martial arts. |
Rathalos | Rathalos swoops in and unleashes many fire attacks, such as fireballs and even stunning foes with his powerful roar! |
Yuri Kozukata | She pulls a camera out of her pockets and takes photographs of spirits roaming the stage. The spirits are you and if you get a picture taken you will be stunned and poisoned. |
Shovel Knight | Shovel Knight runs and jumps around with his shovel to bounce off many obstacles, He can also dig and fling dirt and buried items at foes. This can also mean he can bury you alive! |
Dr. Wright | Wright spawns buildings to rise out of the ground. This damages opponents who are standing in the area of the building. Occasionally makes a massive skyscraper that deals even more damage. |
Pokeballs
Abomasnow | Uses Blizzard and Ice Punch! |
Abra | Uses his most iconic move, Teleport. |
Arceus | Fucks over Gravity. |
Articuno | This majestic ice bird will stand in place and use icy wind and freeze any foes in place. |
Beedrill | A swarm of beedrills spawn off screen then rush the foes down with take down. |
Bellossom | Uses Sweet scent and makes foes tired (that isn’t how it works in game though…..) |
Bewear | Bewear just wants a hug, so if he gets close they’ll hit you with a devastating brutal swing. |
Blastoise | Blastoise will stay in place and fire Hydro Pumps in front of him. |
Bonsly | Bonsly uses tackle. |
Celebi | Does nothing. |
Chansey | Will hand over eggs that can act as explosions. |
Charizard | Charizard uses flamethrower and makes sure to get both sides of the field by tilting his head left to right. |
Chespin | Plants seed bombs. |
Chikorita | Throws razor leaves at foes and stays stationary. |
Clefairy | Clefairy uses metronome and uses every move from the original 64 pokemons (Flamethrower, Hydro Pump, Take Down, Pay day, Rock Throw, Jump kick, Smog, Softboild, Splash, Swift, Body Slam and Fly)
In Melee she can only use 4 moves (Gust, Fire spin, Waterfall or Self Destruction) |
Cyndaquil | Cyndaquil flips over uses it back to use Flamethrower |
Darkrai | Puts foes to sleep with Dark void. |
Dedenne | Fires a powerful discharge. |
Deoxys | Fire a powerful Hyper beam and stay stationary. |
Ditto | Transforms into the opponent. |
Electrode | Suicide Bombing. |
Entei | Stomps on to the ground for a large mountain of fire to spin around him. |
Alohan Exeggutor | Basically a building you can climb. |
Fennekin | Incinerates foes with a spit of fire. |
Fletchling | Pecks and tackles foes. |
Gardevoir | Reflects projectiles thrown at her with a force field surrounding her. |
Genesect | Fires a Techno blast. Doing four small fires of energy before finishing it off with a full force laser. |
Giratina | Turns left and right to fire a gust of his dragon breath. |
Gogoat | Uses Take Down to- take down combatants while using his Leech horn. |
Goldeen | Splashes around. |
Groudon | Stays still and use overheat. Fucking sucks. |
Gulpin | Vore. |
Hitmonlee | Does a jump kick towards an opponent. |
Ho-Oh | Ho-Oh flies into the background and uses his sacred fires in the middle to burn foes. |
Inkay | Makes his opps trip (Not cool Inkay get back in the locker). |
Jirachi | We see the fit Jirachi. |
Keldeo | Annoying ass piece of shit named “Keldeo” enlarges his horn to create a sacred blade and swings it around. |
Koffing/Weezing | Grouping them together because they do the same thing of Smogging foes. |
Kyogre | All this hydro pumping but can’t even beat Chaos without the creation trio he can’t even scale to… |
Kyurem | QUICK! KYUREM USE ICY WIND!!!! “KYUREEEEEEEEEEEM” and that’s how it works. |
Latios and Latias | Uses Steel Wing and dashes across the stage together. |
Lugia | Flies into the background and uses its Aeroblast attack. |
Lunala | Lunala teleports into the background and fires its Moongeist Beam. |
Manaphy | Manaphy swaps the bodies of two players. |
Marill | Marill runs around and tackles their opponent, dealing minimal damage. |
Marshadow | Marshadow uses Spectral Thief, where they go into a shadow, stunning the opponent, then it appears next to their opponent and punches them. |
Meloetta | Meloetta fires two Echoed Voice projectiles that ricochet around the stage. |
Meowth | Meowth fires Pay Day at a rapid rate. |
Metagross | Metagross stomps the ground, burying their opponent into it or launching them into the air. |
Mew | This very rare Pokemon appears to spawn in an item like a CD and flies away. |
Mimikyu | Mimikyu grabs their opponent with a dark hand and drags their opponent underneath their cloth, dealing damage to them. If over 100%, it instantly kills them. |
Moltres | Moltres flies around for a few seconds and anyone who touches them will receive fire damage. |
Munchlax | Munchlax wanders around the stage and eats items. |
Onix | Onix makes boulders fall onto the stage. |
Oshawott | Oshawott surfs around the stage and any opponent caught in it gets dragged along with them. |
Palkia | Palkia uses Spacial Rend, which temporarily turns the camera upside down. |
Piplup | Piplup surfs around the stage and any opponent caught in it gets dragged along with them. |
Porygon2 | Porygon2 tackles their opponent, dealing good launch damage. |
Pyukumuku | Pyukumuku hits the opponent with their fist if they’re close to them. The player that summoned them can pick it up and throw it around like an item. |
Alolan Raichu | Alolan Raichu surfs around the stage, zapping their opponents that get caught in it. |
Raikou | Raikou generates a current of electricity that forms around themselves, damaging anyone that comes close to it. |
Scizor | In Melee, Scizor uses Metal Claw, running forward for a short while and hitting the opponent with it. In Ultimate, Scizor slashes his opponent multiple times with his claws. |
Snivy | Snivy spams their Razor Leaf attack. |
Snorlax | Snorlax jumps into the air and comes back down more massive, delivering damage to anyone that’s near him. |
Solgaleo | Solgaleo uses Sunsteel Strikes, where he dashes towards his opponent in a beam of flame. |
Spewpa | Spewpa uses Stun Spore, which temporarily paralyzes any opponent caught in it. |
Starmie | Starmie flies towards a nearby opponent and spams star-shaped projectiles at them. |
Staryu | Staryu flies towards a nearby opponent and spams star-shaped projectiles at them. |
Suicune | Suicune uses Blizzard as its attack, where they are surrounded by a cloud of icy wind. |
Swirlix | Swirlix uses a pink cloud that slows down time around opponents near it. |
Tapu Koko | Tapu Koko uses Discharge and Electric Terrain, where it unleashes a large net of electricity around itself, dealing damage to their opponents. |
Togedemaru | Togedemaru uses Zing Zap, where they surround themselves in an electric field that causes damage to opponents. |
Togepi | Togepi uses one of five attacks, which can cause either flower status, freezing, sleep, burying, or disorientation. |
Torchic | Torchic surrounds themselves in fire, delivering damage to anyone that gets close to it. |
Unown | Unown creates duplicates of themselves that swarm around a part of the stage. |
Venusaur | Venusaur uses Earthquake, where they shake the ground and deal damage to the opponents near them. |
Victini | Victini uses Victory Star, which grants their summoner a temporary immunity to knockback. |
Vulpix | Vulpix shoots a pillar of fire. |
Alolan Vulpix | Alolan Vulpix shoots a pillar of ice. |
Weavile | Weavile dashes around a part of the stage, any opponent caught in it will be stunned. |
Weezing | Weezing has smogs of gas come out of its holes, which deals damage to the opponent. |
Wobbuffet | Wobbuffet remains immobile, but they deal knockback damage to opponents that hit it. |
Xerneas | Xerneas uses Geomancy, which causes every player's attacks to have increased knockback. |
Zapdos | Zapdos discharges electricity and sparks surround it, which harms players near it. |
Zoroark | Zoroark teleports behind its opponent and slashes them, sending them into the air, where he slashes them multiple times before slamming them to the ground. |
Stickers
Arm Attack | Increases the damage of punches, slaps, pokes, and elbows |
Leg Attack | Increases the damage of kick, knee, and stomps. |
Arm and Leg Attack | Increases the damage of those above. |
Head Attack | Increases the damage of headbutt attacks. |
Body Attack | Increases the damage of full body attacks. |
Spin Attack | Increases the damage of spinning attacks. |
Tail Attack | Increases the damage of attacks done by the tail. |
Bite Attack | Increases the damage of biting attacks. |
Slash Attack | Increases the damage of slashing attacks. |
Weapon Attack | Increases the damage of weapon attacks. |
Throwing Attack | Increases the damage of throws, objects and people. |
Flame Attack | Increases the damage of fire attacks. |
Electric Attack | Increases the damage of electric attacks. |
Freezing Attack | Increases the damage of freezing attacks. |
Water Attack | Increases the damage of water attacks. |
Grass Attack | Increases the damage of grass based attacks. |
Energy Attack | Increases the damage of energy based projectiles like Fox’s gun |
Magic | Increases the damage of magical based attacks. |
PK | Increases the damage of PK abilities. |
Aura | Increases aura based attacks damage from fighters like Lucario. |
Pikmin | Increases Pikmin damage. |
Darkness | Increases darkness based attacks. |
Explosion | Increases explosion attacks. |
Direct | Increases direct attacks damage (Good luck knowing what brawl considers direct) |
Indirect | Increases indirect damage like Snake’s explosives. |
Equipment
Master Hand can grant his fighters equipment as a reward for completing Master Orders. Equipment is a form of stat buff the fighter can use as a way to get ahead of the competition. There are three types of stat buffs that can be enhanced through equipment, Attack, Defense, and Speed. But equipment can also assign fighters with preloaded items as they go into the fight.
Sprinter | Increased Running Speed. |
Stroller | Decreased Running Speed. |
Glider | Increased Aerial Movement. |
Antiglide | Decreased Aerial Movement. |
Leaper | Improved Jump. |
Antileap | Weakened Jump. |
Hi-Jump | Improved Ground Jumps. |
Lo-Jump | Decreased Ground Jumps. |
Double Jump Boost | Improved Double Jump. |
Double Jump Drag | Weakened Double Jump. |
Thistle Jump | Floaty Jumps. |
Anchor Jump | Heavy Jumps. |
Speed Walker | Increased Walk Speed. |
Meanderer | Decreased Walk Speed. |
Lingering Edge | Hang on to the edge of stages for twice as long. |
Hasty Edge | Hang on to the edge of stages for half as long. |
Gluey Edge | Easier Edge Grabs. |
Tough Edge | Harder Edge Grabs. |
Hard Breaker | Improved Braking Ability. |
Perfect Shield Helper | Easy Perfect Shield. |
Imperfect Shield | No Perfect Shield. |
Shield Regenerator | Improved Shield Regeneration. |
Shield Degenerator | Weakened Shield Regeneration. |
Air Defender | Improved Aerial Defense. |
Air Piñata | Weakened Aerial Defense. |
Nimble Dodger | Improved Dodge Ability. |
Dodgy Dodger | Weakened Dodge Ability. |
Smooth Lander | Reduced Landing Impact. |
Crash Lander | Increased Landing Impact. |
Quick Smasher | Quick Smash Attacks. |
Hyper Smasher | Hyper Smash Attacks. |
Air Attacker | Improved Air Attacks. |
Air Pushover | Weakened Air Attacks. |
Meteor Master | Improved Meteor Effect. |
Desperate Attacker | Improved Attack in a Crisis. |
Desperate Defender | Improved Defense in a Crisis. |
Desperate Speedster | Improved Speed in a Crisis. |
Desperate Specialist | Powered Up in a Crisis. |
Desperate Immortal | Invincibility in a Crisis. |
Unharmed Attacker | Improved Attack at 0% Damage. |
Unharmed Speedster | Improved Speed at 0% Damage. |
Unharmed Speed Demon | Improved Attack and Speed at 0% Damage. |
Trade-Off Attacker | Improved Trade-Off Attack. |
Trade-Off Defender | Improved Trade-Off Defense. |
Trade-Off Speedster | Improved Trade-Off Speed. |
All-Around Trade-Off | Improved Trade-Off Ability. |
Moon Launcher | Improved Launch Ability. |
Vampire | Health Steal. |
No-Flinch Charger | No-Flinch Charge Smashes. |
Critical Hitter | Critical Hit Capability. |
Insult To Injury | Prone Damage Dealer. |
First Striker | First Strike Advantage. |
Countdown | Improved Launch During 5 Second Countdown. |
Speed Crasher | Damage Opponents While Running. |
Shield Exploder | Explosive Perfect Shield |
Shield Healer | Health Resorting Shield. |
Shield Reflector | Mirror Shield. |
Escape Artist | Improved Escapability. |
Item Hurler | Throw Stronger Items. |
Item Lobber | Weakened Item Throws. |
Item Hitter | Battering Item Boost. |
Item Pitcher | Throwing Item Boost. |
Item Shooter | Projectile Item Boost. |
Quick Batter | Faster Bat Swing. |
Star Rod | Star Rod Equipped. |
Lip’s Stick | Lip’s Stick Equipped. |
Super Scope | Super Scope Equipped. |
Ray Gun | Ray Gun Equipped. |
Fire Flower | Fire Flower Equipped. |
Beam Sword | Beam Sword Equipped. |
Home Run Bat | Home Run Bat Equipped. |
Bob-omb | Bob-omb Equipped. |
Mr. Saturn | Mr. Saturn Equipped. |
Food Lover | Increased Healing From Food. |
Picky Eater | Decreased Healing From Food. |
Crouch Healer | Heal While Crouching. |
Caloric Attacker | Improved Attack After Eating. |
Caloric Speedster | Improved Speed After Eating. |
Caloric Defender | Improved Defense After Eating. |
Caloric Powerhouse | Power Up After Eating. |
KO Healer | KOs Heal Damage. |
Caloric Immortal | Invincibility After Eating. |
Auto-Healer | Auto-Heal Capability. |
Smash Ball Attractor | Smash Ball Gravitation Towards The Player. |
Pity Final Smasher | Respawn Final Smash. |
Smash Ball Clinger | Smash Ball Retention. |
Super Final Smasher | Powered Up Final Smash. |
Final Smash Healer | Healing Final Smash. |
Double Final Smasher | Chance of a Double Final Smash. |
Sudden Death Gambler | Chance of less damage during Sudden Death. |
Safe Respawner | Extended Respawn Invincibility. |
Risky Respawner | No Respawn Invincibility. |
Polygon Man
PSASBR Items
Baumusu's Axe | A strong melee weapon that’ll spin the foe around and launch them. If spun too many times that opponent will become dizzy. |
Boots of Hermes | The boots make the user much faster, and fall much slower. In addition, when air dodging, The user can air dash! Unfortunately any action during the air dash halts it. |
Dohvat Laser Designator | Can fire lasers and bombs but it can only be used four times. |
Fusion Bomb | When thrown, It splits into multiple balls that ricochet and explode. |
Gravity Shield | It’s a shield that can defend an All-Star from the strongest of attacks. It can even block Supers at the cost of breaking it. |
Great Mighty Scythe | When used in the air, It’ll make tornadoes And blows foes away and swaps opponents movement for a short while. When attacking on the ground the scythe won’t make tornadoes, but if it hits someone they’ll gain a random effect. |
Hedgehog Grenade | It’s basically a mine that blows needles everywhere when people come close to it. If hit they’ll be stunned for 10 seconds! |
Killer Bees | Bees with lasers attack opponents near them. However, they don’t attack unless the user is attacking. |
Leech Beam
| This little shit will sap AP from anyone it targets and give it to the user. Closer they are, the faster it sucks them dry. |
Railgun | It’s a railgun. |
Medusa’s Gaze | A large range item and that turns foes to stone. |
Murder of Crows | With the name it has, it’s no wonder that flocks of crow will be sent out directly where the user is facing. This reverses the fighters movements. |
Nanotech Crates | The name is a lie. It sends AP out lmao |
Razor Claws | It can do a combo on the ground |
Sonic Rifts | When thrown at a player, It will temporarily stun them. |
Rocket Launcher | https://en.wikipedia.org/wiki/Rocket_launcher I want you to have this |
Sackbot | Sackbot loves you alot, so he’ll jump onto you and hug you quite a bit of an adorable baby! But that huge slows you down, what a little bugger. |
Spear of Destiny | While slow on the ground, The Spear of Destiny has incredible range as a melee weapon! When hit the opponent either flies up or blows up |
Sturgeon | Mfs hit you with a comically large fish and slap you around with it, funniest shit i’ve seen since Rappterverse |
Forms
Master Hand
Master Giant
When Master Hand is brought to his core, he turns into many forms. The first of which is Master Giant, a large being capable of creating plus shaped energy explosions, large shockwaves, electrical orbs capable of sucking up players and revolving balls.
Master Beast
A more frantic form of Master Hand that uses a flurry of bites, jumps and spikes to overwhelm the enemy. It can also call down lightning in an attempt to electrocute its foes.
Master Edges
Master Hand takes the form of 5 swords to cut opponents down to size. It can also summon energy orbs varying in movement, size and number.
Master Shadow
A form that turns Master Hand into his opponent. This clone has an identical moveset to the original and knows how to use these moves effectively. The clone also starts off bigger than the original fighter and shrinks as it takes damage.
Master Fortress

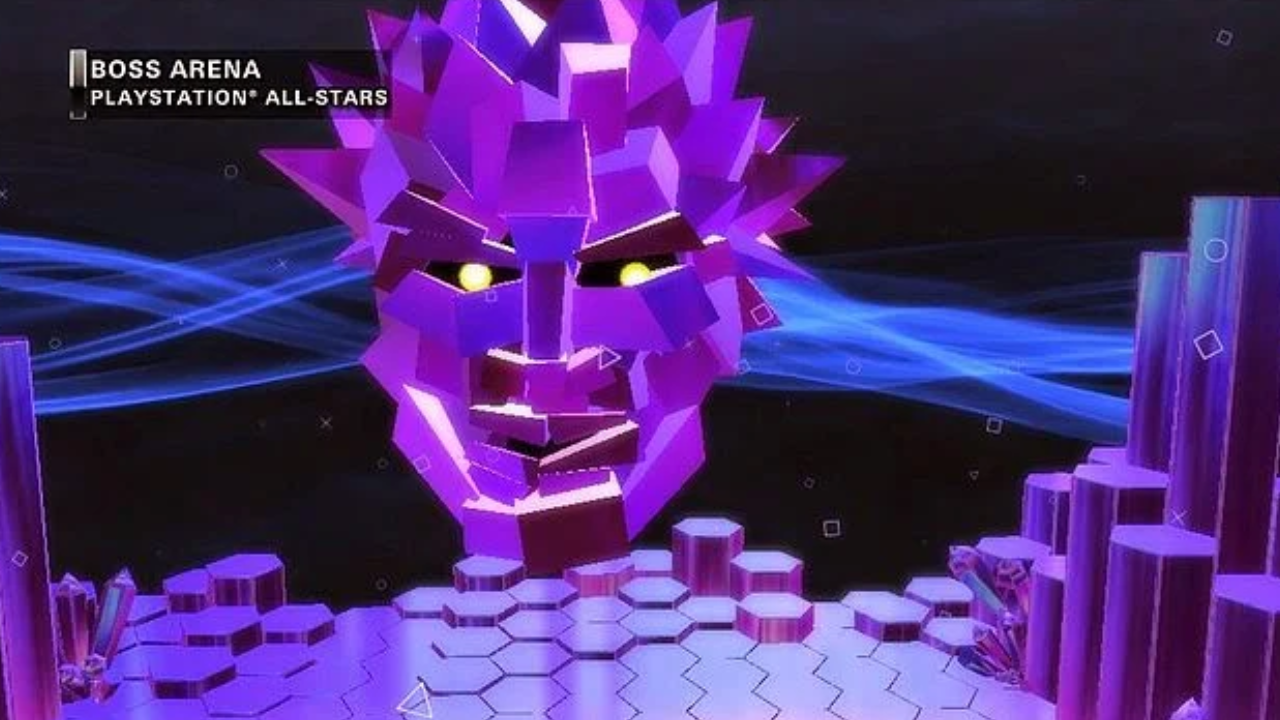
Only fought when Master Hand is at his toughest, Master Fortress is an entire domain that the player must physically step into. Of course, taking town Master Fortress isn’t easy, as it’s filled with foes who can fire lasers, Spider-like enemies that can stab you, sword-wielding foes, and even a chamber filled with an acid-like substance. Oh, don’t forget the exploding black aura.
The Master Fortress has multiple cores inside that you must damage. Significant enough damage will cause it to explode, likely causing the terrain to shift, and you being thrown out of the fortress.
Master Core
The true form of Master Hand, a defenceless core that you must hit over and over to kill. If not, the core will self-destruct and fire off waves that will instantly kill the opponent. To defend itself, the Core creates many forms out of a black mass called Swarm which the fighter must defeat.
Polygon Man
Hades
One of the big bads from God of War. Polygon Man turns into Hades and smashes the ground with his chains, creating two fire streams that meet in between the two chains.
The Hydra

Another monster from God Of War. Polygon Man uses this form to slam the Hydra’s central head onto the stage and swing the other heads to the side.
The Negativitron
Originally hailing from LittleBigPlanet is the Negativitron. By turning into this large vacuum, Polygon Man attempts to suck up his opponents before spitting them out. It can also fire beams of energy as shown above.
Patapon
Here from their titular game, the Patapon are a group of small creatures wielding spears. They throw these spears at their enemy to rack up damage quickly.
Goliath
Goliath is a large mech that originally was used by Specter from Ape Escape. Polygon Man can transform into this robot to fire missiles and detach its hands for rocket propelled claps.
Iron Maiden
Serving as a boss in Twisted Metal, Polygon Man can become the Iron Maiden, shooting head shape missiles and fire blasts.
Satan

Despite not having a playable character in game, Polygon Man can become Resistance 3’s Satan. With this form, he can spit green acid that damages fighters who stand in it.
Turbo Cannons
Hailing from Jak II, the form of the Turbo Cannons allow Polygon Man to shoot dual energy beams.
Summons
Master Hand
The Smash Fighters
EVERYONE IS HERE! LITERALLY!
In the Smash games we see that Master Hand is capable of summoning anyone in the roster to aid him in battle. He created the original roster, can clone and summon everyone for Master Orders and is heavily implied in Ultimate to summon/control characters from its roster (so everyone) like Mewtwo in Pikachu’s route.
Characters in Smash each have a few universal constants as fighters. They all have at least two jumps and the ability to create a small bubble around them that blocks damage (though these shields are susceptible to being grabbed out of or broken under too much damage). Fighters also have a “Final Smash” or powerful move they can do. Usually this requires the item known as the Smash Ball but they can also get this move through the Final Smash Meter.
Mario
Jab | A three hit combo that starts with a punch and then ends with two kicks. |
Side Tilt | Mario does a middle kick to space out his opponent. |
Up Tilt | An uppercut to hit enemies upward. |
Down Tilt | A low sweep to send opponents slightly upwards, making them easy to combo. |
Dash Attack | Mario slides into his foes for high speed damage. |
Neutral Air | Mario does a mid-air kick that somehow counts as a hitbox for his whole body. |
Forward Air | FORWARD AERIAL is used to strike foes out of the sky. If it connects in a sweet spot the overhead punch will “spike” opponents down like a volleyball. |
Back Air | A backwards kick with both legs to keep enemies at bay. |
Up Air | Mario performs a kick in an arc above him to keep his opponent in the sky. |
Down Air | Mario spins his whole body around to knock away nearby enemies. |
Get Up Attack | A 360 degree leg sweep. |
Side Smash | Mario creates a strong explosion of fire in his hand to kick away enemies. |
Up Smash | A strong headbutt in an upward arc. |
Down Smash | Mario gets in his DDR bag and break dances to attack any poor soul caught in his sick moves. |
Neutral Special | Fireball: Mario launched a fireball from his hand. It bounces across the stage until it hits someone or dissipates. Fast Fireball: Throws a faster, but weaker fireball straight ahead. Fire Orb: Throws a big fireball that’s slow, but does a lot of hits.
|
Side Special | Cape: Pulls out a cape that deflects any projectile coming Mario’s way. If an enemy is hit by the attack they will be turned to face the opposite direction. Shocking Cape: Pulls out a cape that zaps opponents, but doesn’t reflect projectiles. Gust Cape: Pulls out a cape that creates a gust of wind that can push opponents.
|
Up Special | Super Jump Punch: A rising uppercut that propels Mario upwards and strikes enemies multiple times. Super Jump: Mario jumps higher, but does no damage. Explosive Punch: Mario’s punch is more explosive, but doesn’t go higher.
|
Down Special | F.L.U.D.D.: Mario spins around damaging anyone caught in this tornado. If it connects properly on its final hit the move can spike/Mario begins to charge up F.L.U.D.D. before spewing out water. This water knocks any enemy hit a far distance away with minimal damage. Scalding F.L.U.D.D.: Shoots hot water at a short distance that can burn the opponent. High-Pressure F.L.U.D.D.: Takes a while to charge, but the blast is longer.
|
Forward Throw | Chucks the opponent forward. |
Back Throw | Spins the enemy around, hitting anyone in the area before launching them backwards. |
Up Throw | Tosses the foe upwards. |
Down Throw | Smashes the enemy into the ground causing them to be launched upwards a small amount. |
Final Smash | Mario hits the enemy with a slow moving giant fireball. |
Donkey Kong
Jab | A strong two hit combo to knock away foes. |
Side Tilt | Donkey Kong gives his opponent a good slap. |
Up Tilt | A hand slap in an arc over his head. |
Down Tilt | Donkey Kong uses his arm to sweep his opponents down. |
Dash Attack | DK rolls out to damage enemies. |
Neutral Air | A 180 spin in the air for maximum coverage. |
Forward Air | An overhead club with the ability to spike foes down if it lands properly. |
Back Air | Donkey Kong extends his leg back to push back his opponent. |
Up Air | An upwards headbutt. |
Down Air | A downward punch that spiked down enemies. |
Get Up Attack | Two claps, one back and one forward. |
Side Smash | A powerful clap for high knockback. |
Up Smash | A powerful clap but upward. |
Down Smash | DK slams his fists on both sides of himself that are capable of burying enemies in the ground. |
Neutral Special | Giant Punch: Donkey Kong begins charging up a powerful punch that he can store until he’s ready to release the strong attack. Lightning Punch: Charges up faster and does electrical damage. Storm Punch: A punch that doesn’t do a lot of damage, but pushes opponents back with a gust of wind.
|
Side Special | Headbutt: A headbutt that buries enemies in the ground. Jumping Headbutt: Jumps up before headbutting, but the bury lasts shorter. Stubborn Headbutt: A slower, more powerful headbutt that won’t be interrupted by attacks.
|
Up Special | Spinning Kong: Donkey Kong spins his arms around like a helicopter to gain upwards momentum or if he uses the move on the ground, spin while moving left or right. Chopper Kong: Spins higher into the air, but deals no damage. Kong Cyclone: Sucks opponents in as DK spins.
|
Down Special | Hand Slap: DK smashes the ground creating shockwaves that knock enemies around for as long as DK continues to slam. In the air he does two downwards slaps that can spike the enemy. Focused Slap: The slaps have smaller shockwaves, but opponents will be stunned for a short while. Hot Slap: The slaps create flame pillars.
|
Forward Throw | Donkey Kong slings the enemy onto his shoulder and carries them around. In this time frame DK can walk around and jump once along with his throws being changed. If the enemy is held he will chuck them forward and up at high velocity. |
Back Throw | Donkey Kong grabs his foe and whips his arm back, launching them with it. |
Up Throw | Donkey Kong performs a 180 turn before chucking his enemy into the air. If the opponent is being carried DK will forgo the turn and just launch them up. |
Down Throw | Donkey Kong grabs his opponent before giving them a high to low slam. If the foe is being carried DK will instead squeeze them until they burst out of his arms flying forward. |
Final Smash | Donkey Kong unleashes a flurry of rapid fire punches before ending the combo with an uppercut.
In Brawl, Donkey Kong pulls out his bongos, using the beats to cause shockwaves in the area. |
Link
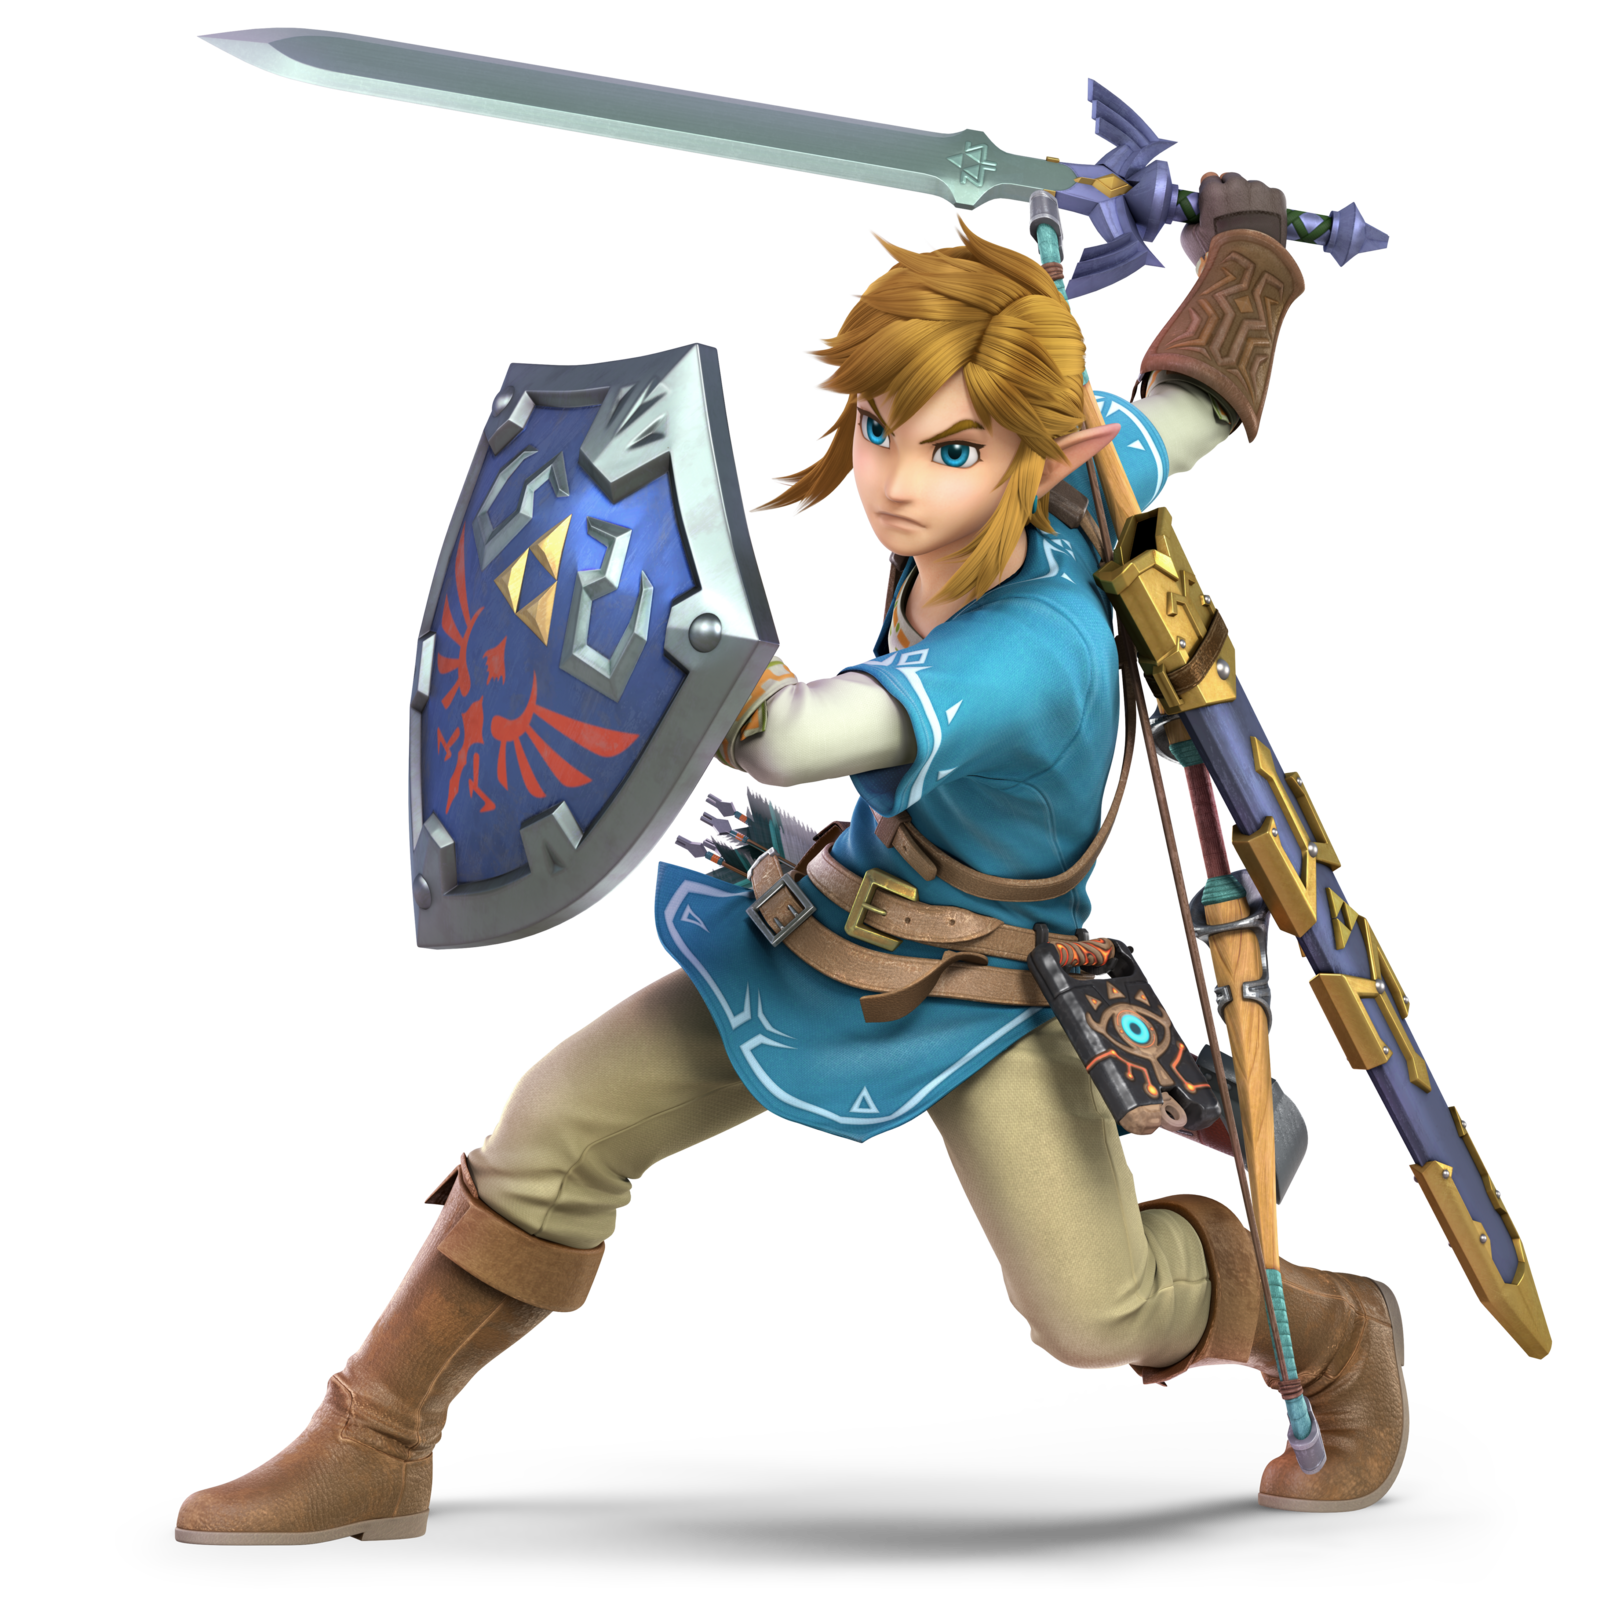
Jab | A trio of slashes that are aimed forwards. |
Side Tilt | A direct downwards forward slash to the ground. |
Up Tilt | A quick arching upwards sword swing. |
Down Tilt | A slash along the ground in front of Link. |
Dash Attack | Link rushes forwards and leaps with a swing of the Master Sword to deal impressive damage. |
Neutral Air | One quick kick that covers a lot of range to knock foes away. |
Forward Air | A set of swings with the Master Sword in front of Link to deal damage. |
Back Air | A pair of backwards kicks, it covers a decent amount of range. |
Up Air | Link attacks directly upwards with the Master Sword, dealing significant damage to anybody caught above him. |
Down Air | Link drops down with his sword below him, slicing anybody he makes contact with. Also works as a Meteor Smash if connected properly. |
Get Up Attack | A pair of slashes to the sides as Link gets up. |
Side Smash | A pair of forwards attacks with the Master Sword, the first to set up, and the second to launch enemies away. If Link has 0% health, he fires a blade beam. |
Up Smash | This one is a trio of upwards arching slashes, with the first two locking adversaries into the chain while the last one launches them. |
Down Smash | Link does a pair of slashes to the sides around him. |
Neutral Special | Hero’s Bow: Link pulls out his bow, where he can fire chargeable arrows. Power Bow: Shorter range arrows that deal a stronger blow if charged more. Quickfire Bow: Rapid fire arrows that can hit multiple enemies.
In Ultimate, Link can pick up his arrow after firing it and can use it again to fire two arrows. |
Side Special | Gale Boomerang: In Brawl and Smash 4, Link throws a boomerang that emits a Tornado that hits opponents and brings opponents toward you on its way back. Boomerang: Link throws a boomerang that tracks him upon its return arc. Ripping Boomerang: A short-range boomerang that goes through multiple opponents, dealing multiple hits.
|
Up Special | Spin Attack: Link does a spinning slash with his sword, striking all enemies who are next to him. If in the air, Link will ascend, with the final swing being directed upward. Shocking Spin: A spin that is strong and electrical, but can’t go sideways. Whirling Leap: Makes Link go higher into the air, but doesn’t do damage.
|
Down Special | Bomb: Link pulls out a bomb that explodes upon contact or when the fuse runs out. Giant Bomb: Link pulls out a bigger bomb that has a bigger kaboom. Meteor Bomb: Link pulls out a bomb with a shorter fuse that has a meteor effect on airborne opponents.
In Ultimate, Link pulls out a bomb with the Sheikah Slate. This bomb can be thrown around and activated to detonate manually whenever Link pleases, giving it plenty of utility. |
Forward throw | Link gives the opponent a front kick. |
Back Throw | Link gives the opponent a side kick. |
Up Throw | Link lifts the opponent up and slashes them with the master sword. |
Down Throw | Link puts the opponent on the ground and performs a devastating elbow drop. |
Final Smash | In Brawl and Smash 4, Link uses the Triforce of Courage to seal his opponents in a Triforce construct as he slashes them multiple times before finishing them off.
In Ultimate, Link fires an Ancient Arrow, dealing enormous damage to anybody who is caught by it and launching them away. |
Samus

Jab | Samus does a straight punch followed by an overhead club with her cannon arm. |
Side Tilt | A kick forward. |
Up Tilt | Samus does a high to low kick capable of spiking enemies. |
Down Tilt | Creates a low to the ground explosion using her cannon. |
Dash Attack | A running shoulder bash. |
Neutral Air | A kick forward that sweeps around into a backwards kick. |
Forward Air | Samus creates a stream of small explosions from her cannon harming anyone in front of her. |
Back Air | An aerial kick behind her. |
Up Air | An upward facing drill kick. |
Down Air | Samus swings her cannon arm in an arc below her, spiking anyone hit by the attack. |
Get Up Attack | A low kick forward and a backhand with the cannon arm on the opposite side. |
Side Smash | Samus extends her cannon arm in front of her before making a powerful explosion. |
Up Smash | Samus creates a stream of explosions in a rainbow shape above her. |
Down Smash | A surprisingly strong 360 degree leg sweep. |
Neutral Special | Charge shot: Samus charges up a ball of energy before firing it out. The longer it’s charged the stronger, faster, bigger, and more range the attack has. Dense charge shot: A more powerful charge shot but it takes longer to charge, longer to recover, and it's slower. Melee charge shot: A powerful close range shot, used best uncharged and point blank with the opponent.
|
Side Special | Missile: Samus fires one of two missiles forward. A slow homing missile and a fast straight shot missile. Relentless Missile: Samus fires two missiles that can lock onto opponents. Turbo Missile: Samus fires one missile that locks onto an opponent and another that launches lightning fast.
|
Up Special | Screw Attack: Samus curls up into a ball and becomes the move that inspired Death Battle’s original channel name. Samus ascends upwards while shocking any foe in her way. Screw Rush: A stronger Screw Attack but it launches directly up. Apex Screw Attack: It does more damage and knockback but only hits twice.
|
Down Special | Bomb: Samus curls into a ball while doing a slight hop. She also drops a small bomb onto the ground which quickly explodes Slip Bomb: A slightly less damaging bomb but trips up grounded opponents. Mega Bomb: A bomb that causes a bigger explosion and does more damage but takes twice as long to go off and Samus can only launch one.
|
Forward Throw | Samus shoots out a plasma whip that tethers to ledges and grabs opponents from afar. Samus then chucks the opponent forward. |
Back Throw | Samus whips around to throw the enemy backwards. |
Up Throw | Samus aims up and fires the opponent out of her cannon. |
Down Throw | Slams the enemy into the ground. |
Final Smash | A big laser that pulls hit enemies inwards for massive multi-hit damage. The attack can also be angled up or down. |
Miscellaneous | Samus has a unique roll where she curls into a ball for further distance, but slower movement. In Brawl, Samus’s Final Smash turned her into Zero Suit Samus after the laser finishes firing, giving her a totally new moveset. |
Dark Samus
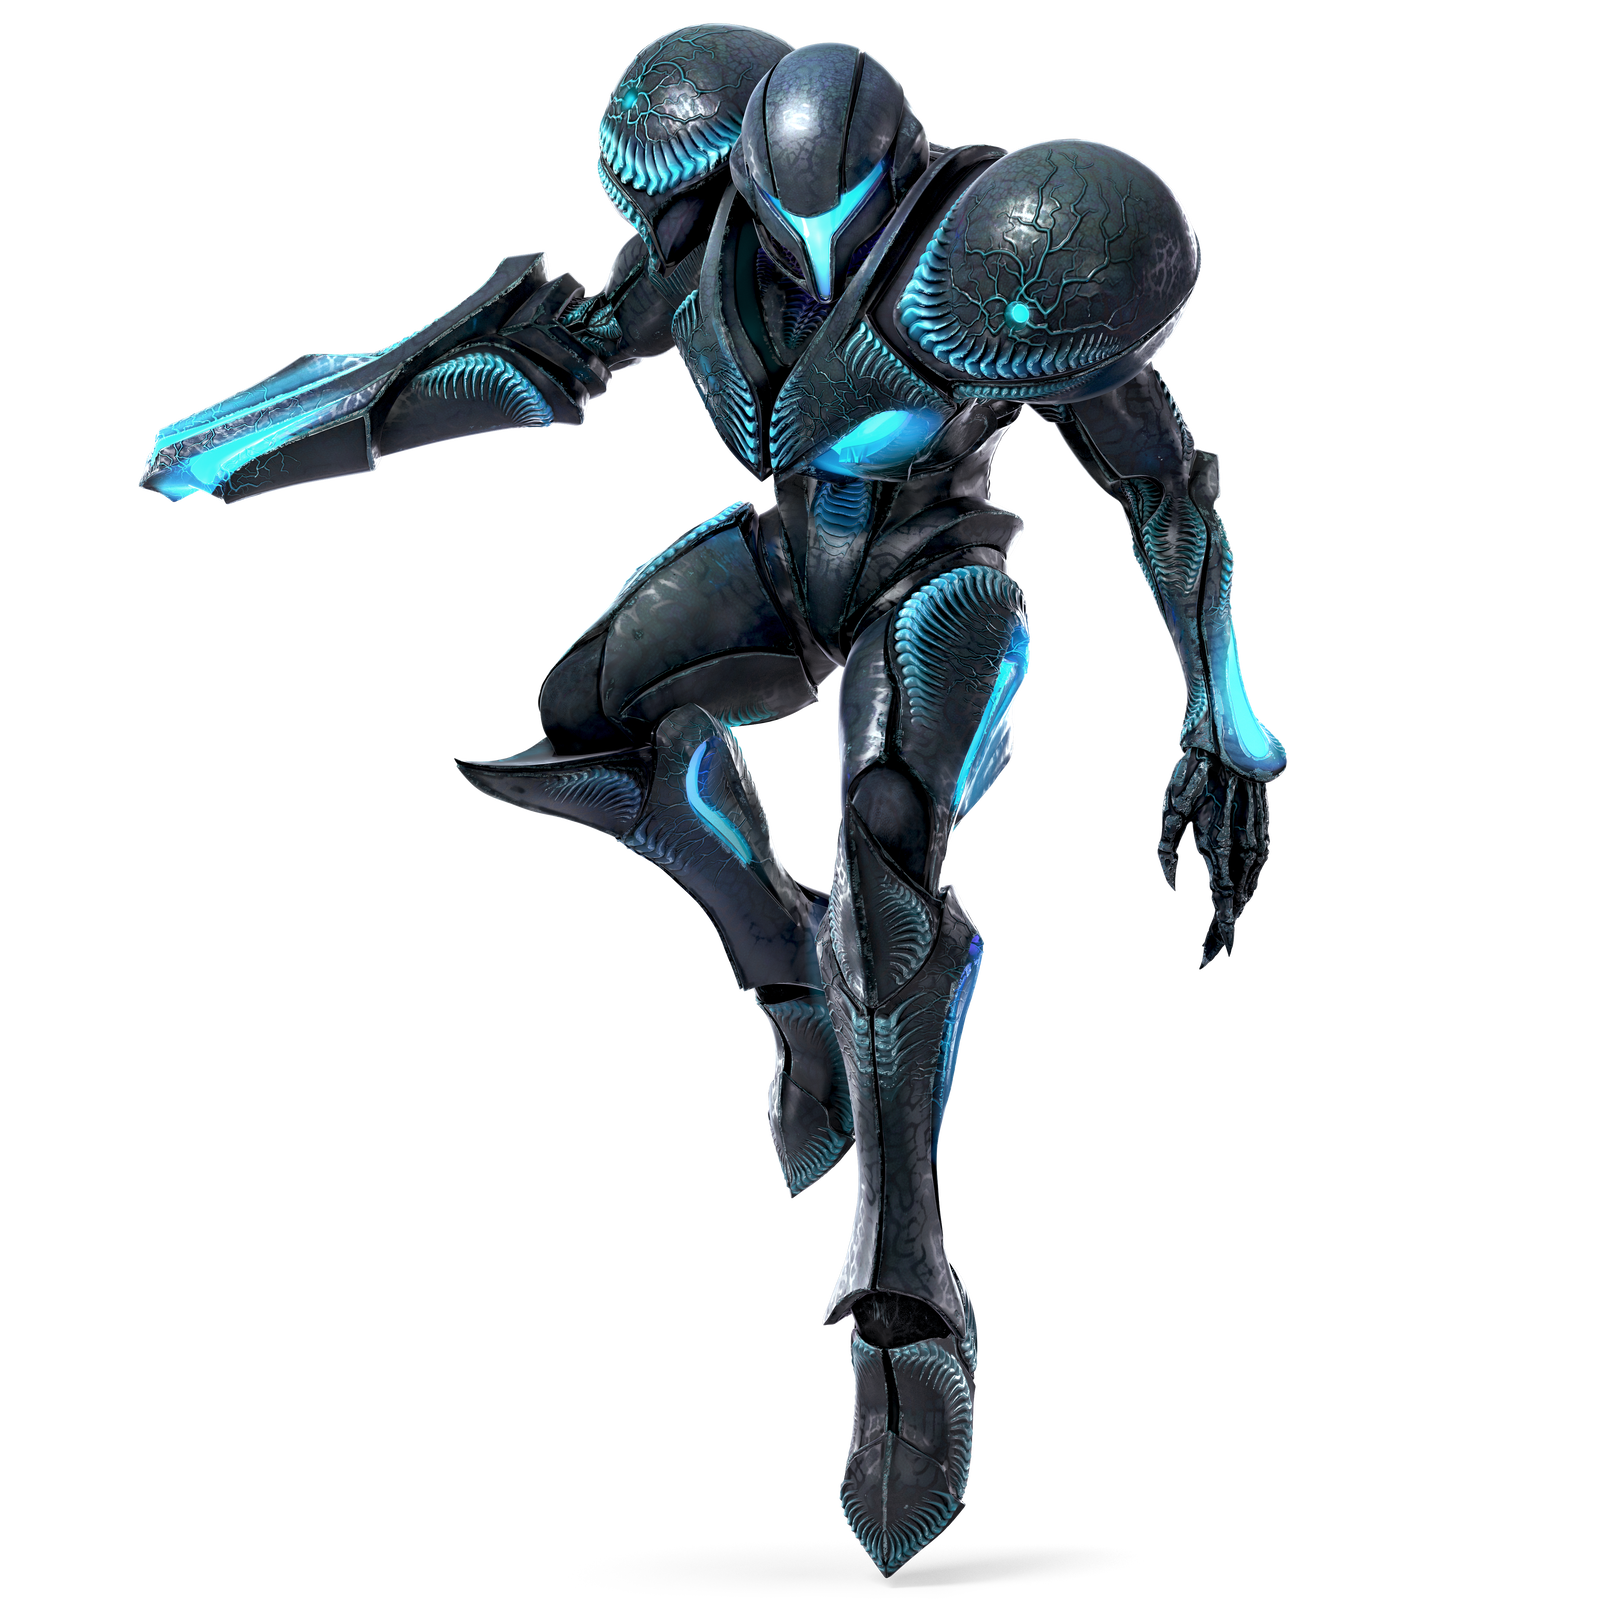
Echo | All of the moves are the same as Samus minus a few things. Dark Samus is floatier and hovers off the ground meaning low angled attacks are less likely to hit them. Then their explosion attacks are all electric instead of fiery. They don’t have Samus’s unique roll and finally their charge shots/missiles go at different angles. |
Yoshi
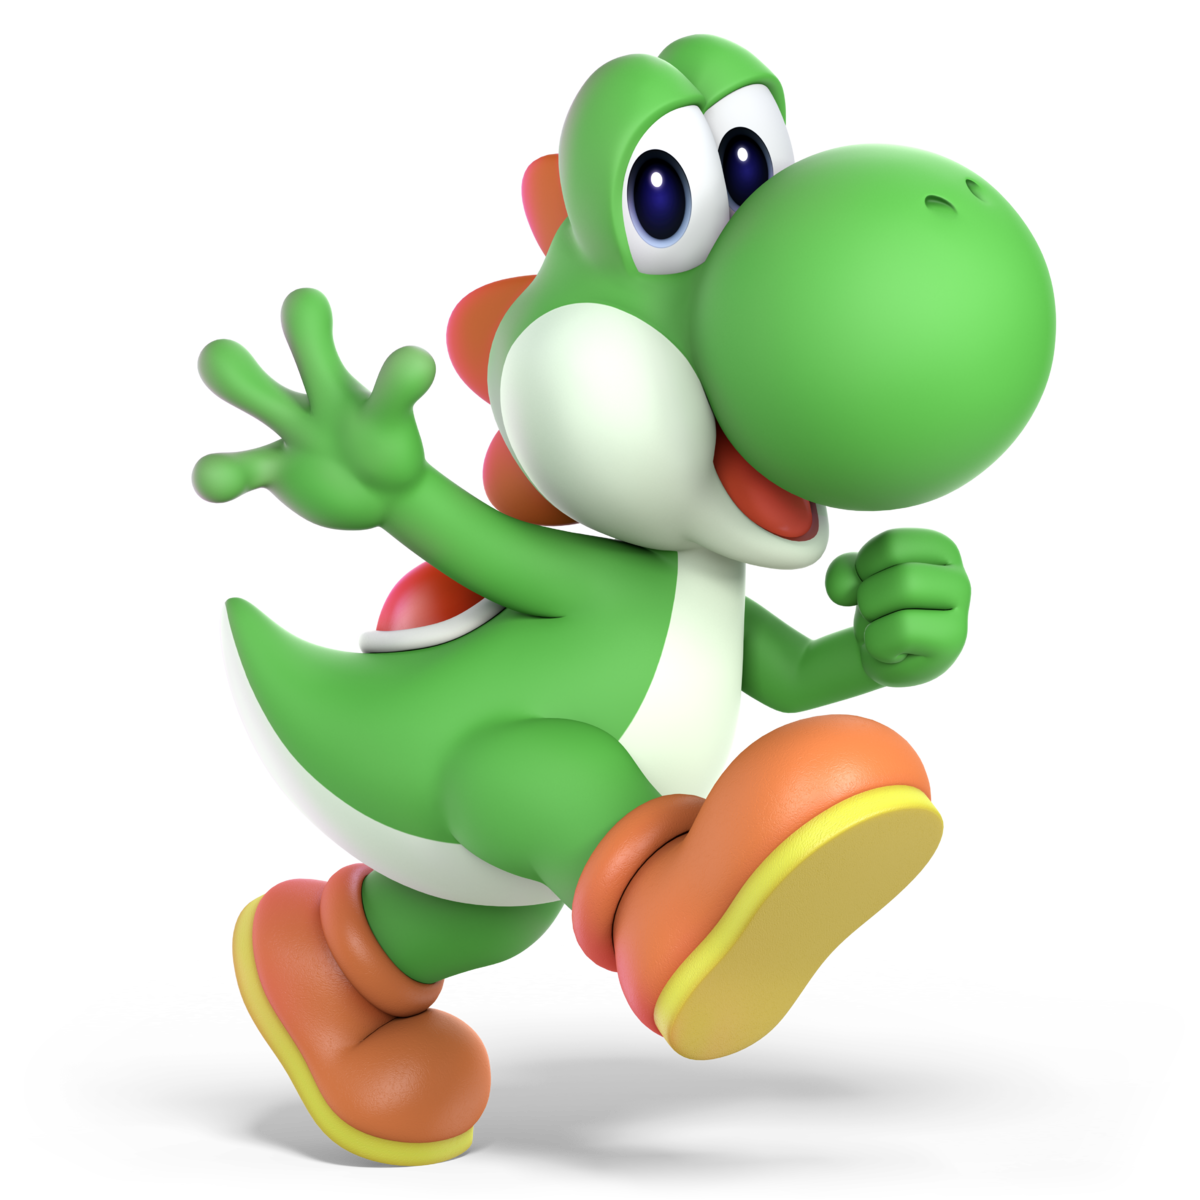
Jab | Two straightforward kicks. |
Side Tilt | A tail swipe that knocks enemies upwards. |
Up Tilt | Honestly the same thing as forward tilt but it hits a larger area. |
Down Tilt | A low to the ground tail swing. |
Dash Attack | A kick while jumping forward. |
Neutral Air | An aerial kick that counts Yoshi as the entire hitbox. |
Forward Air | A high to low headbutt capable of spiking enemies. |
Back Air | Two rapid behind the back tail swipes. |
Up Air | An upwards tail attack in an arc. |
Down Air | Rapid fire kicks underneath Yoshi. |
Get Up Attack | 360 degree tail attack. |
Side Smash | A strong forward headbutt. |
Up Smash | A backflip kick above Yoshi. |
Down Smash | Two low hitting tail swipes with immense power. |
Neutral Special | Egg lay: Yoshi sticks out his tongue eating the opponent. He then poops them out as an egg which is unable to do anything until the enemy breaks out. Lick: Yoshi licks the opponent. Egg launch: It does more damage and he can launch the eggs away.
|
Side Special | Egg Roll: Yoshi turns into an egg and begins rolling around the stage swiftly dealing strong damage and knockback to anyone caught in his way. Heavy Egg Roll: The egg is slower but does more damage and has more armor. Light Egg Roll: The egg is faster but weaker and takes less damage to break.
|
Up Special | Egg Throw: Yoshi tosses an egg out as a projectile. If done in the air the egg throw allows him to gain a small amount of height. High jump: Jump good. Yoshi doesn’t lay an egg for this. Timed Egg Throw: Yoshi tosses an egg that blows up.
|
Down Special | Yoshi Bomb: Yoshi jumps into the air before performing a ground pound. Star Bomb: A band name and when Yoshi hits the ground he produces larger stars. Crusher Bomb: Yoshi hits the ground harder, doing more damage.
|
Forward Throw | Yoshi uses his tongue to slightly increase his grab range. This allows Yoshi to easily enemies and chew them up before spitting them out. With the forward throw he spits them forward… |
Back Throw | Back throw he turns around and spits them out backwards… |
Up Throw | Up throw spits them upwards… |
Down Throw | And down throw spits them into the ground hitting them back up. |
Final Smash | In Brawl and Smash 4, Yoshi grows wings to fly around the stage, as well as shooting fireballs from his mouth to deliver damage.
In Ultimate, Yoshi tackles the opponent taking them into a canyon where a bunch of Yoshi’s run in and crush them. |
Miscellaneous | Yoshi’s second jump in the air is a flutter jump that goes significantly higher than his jump on the ground. Yoshi’s shield turns him into an egg where you cannot see how close the shield is to breaking. |
Kirby
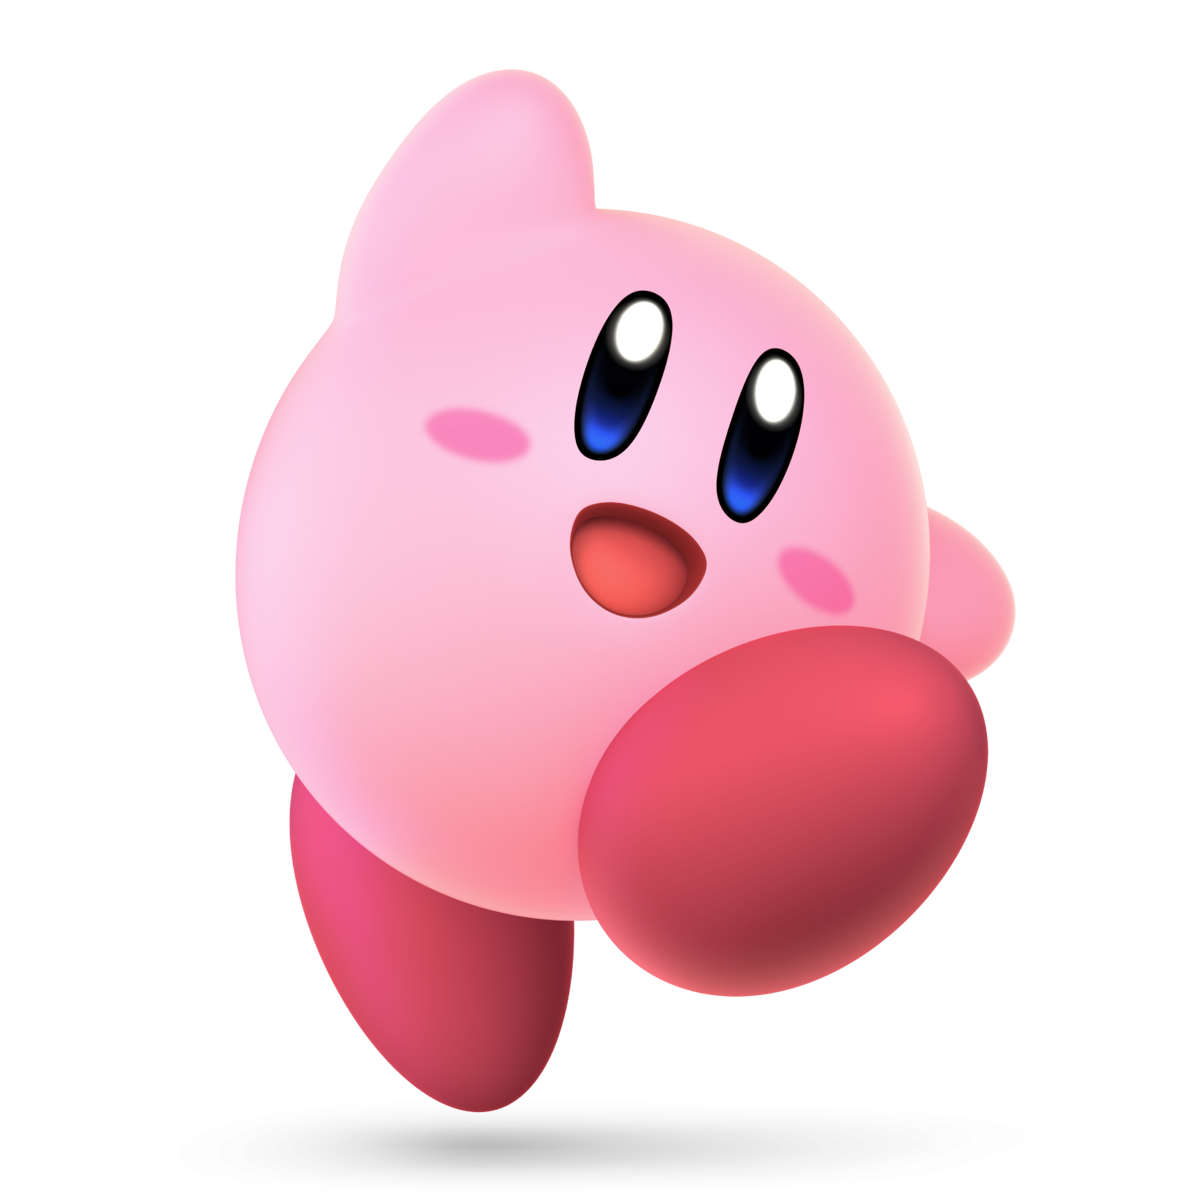
Jab | Two punches followed by a barrage of punches. |
Side Tilt | A short ranged kick forward. |
Up Tilt | A low to high kick using Kirby’s back foot. |
Down Tilt | A short low to the ground kick. |
Dash Attack | In 64, Kirby ran towards his opponents and did a belly flop.
In Brawl and Smash 4, Kirby did a breakdance attack as he dashed towards his opponents.
In Melee and Ultimate, Kirby becomes a flaming ball and dashes forward. |
Neutral Air | Kirby spins around in the air hitting anyone around them. |
Forward Air | Kirby does a few kicks forward. |
Back Air | A kick with both feet behind Kirby. |
Up Air | An upwards kick that goes in an arc above Kirby. |
Down Air | A downwards multi-hit drill kick. |
Get Up Attack | Kirby does one kick in front of himself and one behind. |
Side Smash | Kirby does a kick forward that also moves him forward. |
Up Smash | Kirby performs a powerful backflip kick. |
Down Smash | Kirby does a split before spinning around to hit opponents on either side of him. |
Neutral Special | Inhale: Kirby begins to suck in anything in front of him. This includes projectiles and enemies which he can spit back out to deal damage. However, Kirby can also copy a fighter they have inhaled, taking their neutral special for his own. Ice Breath: Kirby breathes cold air to freeze opponents. Jumping Inhale: Kirby leaps forward and inhales the opponent, but spitting them out won’t do damage.
|
Side Special | Hammer Flip: Kirby charges up a swing with a mallet as he shuffles around the stage. Once charged enough the mallet will set itself on fire for more damage. Hammer Bash: A hammer swing that sends Kirby’s opponents upwards. It’s powerful, but can’t be charged. Giant Hammer: Kirby charges up a bigger hammer, it’s slower, but does a lot of damage.
|
Up Special | Final Cutter: Kirby pulls out a sword and does a slash while moving upwards. He will then fall down while still holding out the sword, spiking anyone hit by it. Once Kirby lands the sword will fire a fast moving energy wave to deal extra damage. Wave Cutter: Kirby jumps high into the air, and slams down, sending rocks flying. Upper Cutter: Kirby strikes upwards, but doesn’t attack back down.
|
Down Special | Stone: Kirby becomes a randomized heavy object, barreling towards the ground at high speeds and crushing enemies beneath him. Grounded Stone: Takes longer to transform, but it buries opponents. Meteor Stone: Has a meteor effect on opponents while falling, but takes longer to transform back.
|
Forward Throw | Kirby does a front flip while holding onto the opponent before slamming them to the ground. |
Back Throw | Kirby does a backflip while latching the opponent before hitting the ground and knocking the enemy away. |
Up Throw | Kirby jumps high into the sky while grabbing the enemy, slamming them down in a powerful explosion. |
Down Throw | Kirby brings the foe to the floor before stepping on them a bunch of times followed by knocking them upwards. |
Final Smash | Kirby pulls out a sword quote “waaaaay bigger than he is”. If he connects the first swing he will hit anyone caught by the attack with a rapid flurry of sword slashes.
In Brawl, he uses a cooking pot to suck in enemies and items, cooking them. |
Miscellaneous | Kirby is lighter and much floatier than most fighters along with having 6 jumps instead of the usual two. |
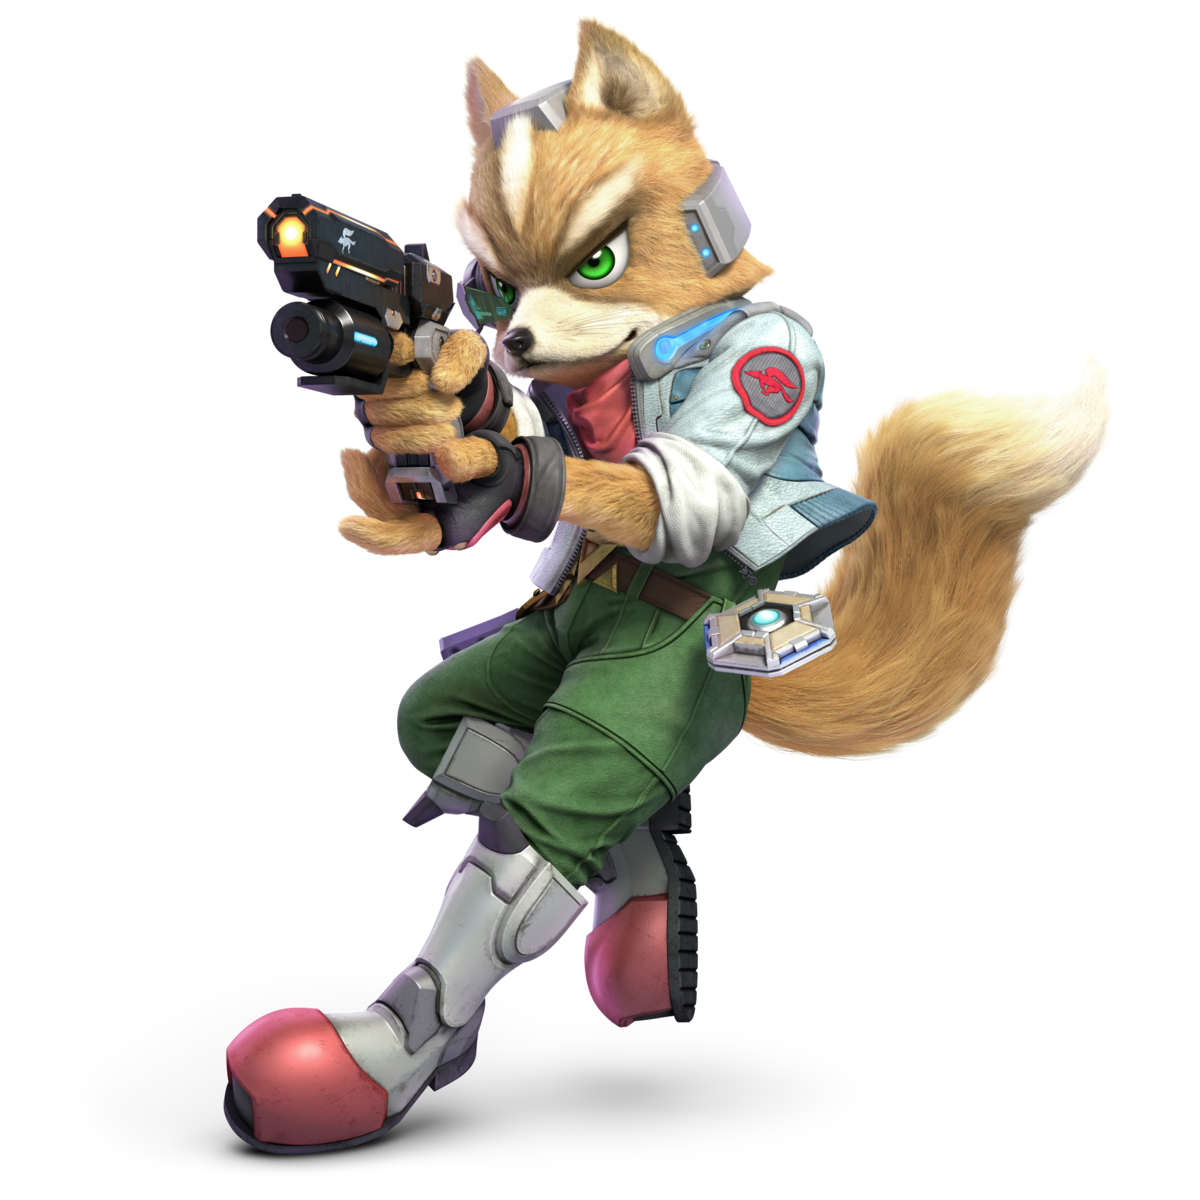
Fox
Jab | Two punches followed by a flurry of kicks. |
Side Tilt | A swift kick forward. |
Up Tilt | A low to high kick behind Fox. |
Down Tilt | A fast, low to the ground tail swipe. |
Dash Attack | A kick using Fox’s forward momentum. |
Neutral Air | An aerial kick that turns Fox’s entire body into a hit box. |
Forward Air | A flurry of rapid fire kicks. |
Back Air | A quick kick to behind |
Up Air | Two aerial kicks towards the sky. |
Down Air | A multi-hitting drill kick. |
Get Up Attack | A kick forward and a kick backwards. |
Side Smash | A front flip kick carrying a lot of power. |
Up Smash | A kick in a front to back arc above Fox. |
Down Smash | Fox does the splits hitting enemies behind and in front. |
Neutral Special | Blaster: Fox shoots a laser from his blaster doing small damage. Impact Blaster: Slower lasers that do more damage. Charge Blaster: Charges up a slower, but more powerful laser.
|
Side Special | Fox Illusion: Fox does a high speed dash forward knocking up any opponent caught in its path. Fox Burst: The Dash deals no damage, but causes an explosion when you stop. Wolf Flash: Similar to Wolf’s side special, Fox dashes into the air at an angle, the hits sending the opponent downwards.
|
Up Special | Fire Fox: Fox charges himself up with fire before rocketing in a chosen direction. Flying Fox: Travels higher, but does no damage. Twisting Fox: Fox spins to pull opponents in and hits them multiple times in the air.
|
Down Special | Reflector: Fox puts up a reflector capable of bouncing projectiles away. Big Reflector: A larger reflector that doesn’t power up reflected projectiles. Amplifying Reflector: The reflector takes longer to activate, but sends projectiles back with double the speed and power.
|
Forward Throw | A punch that knocks away grabbed enemies. |
Back Throw | Fox throws his foe up and behind shooting them with his blaster for extra damage. |
Up Throw | A one handed toss upwards followed by a blaster shot. |
Down Throw | A downwards throw capped off with a laser shot. |
Final Smash | In Brawl and Smash 4, Fox gets into his Landmaster tank. A giant tank that takes up a majority of the stage. In it, Fox can fire lasers from its cannon and can do barrel rolls to damage opponents. that get onto the landmaster. The landmaster also has jets to lift it up into the air.
In Ultimate, Fox summons his crew from Team Star Fox. Fox gets into his ship before calling out for his crew to fly into a targeted spot, running into anyone in their way. |
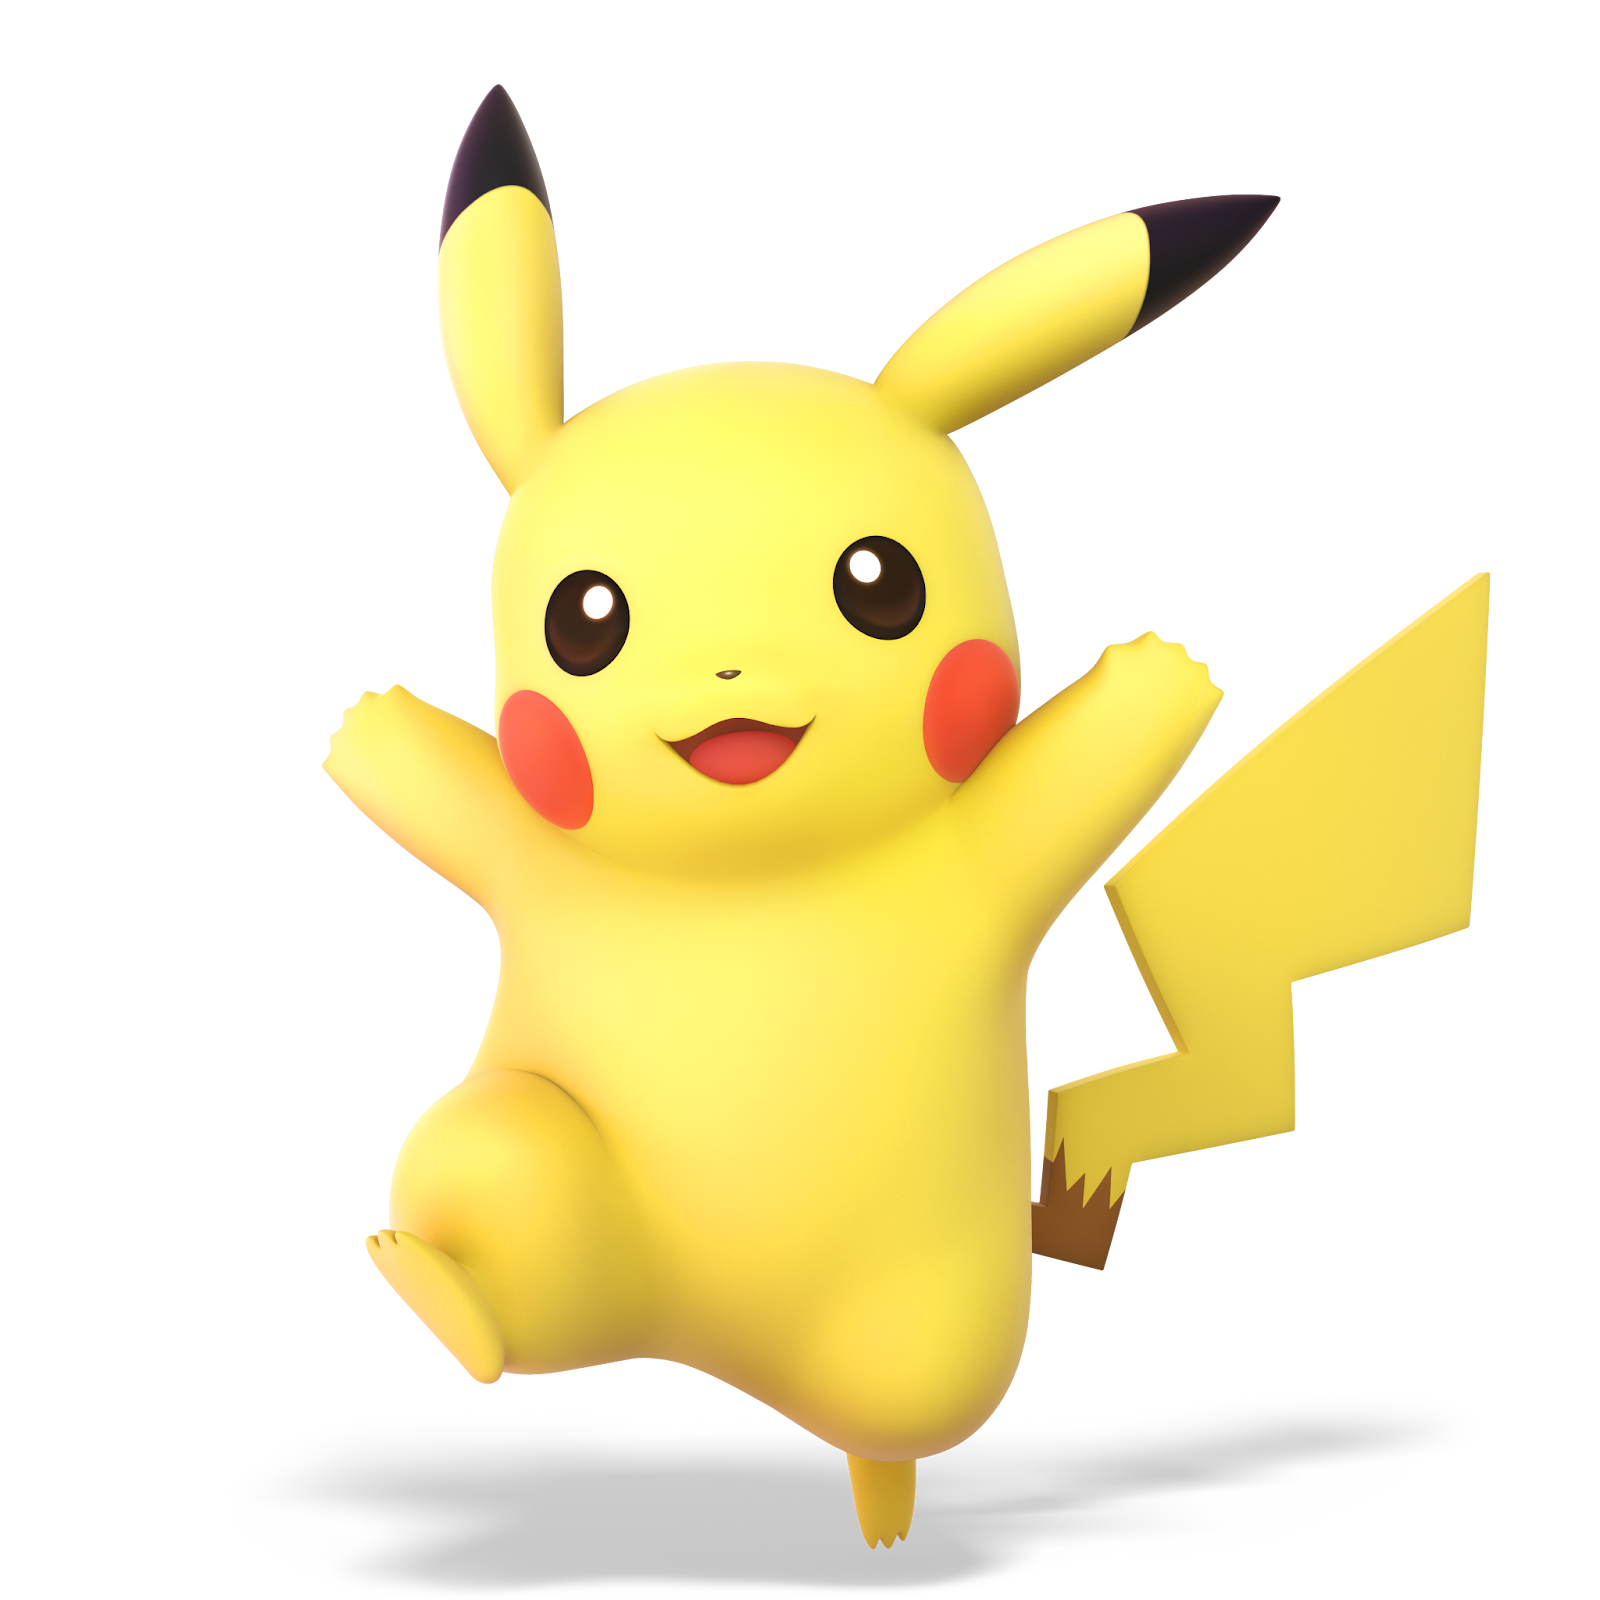
Pikachu
Jab | Pikachu headbutts its opponent. This can be done once or as a rapid jab attack. |
Side Tilt | A two-legged kick charged with electricity.. |
Up Tilt | An upwards tail swipe in an arc above Pikachu. |
Down Tilt | A small tail sweep to knock the foe off their feet. |
Dash Attack | A short tackle forward. |
Neutral Air | Pikachu surrounds its body in electricity for a multi hit shock. |
Forward Air | Electricity sparks from the top of Pikachu’s head as they spin forward to zap enemies in front of itself. |
Back Air | Pikachu spins behind itself rapidly for multi hitting aerial damage. |
Up Air | An upwards tail swipe performed mid-air. |
Down Air | A downwards electrical headbutt towards that can spike if landed properly. |
Get Up Attack | A tail swipe and headbutt in opposite directions. |
Side Smash | Pikachu launches powerful blasts of electricity a short distance forward. |
Up Smash | A strong upwards tail strike. |
Down Smash | An electrical spin that catches and shocks any foes caught in its path. |
Neutral Special | Thunder Jolt: Pikachu fires a small electricity jolt that travels across the stage. The bolt jumps around in an arc and can even scale walls as it moves. Thunder Wave: The jolt paralyzes foes, but does less damage. Thunder Shock: The jolt travels horizontally, but triggers a small blast as it disappears.
|
Side Special | Skull Bash: Pikachu charges up a powerful headbutt before launching itself forward at high speeds. Shocking Skull Bash: A flying headbutt that deals multiple hits, with the last one having added launch power. Heavy Skull Bash: A flying headbutt that dives sideways, but it deals more damage if it hits near the start of the attack.
|
Up Special | Quick Attack: A quick burst of speed in any direction that can be quickly followed by another dash. Meteor Quick Attack: A quick attack with a meteor effect. Quick Feet: Only moves once, but Pikachu goes farther.
|
Down Special | Thunder: Pikachu summons a cloud above itself before releasing a thunderbolt that travels down and hits him. If an enemy is hit by the bolt during its travel to Pikachu they will be zapped for damage. If hit towards the bottom of the cloud the bolt will even spike the opponent. Thunder Burst: An electrical burst that sends Pikachu’s opponents flying. Distant Thunder: The thundercloud appears higher up, but the bolt deals more damage near the cloud.
|
Forward Throw | Zaps the grabbed foe with electricity before flinging them forward. |
Back Throw | Pikachu rolls backwards with the enemy in his grasp. It then throws the opponent backwards. |
Up Throw | An upward throw followed by a headbutt to knock the enemy higher. |
Down Throw | Brings the enemy to the ground before hitting them with a butt slam |
Final Smash | Pikachu charges forward, causing any enemy hit by him to be caught in a tackle where Pikachu rapidly runs through the targets, zapping and shocking them with the electricity |
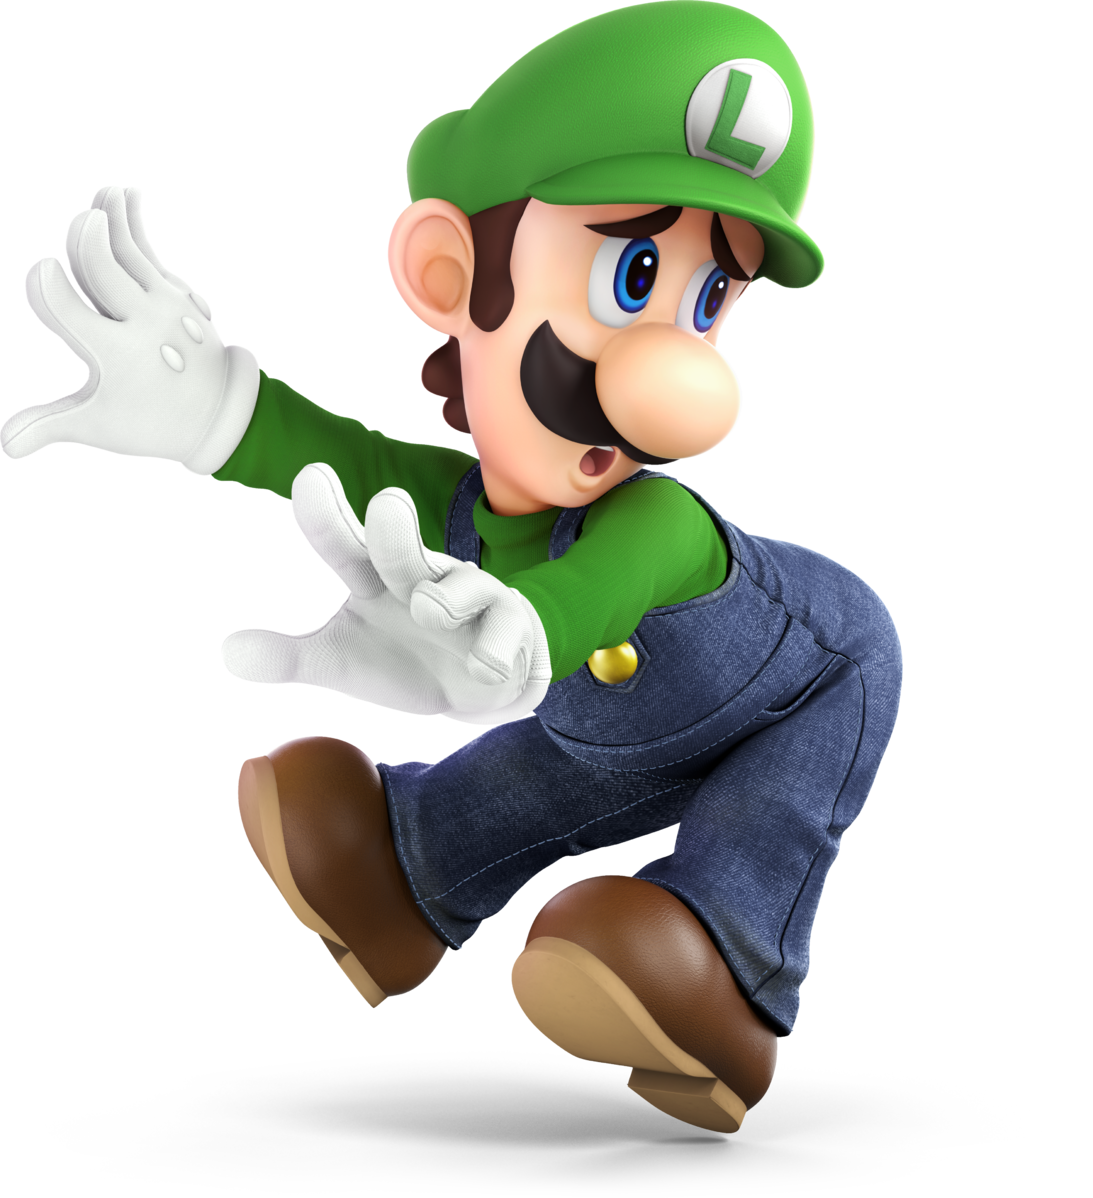
Luigi
Jab | Two punches followed by a butt bash. |
Side Tilt | A quick kick forward. |
Up Tilt | An uppercut that starts from the front and goes up. |
Down Tilt | A fast, highly spammable low kick. |
Dash Attack | Luigi runs forward while flailing his arms around, hurting anyone in his path in the process. |
Neutral Air | A whole body kick. |
Forward Air | A frontal chop. |
Back Air | A backwards dropkick. |
Up Air | A backflip kick that hits above Luigi. |
Down Air | A downwards spin kick capable of spiking enemies. |
Get Up Attack | A low to the ground 360 degree leg sweep. |
Side Smash | A quick yet powerful forward strike. |
Up Smash | A headbutt above Luigi in an arc. |
Down Smash | Luigi does a strong low leg sweep all around his body. |
Neutral Special | Fireball: Luigi creates a slow moving, green floating fireball to scorch foes. Bouncing Fireball: Luigi throws a fireball that bounces like Mario’s, but gradually decreases in power. Iceball: Luigi throws a slow moving iceball that can freeze foes at the right amount of damage.
|
Side Special | Green Missile: Luigi charges himself up before sending himself fiery head first at the enemy. Once released this rocket-like attack is capable of being a misfire. Which makes the attack faster and stronger. Floating Missile: Luigi charges himself quickly as he flies sideways, but it doesn’t do a lot of damage. Quick Missile: Luigi flies faster and farther than normal, sliding across the ground if he doesn't hit anyone.
|
Up Special | Super Jump Punch: Luigi does an uppercut sending him high into the air. If Luigi hits someone as he is beginning his ascent they will take a large amount of fire damage. Otherwise the attack does very little damage and knockback. Fiery Jump Punch: Luigi gets a bigger critical hit window, but he doesn’t jump as high. Burial Header: Luigi can bury opponents on the way down, but doesn’t do any critical hits on the way up.
|
Down Special | Luigi Cyclone: Luigi creates a vortex around him. With this cyclone he can keep himself aloft in the air and suck in enemies for multi-hit damage. Mach Cyclone: A spin that pushes opponents, and can rise far, but with minimal sideways movement. Clothesline Cyclone: A slow spin that sends opponents flying sideways.
|
Forward Throw | Luigi uses his Poltergust’s plunger to grab the enemy from far away. Luigi then slams the opponent on the ground in front of them. |
Back Throw | It’s like the forward throw but backwards. |
Up Throw | Luigi chucks the enemy upwards with the Poltergust. |
Down Throw | Luigi brings the enemy to the ground before butt slamming on them. |
Final Smash | In Brawl, Luigi uses Negative Zone, where a large void surrounds him as he dances. In it, he’s invincible as random status effects happen to the fighters, like time slow, uncontrollable taunting, sleepiness, and flower damage.
In Smash 4 and Ultimate, Luigi pulls out his Poltergust G-00 and sucks anyone nearby in, shooting them out after a few moments. |
Miscellaneous | Luigi has a really funny taunt where he scuffs his shoe on the ground. If this hits it automatically spikes the enemy even if they are on the ground. |
Ness
Jab | He sends out two punches. |
Side Tilt | He performs a roundhouse kick. |
Up Tilt | He jumps and attacks with psi spark. |
Down Tilt | SHIN KICK! |
Dash Attack | He sends out three psi sparks while performing a double palm attack. |
Neutral Air | He jumps and covers himself in PSI Energy. |
Forward Air | He jumps forward and sends a bunch of PSI Sparks. |
Back Air | A Dropkick that sends out PSI Sparks. |
Up Air | By moving his fingers in an ark he generates PSI Sprinkles. |
Down Air | He twirls and kicks the air, sending PSI Sparks from his feet. |
Get Up Attack | He kicks the opponent before getting up. |
Side Smash | He pulls out his bat and uses it, allowing him to reflect projectiles. |
Up Smash | He sends his Yo-Yo around the world. |
Down Smash | He uses his Yo-Yo to walk the dog. |
Neutral Special | PK Flash: He uses PK Flash to cause an explosion and harm opponents. Rising PK Flash: A PK Flash that rises higher, but is less powerful. PK Freeze: Just like Lucas’s own PK Freeze, it freezes the opponent when it hits.
|
Side Special | PK Fire: Everyone’s least favorite move to play against. Ness casts a bolt of fire that upon contact, will continuously burn anyone caught on it. PK Bonfire: The bolt doesn’t travel far, but the flame pillar stays around longer. PK Fire Burst: A bolt that releases a single flame, but knocks opponents farther.
|
Up Special | PK Thunder: He sends PK Thunder that can launch himself or opponents. Lasting PK Thunder: PK Thunder deals multiple hits and doesn’t disappear, but it deals less damage. Rolling PK Thunder: A more powerful PK Thunder, but it moves more slowly.
|
Down Special | PSI Magnet: He uses PSI Magnet to absorb energy based projectiles. PSI Vacuum: Pulls in opponents, and deals damage, but does not absorb projectiles. Forward PSI Magnet: The field appears in front of Ness, which both launches foes and absorbs projectiles.
|
Forward Throw | Ness uses psychokinesis to toss the opponent with a spin. |
Back Throw | Ness uses psychokinesis to toss the opponent behind himself. |
Up Throw | Ness uses his psychokinesis to toss the opponent upwards. |
Down Throw | Ness tosses the opponent to the ground and uses PK Fire to burn the opponent. |
Final Smash | By summoning Poo and Paula he can use PK Starstorm. This summons a barrage of meteors down at his opponents. He learned this from Poo so he can use it alone. |
Captain Falcon
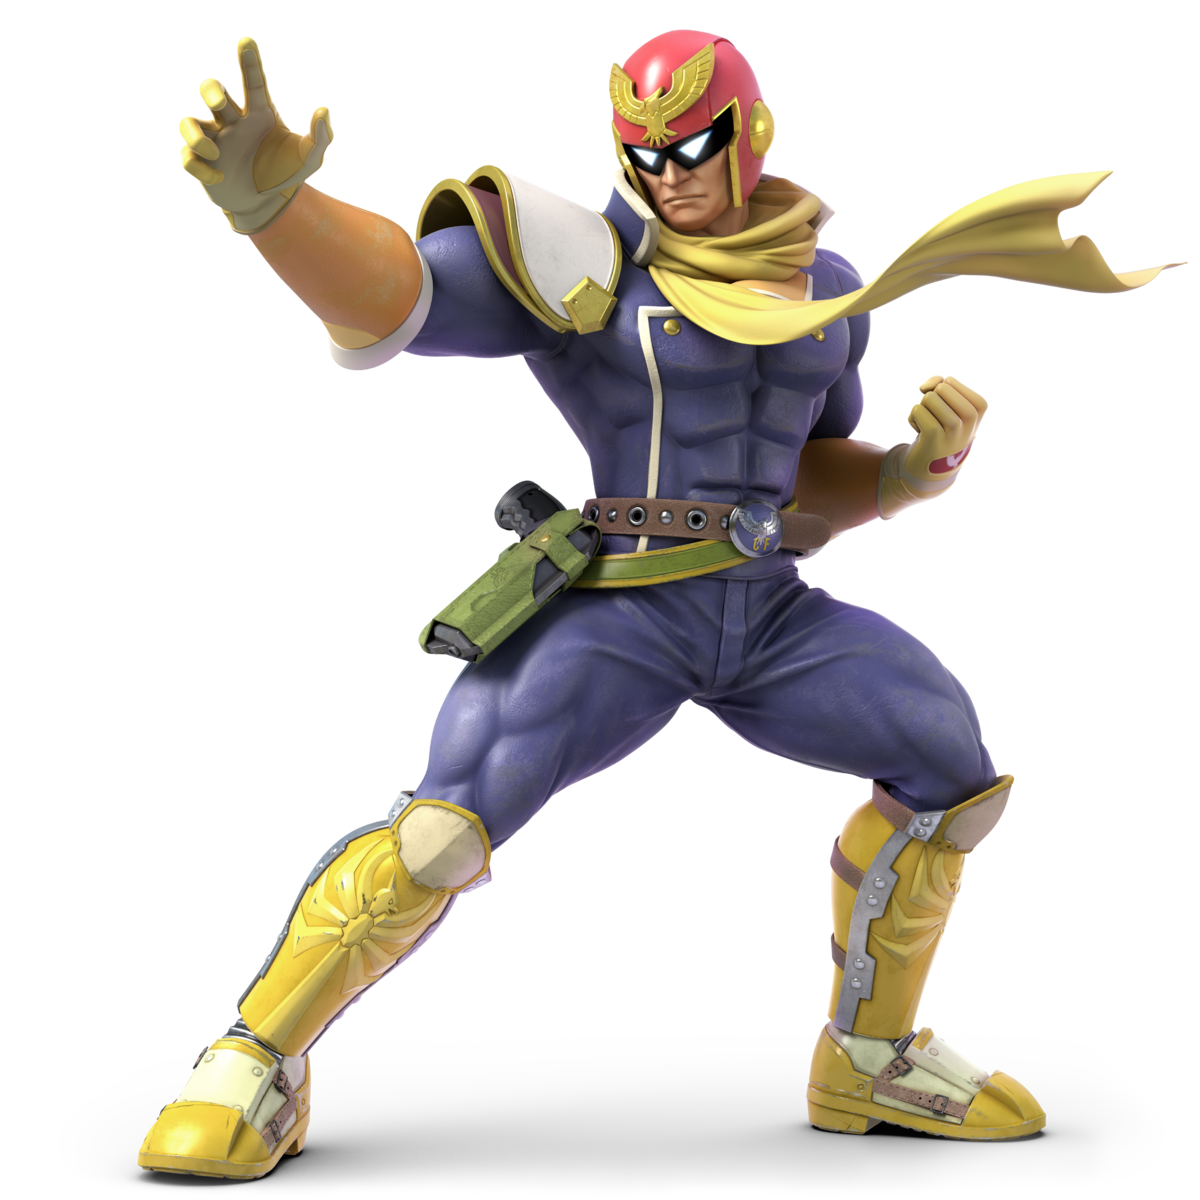
Jab | Captain Falcon punches forward for 3 a hit hit combo ending in a knee or he does a rapid jab. |
Side Tilt | A quick frontal kick. |
Up Tilt | A high to low kick capable of spiking enemies to the ground. |
Down Tilt | A low hitting leg sweep. |
Dash Attack | A shoulder charge forward. |
Neutral Air | Two straight forward kicks |
Forward Air | The infamous Falcon Knee. What is usually a weak knee attack that does minimal damage becomes extremely damaging if you hit the sweet spot. |
Back Air | A short ranged aerial backhand. |
Up Air | A front to back kick in an ark above Captain Falcon. |
Down Air | Falcon pushes down with both of his legs to spike opponents offstage. |
Get Up Attack | Falcon swings his feet around like a helicopter. |
Side Smash | A strong backwards first strike. |
Up Smash | To, powerful kicks aimed high to catch mid-air foes. |
Down Smash | Performs two kicks, one in front and one behind. Walk up slowly for optimal results. |
Neutral Special | Falcon Punch: FALCON PAAAAWWWWWNNNNNCH!!! Falcon Dash Punch: Captain Falcon dashes forward and does a slightly weaker Falcon Punch. Mighty Falcon Punch: A Falcon Punch that has more buildup, but does way more damage.
|
Side Special | Raptor Boost: Captain Falcon zips forward with a fist of fire capable of uppercutting any enemy in his path. Heavy Raptor Boost: A Raptor Boost that’s slow, but more difficult to interrupt. Wind-Up Raptor Boost: Captain Falcon charges up a Raptor Boost that goes faster.
|
Up Special | Falcon Dive: Captain Falcon propels himself upward with fire. If anyone is in the way of Falcon as he goes up he will latch onto them and burn them before jumping off of the target. Falcon Strike: Jumps higher, but doesn’t grab opponents. Explosive Falcon Dive: Doesn’t jump as high, but is more powerful.
|
Down Special | Falcon Kick: Falcon goes flying forward with feet of fire. If this is done in the air he will instead kick towards the ground. Falcon Kick Fury: A Falcon Kick that hits multiple times and can launch opponents. Lightning Falcon Kick: An electrical Falcon Kick that goes right through enemies.
|
Forward Throw | A swift gut punch after a grab. |
Back Throw | Grabs and kicks the enemy backwards |
Up Throw | Grabs the enemy before uppercutting them upwards. |
Down Throw | Slams the opponent downwards causing them to bounce up slightly. |
Final Smash | Captain Falcon hits his enemies onto a raceway before running them over with the Blue Falcon. |
Jigglypuff
Jab | Two quick punches. |
Side Tilt | A forward kick. |
Up Tilt | An upwards kick behind Jigglypuff. |
Down Tilt | A low to the ground quick. |
Dash Attack | Jigglypuff throws her round body forward for a tackle. |
Neutral Air | Another kick that covers the characters whole body. |
Forward Air | An aerial two-legged drop kick |
Back Air | A behind the back spin kick. |
Up Air | An arm swipe in an arc above Jigglypuff. |
Down Air | A drill kick that’s hit below Jigglypuff multiple times. |
Get Up Attack | A front and back kick. |
Side Smash | Jigglypuff kicks forward with enough force to move her a little. |
Up Smash | A headbutt in an arc above Jigglypuff. |
Down Smash | A split kick that hits on both sides. |
Neutral Special | Rollout: Jigglypuff begins to spin around before releasing her built up speed to roll across the stage at high speeds. This damages any foe caught in its way. Relentless Rollout: The rolling that keeps going even after hitting enemies. Raging Rollout: The rolling can’t be turned around, but when fully charged, it does a lot of damage.
|
Side Special | Pound: Jigglypuff does a powerful punch that sends herself forward and enemies hit upwards. Sideways Pound: Opponents get launched sideways. Pound Blitz: Jigglypuff slides across the ground and hits the opponent multiple times.
|
Up Special | Sing: Jigglypuff begins to sing a melody so boring it puts whoever is close enough to hear it to sleep. Hyper Voice: A tune that sends the opponent backwards. Spinphony: A tune that spins enemies around where they stand.
|
Down Special | Rest: By taking a nap Jigglypuff can somehow turn itself into a hit box that deals massive damage and knockback to anyone hit by it. Jigglypuff will be forced to sleep for a few seconds before waking up to fight again. Leaping Rest: Jigglypuffs jumps up as she rests. Wakie Wakie: A short nap that makes Jigglypuff explode when she wakes up.
|
Forward Throw | Jigglypuff expands its body to knock away the opponent. |
Back Throw | Jigglypuff supposes the target sending them flying backwards. |
Up Throw | A graceful spin throw causing the enemy is tossed into the air at high speeds. |
Down Throw | Jigglypuff slams the enemy to the ground before rolling over them a few times until they are launched up. |
Final Smash | Jigglypuff begins to grow and expand its body taking up most of any stage. It will then expand one more time knocking away anyone hit by the sudden growth before Jigglypuff returns to normal size. |
Miscellaneous | Jigglypuff is significantly more floaty and lightweight than the rest of the cast. So while it may not have good air speed it can stay in the air for a while. This is helped further by the fact Jigglypuff has an abnormal 6 jumps. |
Peach
Jab | Two front facing slaps. |
Side Tilt | Peach kicks her opponent into the air. |
Up Tilt | Peach creates a heart above her that damages enemies hit by it. |
Down Tilt | Peach sweeps the ground with her dress. |
Dash Attack | Peach runs forward with sparkle and heart effects. |
Neutral Air | Peach spins around in a circle hurting anyone nearby. |
Forward Air | Peach takes off her crown and swings it down with magic sparkles. |
Back Air | Peach slams her behind into the opponent. |
Up Air | Peach waves her hands above her head, creating two rainbows. |
Down Air | Peach sends 6 rapid kicks down at the opponent. |
Get Up Attack | Peach spins around before getting up. |
Side Smash | Peach uses a frying pan, golf club, and a tennis racket to cook, serve, and sink their opponent off stage. |
Up Smash | Peach uses a ribbon above her head to harm the opponent with the heart created by it. |
Down Smash | Peach does a spinkick. |
Neutral Special | Toad: Peach pulls out Toad who blocks an attack for her, spraying spores onto the opponent. Sleepy Toad: A counter that puts opponents to sleep. Grumpy Toad: Toad doesn’t counterattack, but it releases spores that deal some damage.
|
Side Special | Peach Bomber: Peach uses the Peach Bomber to launch herself into the opponent, which causes a heart explosion. Flower Bomber: A Peach Bomber that once hit, causes a flower status effect on her opponents. Flying Peach Bomber: A Peach Bomber that is harder to land, but is more powerful.
|
Up Special | Peach Parasol: Peach jumps up and glides down with her parasol. Parasol High Jump: Peach jumps into the air quickly, but doesn’t use her parasol. Light Parasol: The jump isn’t high, but the parasol’s opening lifts Peach a bit higher.
|
Down Special | Vegetable: Peach digs into the ground and lifts a turnip easier than luigi could. She can also pull out a bob-omb or a Mr Saturn. Light Veggie: Aslow flying veggie from the ground, but it can only be used so many times in a row. Heavy Veggie: A veggie that doesn’t travel far, but does more damage.
|
Forward Throw | Toad comes in and headbutts the opponent. |
Back Throw | Peach uses her behind to knock the opponent back. Toad is present too I guess. |
Up Throw | Peach places the opponent above her and strikes upwards. Toad aura farms. |
Down Throw | Peach puts the opponent on the ground and toad headbutts them, knocking them back. |
Final Smash | Peach puts the enemy to sleep and then spawns a bunch of peaches so that she can regain her health |
Miscellaneous | Peach is capable of floating in the air allowing her to travel horizontally without losing any height. Peach can also perform aerials while floating. |
Daisy
Echo | Being an Echo fighter, Daisy has the same moveset as Peach, right down to having the same final smash. Only instead of Peaches, it’s Daisies. |
Bowser
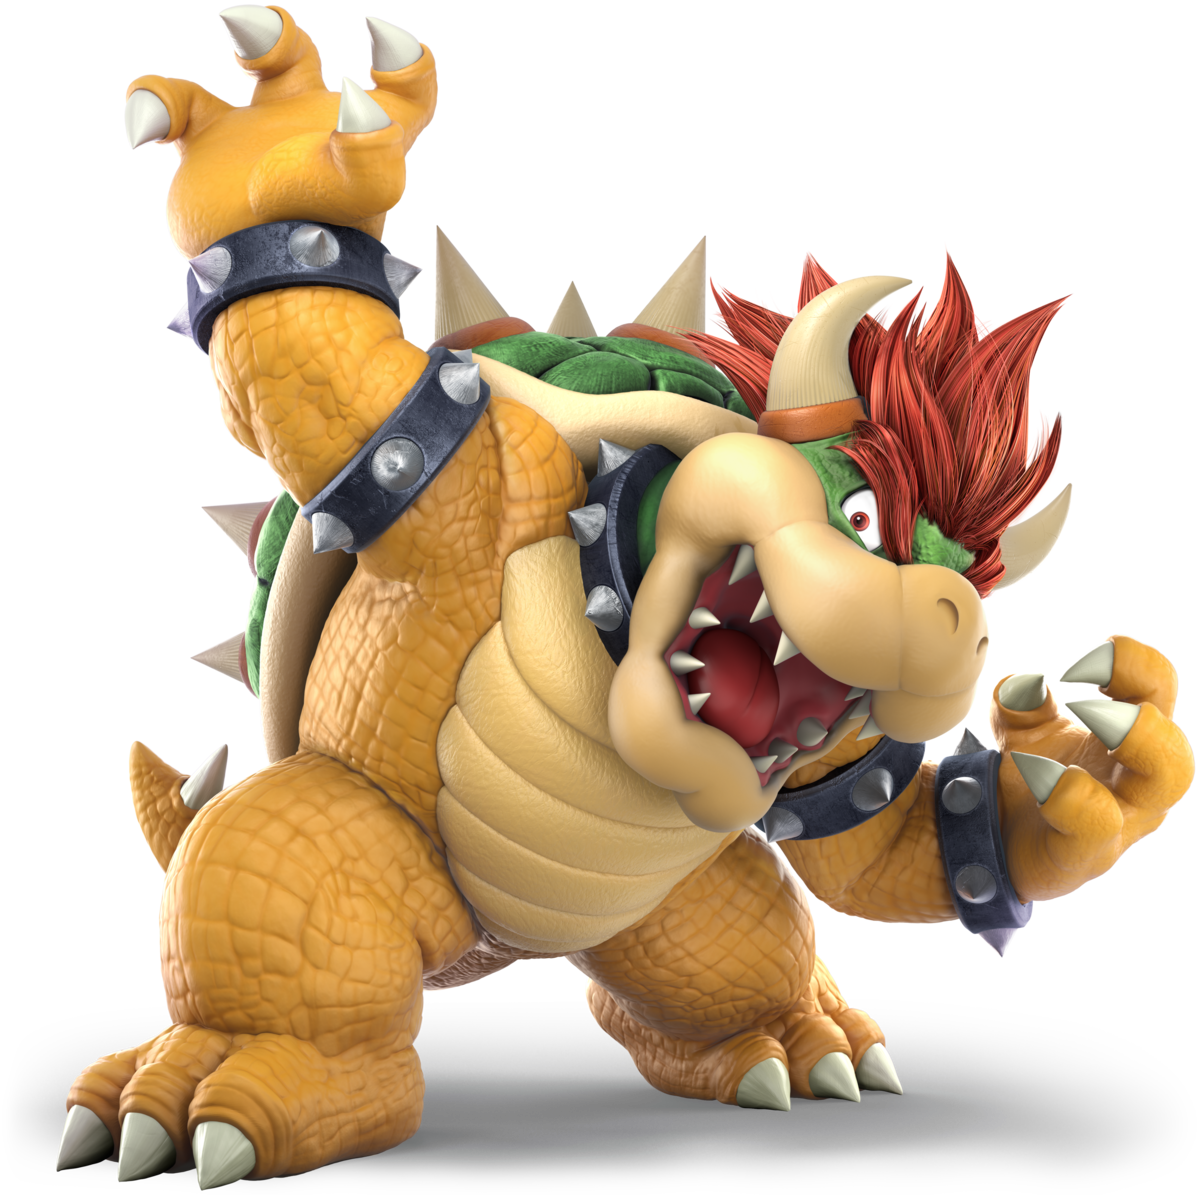
Jab | Throws his palm out and then follows up with a punch. |
Side Tilt | Delivers a powerful punch towards the enemy. |
Up Tilt | Swipes his hand up in the air to to hit the opponent while they are still in the air. |
Down Tilt | Bowser swipes his claws on the ground twice to hit enemies. |
Dash Attack | Does a slide to kick enemies right in the face. |
Neutral Air | Turns his body 360° while in the air to hit enemies. |
Forward Air | Swipes his claw downward to either hit or spike an enemy off stage. |
Back Air | Whilst in the air Bowser delivers a dropkick to any adjacent opponents in the air. |
Up Air | Swings his head around hitting the enemy. |
Down Air | Goes into his shell before dropping down and hitting a player with his spiky shell and depending on how Xcore you are you could possibly pull off a suicide move killing the enemy and yourself with a spike. |
Get Up Attack | Bowser swings his arms around hitting anyone who dares try to attack him while he gets up. |
Side Smash | Dropkicks forward for insane knockback and damage. |
Up Smash | Gets on all fours before jumping into the air hitting any opponents who are nearby. |
Down Smash | Slashes enemies in both directions. |
Neutral Special | Fire Breath: Bowser spews a stream of fire from his mouth to scorch foes. Fire Shot: Bowser shoots out a fireball. Fire Roar: A more powerful version of Fire Breath, but takes longer to recharge.
|
Side Special | Flying Slam: Grabs the enemy and then jumps into the air and then body slams them to the ground. Dash Slam: Bowser dashes towards the enemy and grabs them, but the jump isn’t as high. Dash Slash: Bowser slashes his opponent, dealing high launch power.
|
Up Special | Whirling Fortress: Goes into his shell before spinning around on the ground. Any players next to him will be caught in a tornado of pain. Flying Fortress: Bowser goes higher, but deals no damage. Sliding Fortress: Bowser spin slides across the ground, it has less vertical range.
|
Down Special | Bowser Bomb: Bowser jumps up into the air and then sits on the opponent. Turbulent Bomb: Bowser pushes back his opponents with a gust of wind when landing. Slip Bomb: Bowser shakes the ground upon landing, making his opponents fall over.
|
Forward Throw | Bowser puts the opponent between his horns and rocks his head forward, launching the opponents like a slingshot. |
Back Throw | Bowser grabs the opponent, tossing them with one hand. |
Up Throw | Bowser tosses the opponent up, he then gets into his shell and spins with its spikes, impaling the opponents. |
Down Throw | Bowser puts the opponent on the ground and falls down on them, using his size and weight for massive damage. |
Final Smash | Turns into Giga Bowser before locking in on a target and punching them off the map |
Ice Climbers

Jab | Both Ice Climbers smack their opponents with their hammers twice, one from right then to the left |
Side Tilt | Both Ice Climbers swipe their hammers to the left |
Up Tilt | Both Ice Climbers raise their hammers and spin them around |
Down Tilt | Both Ice Climbers swipe their hammers to the left on the ground |
Dash Attack | Both Ice Climbers swing their hammers vertically while running |
Neutral Air | The Ice Climbers spin in the air with their hammer |
Forward Air | Both Ice Climbers smack the hammers forward, causing a potential spike |
Back Air | The Ice Climbers spin their hammers and turn around to their backside |
Up Air | The Ice Climbers swing their hammers overhead |
Down Air | Both Ice Climbers fall at a fast rate while having their hammers smackdown when they hit the ground |
Get Up Attack | As they get up, both Ice Climbers swing their hammers both directions on the ground |
Side Smash | Both Ice Climbers lift their hammers overhead and smack them to the ground |
Up Smash | Both Ice Climbers swing their hammers overhead |
Down Smash | Nana and Popo swing their hammers on opposite directions |
Neutral Special | Both Ice Climbers pull out a small bit of ice and smack it forward to make it slide to their opponents |
Side Special | Both Ice Climbers spin around forward in an icy whirlwind with their hammers out |
Up Special | Popo throws Nana up with a tether and as Nana flies up, Popo flies up as well bounded by the tether |
Down Special | Both Ice Climbers shoot a wave of ice out of their palms |
Forward Throw | Popo grabs the opponent and smacks them with a headbutt (or Nana and Popo can wobble their opponent infinitely). Once they are done Popo smacks their opponent with a hammer as they fly forward |
Back Throw | Popo throws their opponent backwards as they hit the ground |
Up Throw | Popo lifts their opponent above them and hits them with his hammer |
Down Throw | Popo lifts their opponent overhead and throws them down on the floor |
Final Smash | The Ice Climbers both summon a glacier that occupies most of the stage space and can be controlled from left to right. It may even freeze the opponent. |
Sheik
Jab | He uses his knives in an inward knife hand strike to attack the opponent. |
Side Tilt | He performs a roundhouse kick. |
Up Tilt | He does a stretch Kick followed by an axe kick. |
Down Tilt | He performs a leg sweep. |
Dash Attack | He launches himself at the opponent with an outward fanning knife hand strike. |
Neutral Air | He does a flying kick. |
Forward Air | He does a lunging attack with a downward arching arcing knife hand attack. |
Back Air | He does a sidekick. |
Up Air | He does a corkscrew flying kick then a thrust kick. |
Down Air | He does a downward falling kick. |
Get Up Attack | He does a kip-up followed by a scorpion kick |
Side Smash | He does a roundhouse kick followed up by a jumping spinning kick. |
Up Smash | He raises her arms up and swings them downwards, performing an outward fanning knife strike attack. |
Down Smash | He starts up a windmill to use it for a butterfly kick. |
Neutral Special | Needle Storm: He launches 6 needles into the opponent. Penetrating Needles: Throws needles that go through enemies, but he can only throw 3 needles. Paralyzing Needles: Throws needles that deal less damage and take longer to charge, but they paralyze opponents.
|
Side Special | Burst Grenade: He throws a grenade attached to a tripwire. Gravity Grenade: Has a smaller explosion radius, but opponents hit by the blast will be knocked towards Sheik. Skimming Grenade: Sheik throws a small, bouncing grenade. The longer it takes to explode, the less damage it deals.
In Melee and Brawl, Sheik brings out a chain whip that can be dangled around to deal damage. |
Up Special | Vanish: He uses a deku nut to create smoke and seemingly teleport away. Gale: An ultra swift teleport that goes faster, but deals no damage. Abyss: A stealthy leap that has a meteor effect.
|
Down Special | Bouncing Fish: He performs a 360° Tengkong Pantui Cepu. Jellyfish: Sheik flips higher and slams downwards with their heel, they then bounce straight up after hitting. Pisces: Sheik flips lower and kicks, which bounces them forward.
|
Forward Throw | Sheik shoulders their opponent forward. |
Back Throw | Sheik kicks his opponent in the opposite direction. |
Up Throw | Sheik kicks their opponent upwards using both feet. |
Down Throw | Sheik slams his opponent onto the ground and drops their leg down to kick them. |
Final Smash | In Brawl and Smash 4, Sheik fires a light arrow, which pierces through multiple foes, instantly killing them. In Ultimate, he launches forward and anyone in contact is in a barrage of punches, kicks, and slashes. |
Miscellaneous | He is a female!? She can turn into Zelda in Melee and Brawl. |
Zelda
Jab | She sends out magic bursts from her palms. |
Side Tilt | She uses magic to perform an outward hand strike. |
Up Tilt | She uses magic in an overhead arch to hurt opponents. |
Down Tilt | She does a kneeling kick. |
Dash Attack | A double palm thrust with magic. |
Neutral Air | She spins with magic around her. |
Forward Air | She infuses her kick with magic. |
Back Air | The same thing as the forward air but backwards. |
Up Air | She creates an explosion above her. |
Down Air | She stomps down with electric magic. |
Get Up Attack | She kicks forwards and backwards. |
Side Smash | A palm thrust with magic energy. |
Up Smash | She waves her arms with magical energy. |
Down Smash | She does a spinning roundhouse kick. |
Neutral Special | Nayru’s Love: Nayru's Love creates a blue crystal around her that protects her from damage. Nayru’s Rejection: Instead of hitting opponents, it spins them around. Nayru’s Passion: Pulls opponents in and does fire damage, but it doesn’t reflect projectiles.
|
Side Special | Din’s Fire: She shoots Din’s fireball at the opponents causing an explosion. Din’s Flare: It travels farther, but can’t be aimed up or down. Din’s Blaze: A steady fireball that floats in the air for a bit and explodes.
|
Up Special | Farore’s Wind: She uses Farore's wind to teleport upwards. Farore’s Squall: Teleporting doesn’t deal damage, but a gust of wind pushes opponents away. Farore’s Windfall: Teleports Zelda upwards, and foes hit when reappearing are meteor smashed.
|
Down Special | Phantom Slash: She summons a phantom knight to slash the opponent. Phantom Breaker: The Phantom travels a set distance and breaks shields. Phantom Strike: The summoned Phantom strikes harder, but doesn’t move forward as much.
|
Forward Throw | Using her magic, Zelda throws her opponent forward. |
Back Throw | Using her magic, Zelda throws her opponent to the opposite side. |
Up Throw | Using her magic, Zelda throws her opponent upward. |
Down Throw | Using her magic, Zelda throws her opponent to the ground and uses fire magic on them to deal multiple hits. |
Final Smash | In Brawl and Smash 4, Zelda fires a light arrow, which pierces through multiple foes, instantly killing them. In Ultimate, she uses the triforce of wisdom to create a blackhole-like force that sucks in the opponents and has the ability to kill them. |
Miscellaneous | She can turn into Sheik in Melee and Brawl. |
Dr. Mario
Jab | A pair of punches followed by a kick. |
Side Tilt | Doctor Mario kicks forwards, with surprisingly good range. |
Up Tilt | An upwards punch, like Mario’s, for obvious reasons. |
Down Tilt | A downwards sweeping kick. |
Dash Attack | Doctor Mario rushes forwards with a sliding kick. A bit slow, but armed with a decent amount of power. |
Neutral Air | A stationary kick position to knock foes away. |
Forward Air | Basically the same as Mario’s forward aerial, but this one doesn’t come with a Meteor Smash. It does come with really good knockback, however, so it can still take stocks more than you would think. |
Back Air | A backwards sweeping kick with both legs. Good edgeguarding tool. |
Up Air | An upwards flip kick to hit airborne foes. |
Down Air | Doctor Mario performs a powerful downwards kick stomp, Meteor Smashing anybody stupid enough to be underneath him to their demise. Or a trip to the doctor’s office. |
Get Up Attack | A pair of punches to the side as he gets back up. |
Side Smash | Doctor Mario unleashes a powerful surge of electricity from his hand that blasts enemies away, somehow. Doctors don’t actually have electric powers, but Mario doesn’t care. |
Up Smash | A strong upwards headbutt attack with more range than you would expect it to have. |
Down Smash | A sweeping breakdancing-like kick that covers both sides. |
Neutral Special | Megavitamins: Doctor Mario tosses forwards a Megavitamin or two, or more depending on how much you spam this move. Megavitamins don’t kill viruses in this game like they usually do, but they do deal a pretty good amount of damage, and their unorthodox bouncing pattern can make them a bit trickier to read or reflect compared to most projectiles. Fast Capsule: Fires a capsule that isn’t as strong, but easier to use repeatedly. Mega Capsule: Throws a large, but slow moving capsule that deals more damage to the opponents.
|
Side Special | Super Sheet: Doctor Mario sweeps upwards with a doctor’s coat. Somehow this works and can reflect projectiles away or flip opponents around, because doctors are overpowered. It isn’t really good for airborne movement like Mario’s Cape, though, but it comes with better range to make up for that. Shocking Sheet: Launches foes with an electrically charged sheet, but it can’t reflect projectiles. Breezy Sheet: The sheet swipes a gale of wind that damages foes, as well as pushing them back.
|
Up Special | Super Jump Punch: An upwards jump punch, just like Mario’s. Its height is not as impressive, but it is dramatically more powerful on the initial strike and can KO if done right. Super Jump: A slow jump that travels higher, but does no damage. Ol’ One-Two: A burning uppercut that doesn’t travel as high, but does more damage.
|
Down Special | Dr. Tornado: Doctor Mario spins around like a medical tornado and knocks enemies away. This can even be used to fly around a little bit and move some. Soaring Tornado: A rapid spin that creates wind and launches foes. Clothesline Tornado: A slow spin that launches opponents higher.
|
Forward Throw | Dr. Mario swings his opponent forward. |
Back Throw | Dr. Mario picks up his opponent and throws them over his head to the opposite side. |
Up Throw | Dr. Mario throws his opponent upwards. |
Down Throw | Dr. Mario throws his opponent to the ground, making them bounce into the air. |
Final Smash | A huge wave of really giant Megavitamins. Guaranteed to kill any and all cases of the common cold, flu, bronchitis, pneumonia, stomach bugs, food poisoning, measles, and chicken pox. Probably even more stuff. Also guaranteed to deal huge damage to your enemies and potentially KO them! |
Pichu
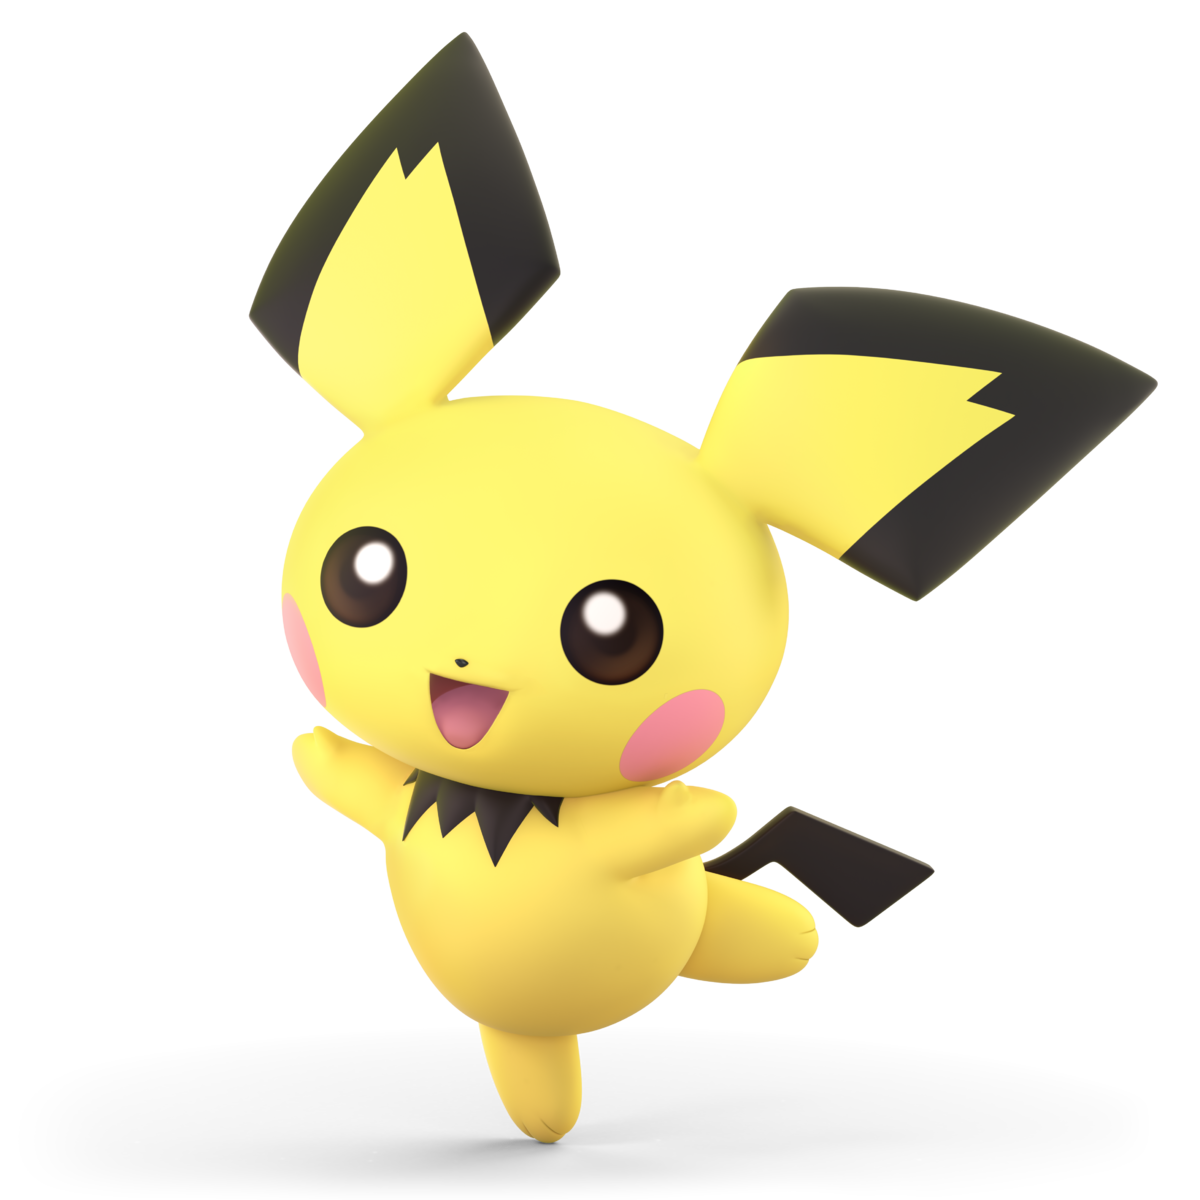
Jab | It performs a headbutt. |
Side Tilt | It puts itself on its upper paws and kicks forwards. |
Up Tilt | It swipes its tail in an arch above itself. |
Down Tilt | It swipes its tail in front of itself. |
Dash Attack | It launches itself with a headbutt. |
Neutral Air | It performs an aerial somersault. |
Forward Air | It performs a barrel roll. |
Back Air | It does electric spins. |
Up Air | It flicks its tail above itself |
Down Air | It does a downward barrel roll. |
Get Up Attack | It does a full spin then gets up. |
Side Smash | It sends a jolt of electricity from its cheeks. |
Up Smash | It does an upward headbutt. |
Down Smash | It spins around sending out electricity. |
Neutral Special | It sends a thundering jolt of electricity. |
Side Special | It launches itself forward, bashing its skull into the opponent. |
Up Special | It uses agility to launch itself up. |
Down Special | It summons a thundercloud, sending lightning down on itself and the opponent. |
Forward Throw | Pichu zaps their opponent forward. |
Back Throw | Pichu rolls around and throws his opponent to the opposite side. |
Up Throw | Pichu headbutts their opponent upwards. |
Back Throw | Pichu jumps and stomps their opponent while they're on the ground. |
Final Smash | It turns into a ball of electricity, running around and damaging opponents. |
Miscellaneous | Its electric attacks harm it. |
Falco
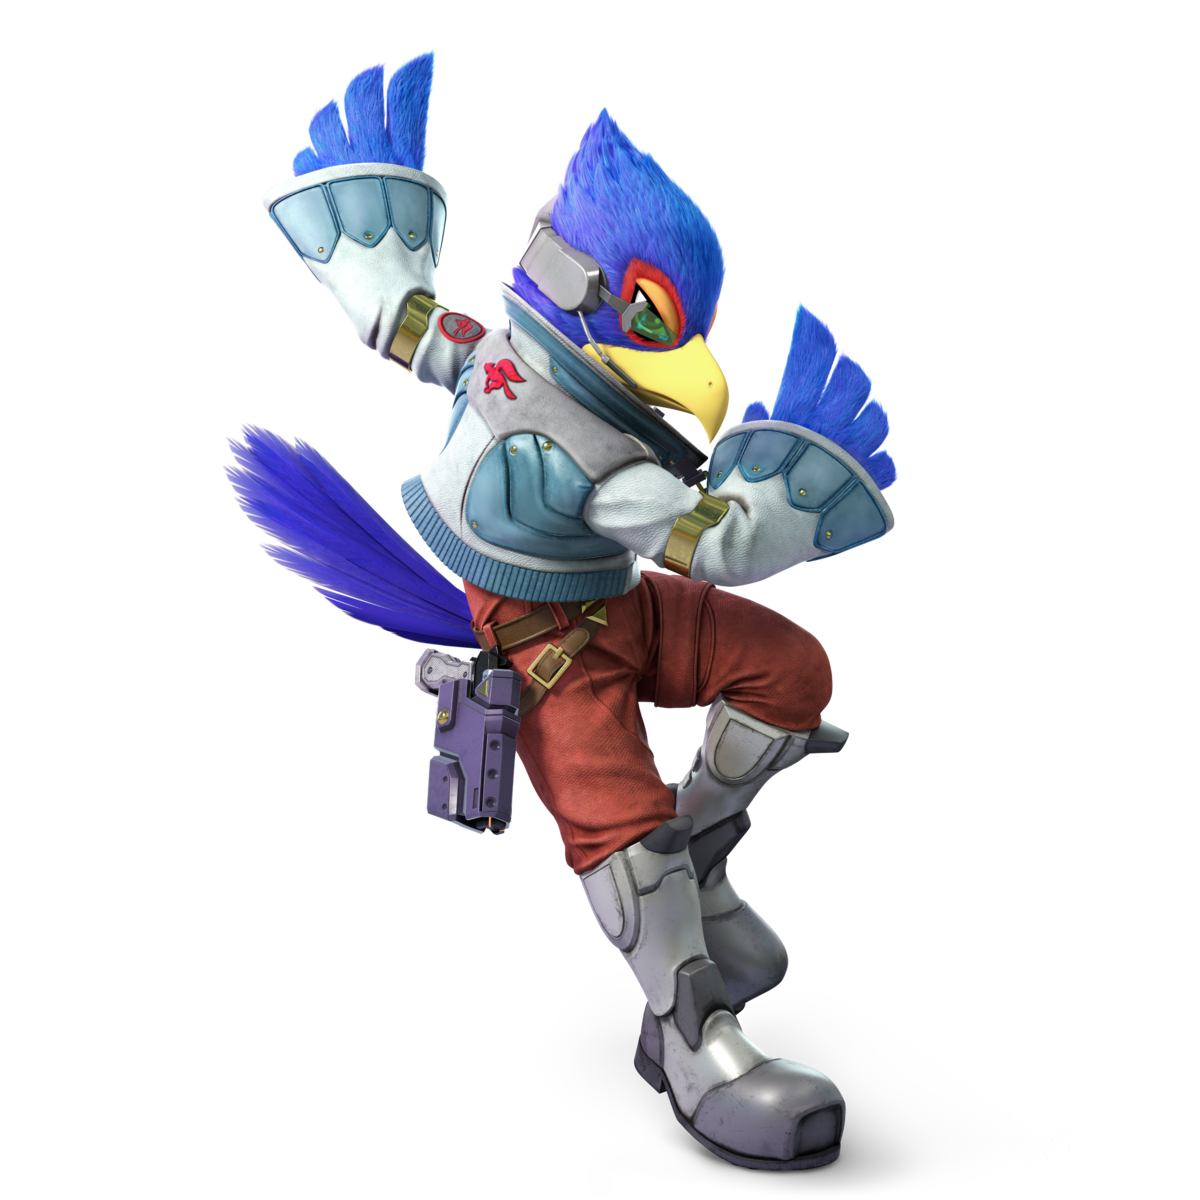
Jab | Falco chops to the right, then to the left, then spins around and hits their opponent with a whirlwind of chops. |
Side Tilt | Falco does a quick kick forward. |
Up Tilt | Falco chops overhead with both hands back to back. |
Down Tilt | Falco uses his tail to sweep underneath his opponent. |
Dash Attack | Falco does a jump kick as he runs forward. |
Neutral Air | Falco spins in the air delivering a couple of chops. |
Forward Air | Falco spins his whole body forward, hitting his opponent with his head a few times. |
Back Air | Falco delivers a kick backwards. |
Up Air | Falco does an overhead kick with a front flip. |
Down Air | Falco spins around with his foot forward to the ground. |
Get Up Attack | As Falco gets up, he does two kicks from left to right. |
Side Smash | Falco puts both of his hands overhead as he swipes them both down, doing two chops at once. |
Up Smash | Falco does an overhead kick with both his feet. |
Down Smash | Falco does the splits, delivering kicks to both sides. |
Neutral Special | Blaster: Falco pulls out his blaster and shoots a single laser that makes the opponent flinch. Explosive Blaster: Fires a shot that’s slower, but explodes upon impact. Burst Blaser: Fires faster shots, but the power and range of the lasers are decreased.
|
Side Special | Falco Phantasm: Falco does a high speed dash forward, hitting his opponent, though it doesn’t get as far as Fox does. Falco Phase: Falco can’t be hit during the dash, but can’t harm his opponents. Falco Charge: A shorter dash that hits much harder.
|
Up Special | Fire Bird: Falco ignites his body on fire and dashes into the air, delivering fiery damage to his opponent on contact. Fast Fire Bird: A Fire Bird that dashes instantly, but doesn’t go as far. Distant Fire Bird: Takes longer to charge, but hits enemies harder.
|
Down Special | Reflector: Falco kicks his reflector forward and catches it as it comes back, reflecting any projectiles during that time or hitting their opponent to do some quick damage. Accele-Reflector: reflects when moving forward, but gets sent back stronger. Reflector Void: A reflector that destroys projectiles and the reflector itself does more damage.
|
Forward Throw | Falco does a chop forward, making his opponents fly that way. |
Back Throw | Falco throws his opponents backwards, firing a laser shot from his blaster. |
Up Throw | Falco throws his opponents up into the air and fires a shot from his blaster upwards. |
Down Throw | Falco slams his opponent down to the ground and shoots a laser at them while down. |
Final Smash | In Brawl and Smash 4, Falco gets into his Landmaster tank. A giant tank that takes up a majority of the stage. In it, Falco can fire lasers from its cannon and can do barrel rolls to damage opponents. that get onto the landmaster. The landmaster also has jets to lift it up into the air.
In Ultimate, Falco summons his crew from Team Star Fox. Falco gets into his ship and flies alongside them. But unlike Fox, Falco flies ahead and shows off, doing barrel rolls as he fires lasers to his opponent and wiping them out. |
Miscellaneous | Falco has the highest jump distance of any character. |
Marth
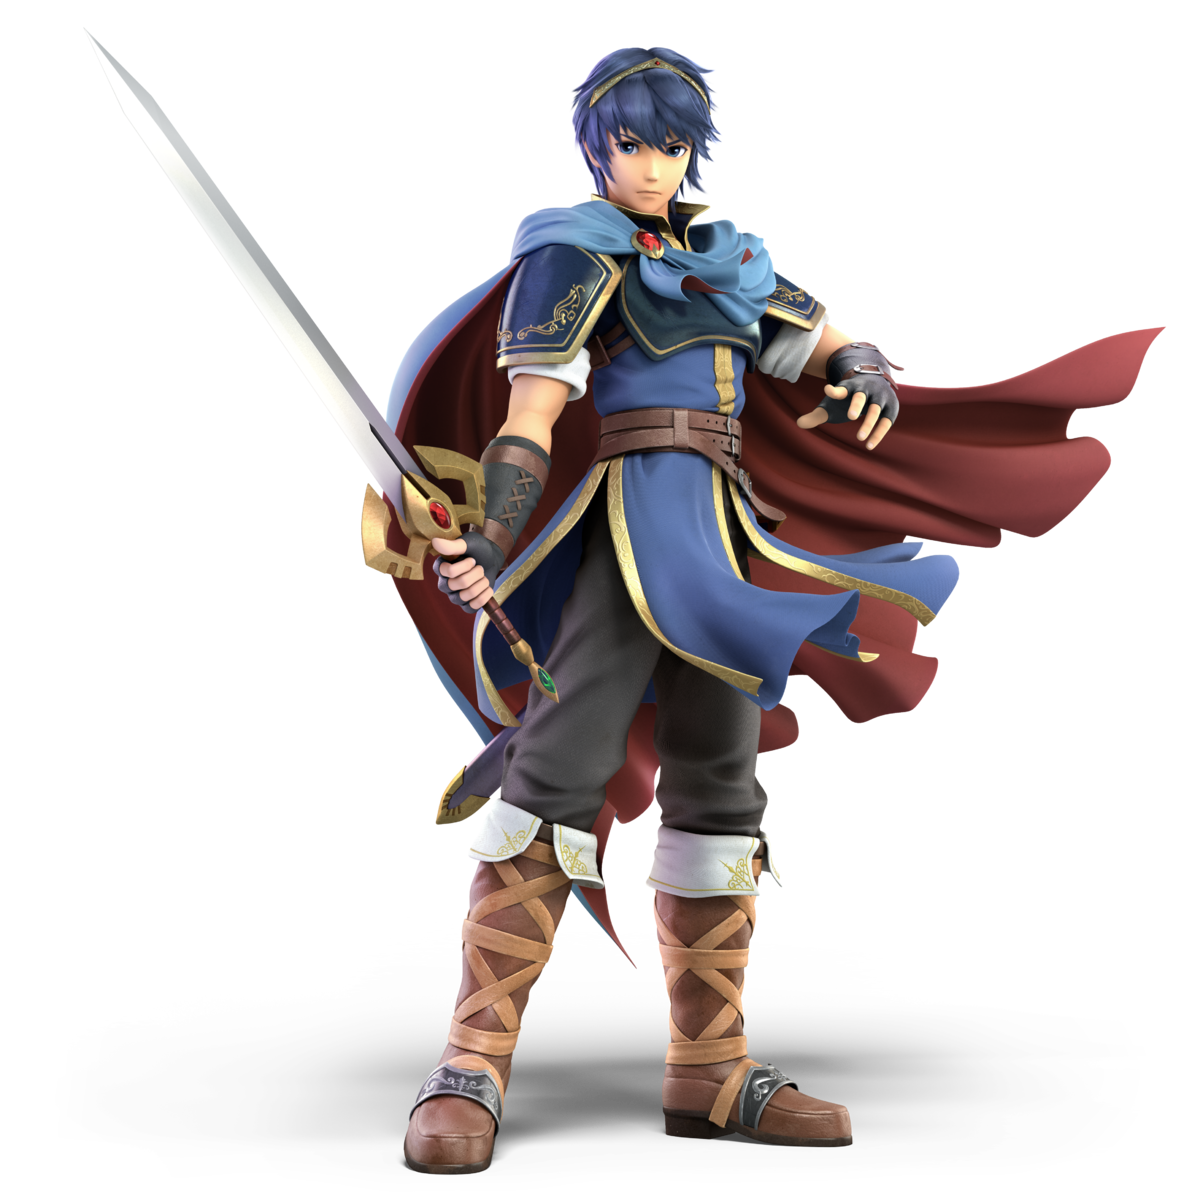
Jab | A quick sword slash that combos into itself. |
Side Tilt | A low to high forwards sword slash. |
Up Tilt | A front to back sword swing that goes over Marth. |
Down Tilt | A low angled sword poke. |
Dash Attack | A sword attack as Marth slides forward. |
Neutral Air | Marth does two 180 degree sword swings with the forward swing angled down and the backswing angled up. |
Forward Air | An aerial high to low sword slash. |
Back Air | Marth quickly turns to slash any foe behind him. |
Up Air | An upwards sword slash. |
Down Air | A sword attack in a downwards arc capable of spiking enemies. |
Get Up Attack | Two sword attacks starting with the back and then the front. |
Side Smash | A strong high to low sword slash. |
Up Smash | Marth thrusts his sword upwards stabbing any enemy who dares to be above him. |
Down Smash | Two low sword swings starting from the direction Marth is facing before swinging behind himself. |
Neutral Special | Shield Breaker: Marth thrusts his sword forward with immense force capable of easily busting shields. Storm Thrust: Marth thrusts his sword forward, creating a gust of wind that knocks opponents back. Dashing Assault: Thrusts while dashing forward, dealing less damage than normal.
|
Side Special | Dancing Blade: Marth does a series of sword attacks that catches his opponents in multiple hits. Each sword attack can be different based on the direction Marth desires being slashes that hit upwards, forwards or downwards. Effortless Blade: The combo type can’t be changed, but Marth waits longer between attacks. Heavy Blade: Each strike is stronger and has more launch power, but it can be difficult to pull off a combo.
|
Up Special | Dolphin Slash: In the blink of an eye Marth rises up with a powerful sword slash. Crescent Slash: Rises in an arc while attacking, and deals more damage at the midpoint, but it doesn’t go as high. Dolphin Jump: A high jump, but deals no damage.
|
Down Special | Counter: Marth gets into a counter stance, countering any melee attack he is hit with during this timeframe. Easy Counter: Marth’s counter stance lasts longer, but the attack power is lower. Iai Counter: A counter that knocks opponents behind Marth. It’s faster, but it does less damage.
|
Forward Throw | As the master of chain grabs Marth is good at keeping close with foes. That is until he knocks them away with an elbow bash. |
Back Throw | Marth trips the opponent, sending them at a low angle backwards. |
Up Throw | Marth yeets the enemy into the sky. |
Down Throw | Marth chucks the opponent to the ground with enough of an impact to send them upwards. |
Final Smash | Marth dashes forward to deliver a powerful sword strike. |
Miscellaneous | Marth deals more damage when he hits the enemy with the tip of his sword. |
Lucina
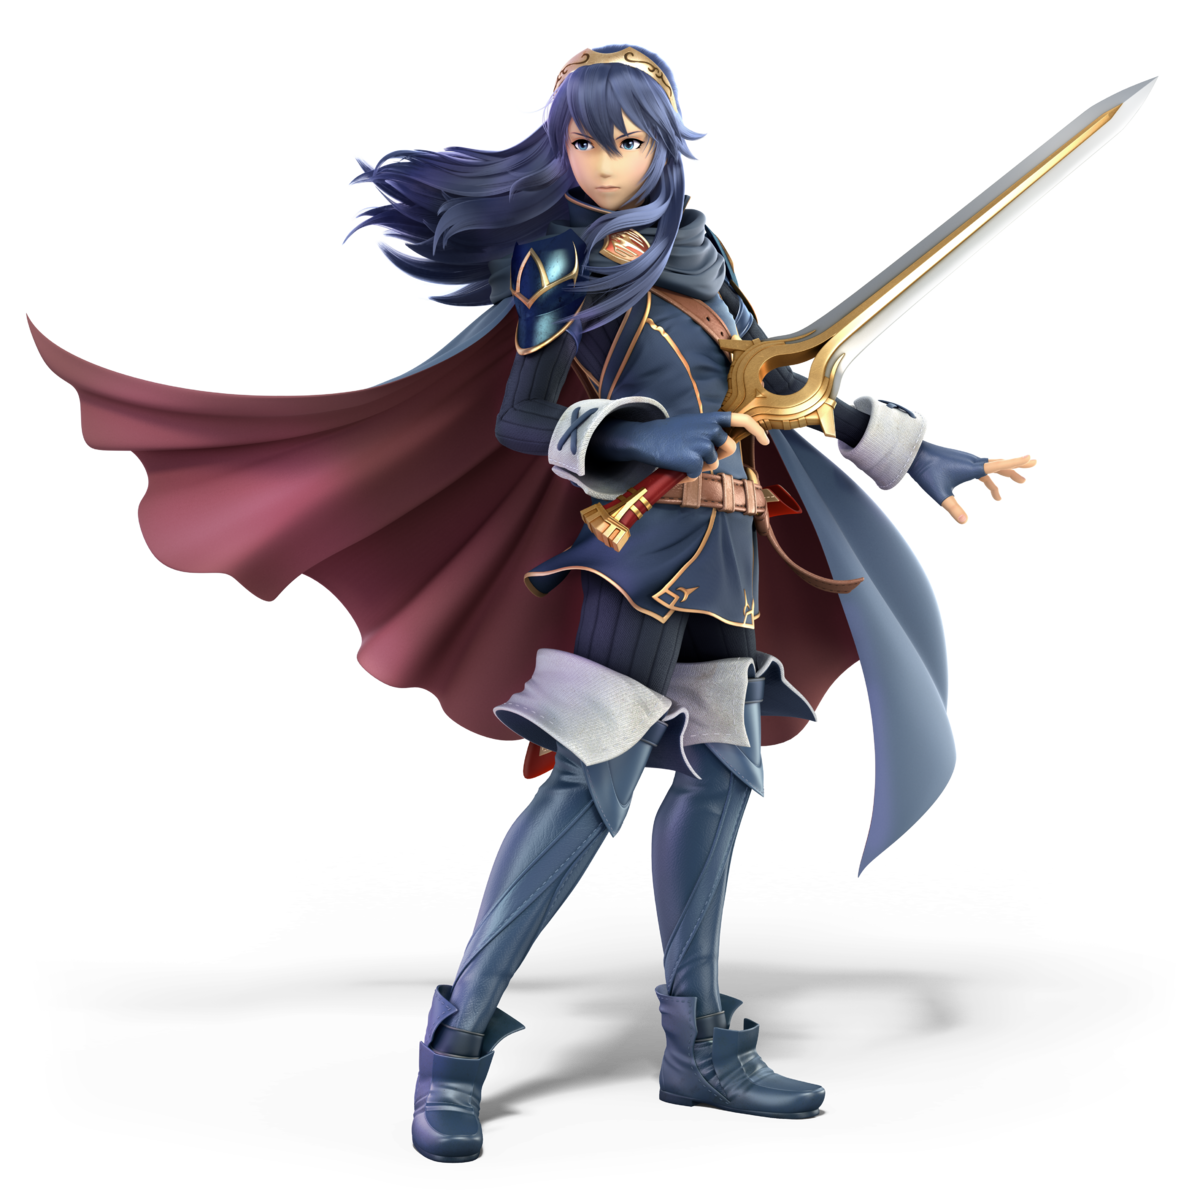
Echo | Being an echo, all of Lucina’s moves are similar to Marth’s. She even has the same custom moves as Marth in Smash 4. But she has a bit more of a balanced type approach with them. |
Young Link

Jab | Young Link does two slashes with his sword and then does a flurry of slashes. |
Side Tilt | Young Link does an overhead slice. |
Up Tilt | Young Link swipes his sword upwards. |
Down Tilt | Young Link sweeps his sword on the ground. |
Dash Attack | Young Link does a running slice with his sword. |
Neutral Air | Young Link does a jump kick. |
Forward Air | Young Link does two sword swipes in the air. |
Back Air | Young Link does two backwards roundhouse kicks. |
Up Air | Young Link thrusts his sword upwards. |
Down Air | Young Link thrusts his sword downwards. |
Get Up Attack | As Young Link gets up, he does two sword slices from left to right. |
Side Smash | Young Link charges up and does two massive sword slices. |
Up Smash | Young Link does three overhead sword slices upwards. |
Down Smash | Young Link does two massive sword slices from left to right. |
Neutral Special | Young Link shoots a fire arrow. |
Side Special | Young Link throws a boomerang. |
Up Special | Young Link does a spin attack with his sword that can be charged on the ground, as well as help him recover back onto the stage. |
Down Special | Young Link throws a bomb. |
Forward Throw | Young Link kicks away his opponent forward. |
Back Throw | Young Link kicks away his opponent in the opposite direction. |
Up Throw | Young Link slashes his sword upwards, making his opponent go up. |
Down Throw | Young Link puts his opponent down on the ground and elbow drops them, making them bounce upwards. |
Final Smash | Young Link uses the Triforce of Courage to seal his opponents in a Triforce construct as he slashes them multiple times before finishing them off. |
Miscellaneous | Young Link uses his hookshot to grab his opponents, as well as to grapple back onto the stage. |
Ganondorf
Jab | An electrical palm strike. |
Side Tilt | A strong forward kick. |
Up Tilt | Ganondorf lifts his leg up causing a small vortex in front of him. He then drops his leg down for a powerful fiery leg drop. |
Down Tilt | A low kick. |
Dash Attack | A shoulder bash. |
Neutral Air | Two aerial kicks forward. |
Forward Air | An aerial overhead punch. |
Back Air | A backwards backhand. |
Up Air | A front to back kick above Ganondorf. |
Down Air | A two legged stomp downwards that shocks and spikes the enemy. |
Get Up Attack | Ganondorf spins his body around, hitting enemies on both sides of him. |
Side Smash | In Melee, Brawl and Smash 4, Ganondorf performs a devastating elbow attack.
In Ultimate, Ganondorf pulls out a sword and slams it down in front of him. |
Up Smash | In Melee, Brawl, and Smash 4, Ganondorf does a giant devastating kick upwards.
In Ultimate, Ganondorf does a large front to back sword swing that arcs above him. |
Down Smash | In Melee, Brawl, and Smash 4, Ganondorf does two kicks towards the ground from left to right.
In Ultimate, Ganondorf does a low to the ground sword hilt attack that drags the opponent into a second sword attack. |
Neutral Special | Warlock Punch: Ganondorf readies a powerful punch that he can not be hit out of. However, take 7-10 business days to come out so if you get hit that’s on you. Warlock Blade: Ganondorf thrusts his sword forward, with the tip doing the most damage. Warlock Thrust: A faster and more explosive Warlock Punch.
|
Side Special | Flame Choke: Ganondorf lunges forward with his arm outstretched for a grab. If done on the ground he will raise the target in the air before exploding them in a purple flame. If used in the air Ganondorf will slam the enemy into the ground with dark purple flame. Flame Wave: Dashes forward to grab the enemy and blasts them into the air. Flame Chain: Dashes forward and strikes enemies, but doesn’t grab them.
|
Up Special | Dark Dive: Ganondorf slowly floats up with his arm out in an attempt to grab an opponent. If it lands he will charge them with purple energy that explodes sending Ganondorf upwards. Dark Fists: Ganondorf punches opponents into the air and then hits them in midair to do more damage. Dark Vault: Ganondorf jumps higher, but he can only grab at the beginning or end of his attack.
|
Down Special | Wizard’s Foot: Ganondorf will slide foot first with dark energy. If the attack is used in the air Ganondorf will drop down with his foot filled with the same dark energy. Wizard’s Dropkick: Ganondorf jumps low into the air and does a flying kick. Wizard’s Assault: A faster flying kick that goes right through foes.
|
Forward Throw | Ganondorf does a gut punch after grabbing his enemy. |
Back Throw | Ganondorf sends the opponent behind him with a kick. |
Up Throw | Ganondorf lifts the enemy up before punching them upwards. |
Down Throw | Ganondorf tosses the enemy into the floor pushing them up and out. |
Final Smash | Ganondorf transforms into the large beast Ganon. First the beast stuns enemies in front him with his blades before ramming into them for massive knockback. |
Mewtwo
Jab | Extends its arm to release small bursts of purple energy, if they spam it continually they’ll finish being annoying by an energy infused swipe upwards. |
Side Tilt | Swings their tail forward, shockingly strong for a tilt attack. |
Up Tilt | Aura farms by using their own powers to do a backflip while spinning their tail around. |
Down Tilt | Crouches and spins its tail around (Noticing a pattern?) |
Dash Attack | A clean energy palm thrust that sends foes flying. |
Neutral Air | Discharges electricity around himself with its limbs spread out. |
Forward Air | An energy-infused swipe. |
Back Air | Swings its tail behind itself |
Up Air | A wide arching upwards swing of Mewtwo’s tail. Has excellent range and coverage. |
Down Air | Mewtwo sends a surge of energy crashing down below him. Functions as a Meteor Smash if landed correctly. |
Get Up Attack | A pair of slashes and tail swipes to the sides. |
Side Smash | A powerful surge of psychic energy Mewtwo aims in front of him with both arms. |
Up Smash | Thrust its arm upwards to create a purple galaxy-shaped swirl. |
Down Smash | Moves its arm in a diagonal angle towards the ground of both sides and fires large bursts of energy from their fingertips. |
Neutral Special | Mewtwo charges up a powerful Shadow Ball, firing it early or when fully charged at will. It then rushes forwards, dealing impressive damage to anybody caught by it. |
Side Special | Mewtwo uses a field of Confusion in front of him, messing with enemy movement or reflecting enemy projectiles caught in the field. |
Up Special | Mewtwo teleports somewhere else on the battlefield. This can be aimed in basically any direction. |
Down Special | Mewtwo uses Disable directly in front of him. While the range is poor, anybody caught by it will be rendered dazed and stunned for a noteworthy amount of time, leaving them entirely at Mewtwo’s mercy. |
Forward Throw | A barrage of small Shadow Balls hammer into the victim to launch them away. |
Back Throw | Mewtwo psychically tosses a foe away behind him. |
Up Throw | The enemy is spun above Mewtwo for a few rotations before being launched upwards. |
Down Throw | Mewtwo tosses the enemy downwards before slapping them with his tail. |
Final Smash | Mewtwo Mega Evolves into Mega Mewtwo Y, before firing off a powerful Psystrike. Anyone caught will take enormous psychic damage, before being launched away. |
Roy
Jab | A set of upwards slashes that can be chained together. |
Side Tilt | A forwards aimed slash that covers a wide arc. |
Up Tilt | An upwards arching slash. |
Down Tilt | A quick downwards slice along the floor in front of Roy. |
Dash Attack | Roy rushes forwards and performs a horizontal slash directly in front of him. |
Neutral Air | A pair of slashes both in front and behind Roy. |
Forward Air | A wide arching downwards slash aimed in front of Roy. |
Back Air | An upwards slash Roy aims behind him. |
Up Air | An upwards horizontal slash above Roy. |
Down Air | Roy does a powerful downwards slash below him, functioning as a Meteor Smash at the hilt. |
Get Up Attack | A pair of slashes to both sides as Roy gets up. |
Side Smash | A somewhat slow but very powerful forwards slash that deals more damage at the hilt. |
Up Smash | Roy attacks upwards with his blade, emitting a powerful eruption in the sword that damages foes. |
Down Smash | Roy slashes at both sides around him low to the floor. |
Neutral Special | Roy charges his sword for an extensive period of time, before slamming it into the ground to create a terrifyingly powerful explosion. This move takes a long while to charge, but should it land at maximum charge, it will be devastating. |
Side Special | Roy performs a number of quick slashes directly in front of him for a lengthy chain. |
Up Special | Roy leaps into the air with his sword aflame, it can be arced somewhat to change its direction. |
Down Special | Roy enters a countering stance, countering any hits he might take in this state. |
Forward Throw | Roy shoulders his opponent forwards. |
Back Throw | Roy trips his opponent into the opposite direction. |
Up Throw | Roy throws his opponent upwards. |
Back Throw | Roy slams his opponent onto the ground, making them bounce into the air. |
Final Smash | Roy performs a quick slash in front of him, before unleashing a devastating explosion with his blade that sends anyone caught by it flying. |
Miscellaneous | Roy’s sword comes with a unique mechanic, in that he is the opposite of Marth and Lucina. Instead of dealing more damage with the tip of his sword, Roy’s attacks instead to deal the most damage at the hilt, prioritizing extremely close quarters to deal better damage. |
Chrom
Echo | As an Echo of Roy, Chrom’s moveset is largely similar. He lacks the mechanic of dealing more damage at the hilt, and instead deals more consistent damage across his entire sword. Besides that, his up special is more akin to Ike’s, acting quite similarly to his Aether recovery move. His Final Smash is also different, rushing forwards to deliver a pair of powerful slashes to launch enemies away rather than staying in a single spot. Otherwise, Chrom’s moveset is largely the same outside of a few, minor differences here and there. |
Mr. Game And Watch
Jab | He grabs a pump, sending gas at the opponent. |
Side Tilt | He uses a chair to knock opponents back. |
Up Tilt | He uses two flags to attack the opponent. |
Down Tilt | He uses a manhole to harm the opponents, forcing it into them. |
Dash Attack | He headbutts the opponent with a helmet on. |
Neutral Air | He mercilessly rips fish out of their bowl home and sends them at the opponent. |
Forward Air | He sends out a bomb blowing up opponents or anyone in its destructive path. |
Back Air | This monster swings a turtle behind himself, harming the opponents and the poor turtle. |
Up Air | He shoots a puff of air at the opponent. |
Down Air | He reminds Mario and Donkey Kong of their dark past by slamming a key down at the opponent. |
Get Up Attack | He swings a hammer down to knock opponents away. |
Side Smash | He lights a torch and burns the opponent. |
Up Smash | He puts on a diving helmet and headbutts the opponent. |
Down Smash | He swings two hammers down like he smashes moles, digging the opponent into the ground. |
Neutral Special | Chef: He cooks up a beating, tossing a mysterious food at the opponent. XXL Chef: Flings massive food that is slower, but more powerful. Short-Order Chef: Flings mini bits of food, which have lower attack power, but farther range.
|
Side Special | Judge: He judges the opponent and RNGesus judges Game and Watch with several effects.
1: It's a weak flinching attack. 2: It can knock people down or bring back the worst brawl mechanic, tripping. 3: It's a weak hit. 4: It's a slashing attack. With a hammer. 5: It does an electric attack. 6: It does a fire attack. 7: It summons 3 apples. 8: It freezes people. 9: Lord have mercy, it practically kills the opponent. Extreme Judge: Only 1 and 9 appear, but 9 isn’t as devastating. Chain Judge: The number shown equals the number of hits dealt.
|
Up Special | Fire: He jumps up from two firemen launching him. He descends into the war with a parachute. Heavy Trampoline: Lower distance, but does more damage on the way up. Trampoline Launch: Launches G&W and his foes next to him into the air, but he doesn’t descend with a parachute.
|
Down Special | Oil Panic: He grabs a bucket, filling it with whatever projectile it can. When it's full he dumps oil all over the place, instantly killing opponents and the ocean's animals. Efficient Panic: The bucket fills more quickly, but it does less damage. Panic Overload: The bucket has a smaller absorption rate, but the oil dumped is larger.
|
Throw | Mr. Game And Watch juggles a stock icon of their opponent and throws them in any of the four directions. |
Final Smash | Transforms into a giant Octopus and makes its way across the screen, picking up any unlucky foes in its path and carrying them away. |
Miscellaneous | One of Mr. Game and Watch's most defining aspects is his odd body. However, this acts as a huge advantage because it allows G&W to create Shadow Bugs. Shadow Bugs are tiny creatures capable of (even being able to make them bigger), creating small enemies, making doppelgangers (at increased sizes) and even forming the powerful boss, Duon. Duon has two sides. One with swords capable of chopping enemies up and the other has a cannon that fires explosive blasts. |
Meta Knight
Jab | Meta Knight unleashes a flurry of swings with Galaxia. Unlike pretty much all other jabs, this move can be used continuously for as long as one likes without stopping, and finishes off with a useful upwards slash. |
Side Tilt | A trio of sword swings that locks foes in place before launching them away. |
Up Tilt | An upwards drilling thrust with Galaxia to hit airborne enemies. |
Down Tilt | Meta Knight pokes his blade forwards along the ground quickly. |
Dash Attack | A swift and effective forwards kick that launches foes into the air, a good combo starter as well! |
Neutral Air | Meta Knight spins around mid-air like a little blue buzzsaw, slicing anybody close with Galaxia. |
Forward Air | A set of forwards aiming sword swings with excellent range. |
Back Air | A trio of backwards swings in mid-air. Excellent for edgeguarding KOs if you like that sort of strategy. |
Up Air | A quick horizontal slash aimed upwards. |
Down Air | Same as above, but aimed downwards. |
Get Up Attack | Meta Knight strikes in both directions with Galaxia before getting back up. |
Side Smash | A charged and powerful slash with Galaxia, while its range isn’t great, it is rather fast and powerful. |
Up Smash | A trio of upwards slashes that can catch airborne foes with ease and launch them away. |
Down Smash | Meta Knight quickly slashes around both of his sides, striking low foes (or the legs of taller adversaries I guess) and knocking them away. |
Neutral Special | Mach Tornado: The Mach Tornado activates, where the masked knight spins around rapidly, sucking in opponents to deal a continuous stream of damage before launching them away. Meta Knight can even fly about while using this move, giving it excellent range and versatility. Entangling Tornado: Pulls enemies in to launch them upwards. Dreadful Tornado: A more powerful Mach Tornado, but the spins can’t be increased.
|
Side Special | Drill Rush: Meta Knight uses the Drill Rush, flying forwards in a spinning motion with his blade, rushing through enemies and dragging them along to deal continuous damage. High-Speed Drill: A faster Drill Rush, but the angle can’t be changed. Shieldbreaker Drill: A Drill Rush reduced in power and distance, but breaks shields.
|
Up Special | Shuttle Loop: Meta Knight’s wings aren’t just for show. The Shuttle Loop allows the warrior to perform an incredible upwards slice while rapidly ascending into the skies above, potentially bringing victims along and over the top blast line. Blade Coaster: Flies forwards instead of up, which makes opponents be launched at a lower angle. Lazy Shuttle Loop: Does a slow loop, and strikes hard while rising quickly.
|
Down Special | Dimensional Cape: Tapping into the spatial properties of the Dimensional Cape, Meta Knight disappears in order to teleport to a different location. He is then able to reappear somewhere else on the map, maybe even attacking with surprisingly great power on top of that. Meta Knight is completely undamageable while this move is in use, making it an incredible option for getting around, or maybe scaring people by popping up in front of them or something. Shield Piercer: The power and distance is lower, but the attack pierces shields. Stealth Smasher: Distance travels longer, but Meta Knight is left vulnerable.
|
Forward Throw | Meta Knight flip kicks their opponent forward. |
Back Throw | Meta Knight teleports behind his opponent and slashes them away. |
Up Throw | Meta Knight lifts his opponent high into the air and slams them back down to the ground. |
Down Throw | Meta Knight stomps on his opponent repeatedly. |
Final Smash | In Brawl and Smash 4, Meta Knight throws his cloak over his opponents. The screen turns to black and comes back when Meta Knight performs a single devastating sword slash.
In Ultimate, Meta Knight performs Darkness Illusion. Which is a powerful attack where the masked knight creates a stream of lightning to trap opponents, before dragging them into the skies above. Then, the great warrior attacks with a barrage of clones, slicing his enemies to shreds in the dark skies and finishing them off with a powerful slash attack. |
Pit
Jab | A trio of slashes with the bow, can be turned into a flurry of attacks if mashed. |
Side Tilt | Pit does a horizontal slash with his blades aimed forwards. |
Up Tilt | A trio of upwards kicks to hit those in front of Pit or in the air. |
Down Tilt | A quick slash across the ground in front of Pit to hit low enemies. |
Dash Attack | A rushing slash with Pit’s blade. |
Neutral Air | A large spinning twirl with both of the Bow of Light’s blades, it deals numerous hits and lasts quite a while. |
Forward Air | A forwards spinning twirl with both blades. |
Back Air | A quick backwards stab with the blades, it has surprisingly good knockback power. |
Up Air | An upwards spinning twirl with the blades, a very good anti-air tool. |
Down Air | Pit swings one of the Bow of Light’s blades in a large downwards arc below him. It is a Meteor Smash on those caught under it. |
Get Up Attack | Pit slashes at both sides while he gets back up. |
Side Smash | A quick but powerful pair of direct forwards slashes with both blades, knocking foes away. |
Up Smash | A trio of upwards aimed bow slashes to hit those above the angel. |
Down Smash | Pit slashes at the ground on both sides with his blades. |
Neutral Special | Palutena’s Bow: Pit uses the Bow of Light to fire an arrow forwards. It can be charged for a while and also aimed in all sorts of directions, allowing it to hit just about anywhere with enough skill. Piercing Bow: Fires a stronger arrow that pierces through foes, even breaking shields, but the charge takes longer. Guiding Bow: The arrow can be more easily guided, but is less powerful.
|
Side Special | Upperdash Arm: Pit rushes forwards with the Upperdash Arm, bashing anybody he rams into up to the skies above. Interception Arm: Doesn’t dash, but acts as a counter. Quickdash Arm: A faster and longer dash that continues after the uppercut, but is harder to control.
In Brawl, Pit spins Palutena’s bow around in a circular motion in front of him, hitting opponents and reflecting projectiles. |
Up Special | Power of Flight: Pit takes flight to the skies with the Power of Flight. It deals no damage and can only go one direction once activated, but it has incredibly good range and is a remarkable recovery tool. Striking Flight: The angle of the flight can’t be controlled, but deals more damage upon takeoff. Breezy Flight: The flight doesn’t go as far, but it creates a whirlwind that pushes enemies away.
In Brawl, Pit had the power of flight, but it only enhanced his jumps rather than send him in a specific direction. |
Down Special | Guardian Orbitars: Pit uses the Guardian Orbitars on both sides around him. It can block attacks, reflect projectiles, and hamper enemy movement, giving it plenty of use. Impact Orbitars: The orbitars deal damage and knockback to opponents, but don’t reflect or guard. Amplifying Orbitars: Boosts the power of the projectiles reflected, but the Orbitars will be broken more easily.
In Brawl, Pit only had one shield to reflect projectiles with instead of two. |
Forward Throw | Pit slashes his opponent forwards. |
Back Throw | Pit throws his opponent into the opposite direction, slamming them onto the ground while doing so. |
Up Throw | Pit kicks his opponent upwards with both legs. |
Down Throw | Pit places his opponent onto the ground and slashes them with Palutena’s Bow. |
Final Smash | In Brawl, Pit summoned Palutena’s troops to attack his opponents while dealing with other parts of the battle.
In Smash 4, Pit equips the Three Sacred Treasures, where he fires multiple types of projectiles at his opponents, ending with blue beams that go across the stage.
In Ultimate, Pit summons the Lightning Chariot, aims, and then launches forwards in it to ram anybody caught in the crosshairs. Deals devastating damage, but has a small area of affect. |
Dark Pit
Echo | All of the moves are the same as Pit, even having the same custom moves in Smash 4, but some things are different. Dark Pit uses his electroshock for his side special and hits his opponent with an electrical attack that can also reflect projectiles. Dark Pit also has a different final smash, using his bow to deliver a devastating and quick shot that can kill the opponent almost instantly. |
Zero Suit Samus
Jab | A three hit combo with one chop and two elbow strikes. |
Side Tilt | A kick that can be angled almost anywhere in front of Samus. |
Up Tilt | Samus does a handstand as she crushes foes above her between her legs. |
Down Tilt | A low sweep. |
Dash Attack | Samus uses her rocket boots to propel herself forward for a knee strike. |
Neutral Air | Samus uses her plasma whip to do a 180 attack around herself, zapping enemies hit by the attack. |
Forward Air | Two swift kicks forward. |
Back Air | A strong backwards kick. |
Up Air | A kick in an arc above Samus. |
Down Air | Samus dives towards the ground foot first hitting anyone in her path with a spike. |
Get Up Attack | A 180 kick around her body. |
Side Smash | Two high damaging kicks forward. The second of which uses fire from Samus boots to deal extra damage. |
Up Smash | Samus shocks enemies above her by whipping around her plasma whip. |
Down Smash | Samus fires a paralyzer shot at the ground that stuns opponents for a short duration. |
Neutral Special | Paralyzer: Samus charges up a paralyzer blast that slowly travels forward. The longer the charge the more powerful it becomes with longer range and stun duration. Blast Shot: The blast shoots farther and faster, but it’s less powerful and won’t stun. Electromagnetic Net: The energy blast expands after being fired, but has a reduced range.
|
Side Special | Plasma Whip: Samus whips her plasma whip forward to shock and scorch any foe hit by the attack. The whip can also grab ledges to help Samus recover to stage. Plasma Dash: A dashing strike with Samus’s gun that doesn’t use the whip. Whip Lash: Knocks opponents towards Samus with the very end of the whip, the rest does nothing.
|
Up Special | Boost Kick: Samus uses her boots to boost upward with a flurry of kicks to anyone caught in the way. Impact Kick: Samus kicks opponents into air and finishes them with a powerful spinning kick. Lateral Kick: Samus lifts opponents into the air at an angle, and dashes forward with a spin kick.
In Brawl, Samus uses her whip to grab onto a ledge. |
Down Special | Flip Jump: Samus jumps in an arc using her boots. She can then use the fire from her boots to deliver a strong kick to anyone in her way. If Samus perfectly lands on an opponent in the air they are spiked down and if she perfectly lands on them while they are on the ground they are buried. Shooting Star Flip Kick: The flip itself doesn’t attack, but the descending kick does when the button is pressed again. Low Flip: A flip that doesn’t go very high, but covers a lot of ground.
|
Forward Throw | Samus uses her plasma whip for extra grab range. Once grabbed she will kick away the foe. |
Back Throw | Samus flings the enemy behind her before kicking them further back. |
Up Throw | Samus does a backflip kick that sends the opponent up. |
Down Throw | Samus brings the enemy to the floor before performing a leg drop on them to hit them upwards. |
Final Smash | Samus climbs on top of her ship and dawns her Power Suit to fire a massive laser from afar at anywhere she targets. |
Miscellaneous | In Brawl, if Zero Suit Samus uses her Final Smash she will turn back into regular Samus. |
Wario
Jab | Wario attacks with a couple of angled punches. |
Side Tilt | Wario does a quick side slap forwards, batting foes away. |
Up Tilt | Wario raises both of his arms into the air, slapping foes with them. |
Down Tilt | Wario pokes his hand forwards towards the ground, hitting any low opponents with surprising speed. |
Dash Attack | The iconic Shoulder Bash from the Wario Land games. Wario charges forwards and slams enemies with his shoulder, knocking them away with impressive power. |
Neutral Air | Wario does a quick airborne spin. |
Forward Air | A very brief forwards kick with Wario’s tiny little foot. While it lacks range and power, it’s pretty good for combos. |
Back Air | Wario swings his whole body backwards in midair, slamming his body into anybody behind him with ease. |
Up Air | Wario does an upwards clap, smacking anybody above him. |
Down Air | Wario does a downwards corkscrew attack, piledriving foes beneath him. |
Get Up Attack | Wario smacks foes on both sides as he gets up. |
Side Smash | Wario unleashes an immensely powerful forwards punch that sends opponents flying with ease. In Brawl, his side smash was a shoulder bash. |
Up Smash | Wario does a huge upwards headbutt. It has surprising range and power, making it great for dealing with airborne enemies. |
Down Smash | Wario spins about on the ground with surprising speed, knocking away opponents. |
Neutral Special | Chomp: Wario chomps down on his prey and munches on them for a good long while. He somehow restores his health doing this, and can even eat items and some projectiles. His diet is already pretty atrocious, so it’s not like this does anything worse for him… Inhaling Chomp: Pulls enemies in for a bite, but it does less damage. Garlic Breath: Wario’s rancid breath makes enemies fall over and pass out.
|
Side Special | Wario Bike: Created by the brilliant Doctor Crygor, the Wario Bike comes into the fray with this move. Wario can ride it all over the place, running targets over, speeding, doing wheelies, and being a general pain in the neck. Wario can also dismount the bike to throw it at people or eat it, because why not. Speeding Bike: The bike goes faster and is lighter, but does less damage and can be destroyed easier. Burying Bike: The bike is slower and heavier, but it buries opponents.
|
Up Special | Corkscrew: Wario spins around in the air like a big yellow and purple tornado, somehow rising higher into the air with it. Not as efficient as Kat and Ana’s gliders or Ashley’s broom, but it is effective. Probably gets kind of dizzy though. Widescrew: Does less damage and range, but the angle can be changed. Corkscrew Leap: Takes longer to charge and deals no damage, but Wario goes higher.
|
Down Special | Wario Waft: Wario’s not exactly known for his good manners, and the Wario Waft is a good example of why. This astonishingly powerful move has the microgame maker unleash his stored gas into a powerful blast, obliterating foes with ease. Absolutely vile… Rose-Scented Waft: Release gas that gives opponents the flower status effect. Quick Waft: The waft charges more quickly, but does less damage.
|
Forward Throw | Wario uses his butt to bash his opponent forward. |
Back Throw | Wario swings his opponent around and throws them in the opposite direction. |
Up Throw | Wario uses both of his hands to smack his opponent upwards. |
Down Throw | Wario jumps and lands on his opponent, butt first. |
Final Smash | Ladies and gentlemen, people of all ages! Behold the greatest hero of Diamond City, the one, the only, WARIO MAN!!!
Yeah, yeah, his powers are a total dud in WarioWare, shut up. You’re just jealous. Unleashing the incredible might of Nasty Garlic, Wario Man takes to the skies to put the hurting on his stupid enemies, and make them have a rotten day! He’ll pulverize everyone dumb and stinky enough to challenge him, and send them flying into orbit!
…Or Orbulon’s inconveniently timed Oinker that happens to be passing by. Whichever happens first. |
Snake
Jab | Snake does two punches and a roundhouse kick. |
Side Tilt | Snake delivers an attack with his knee and an overhead hammerfist. |
Up Tilt | Snake does an overhead kick, doing the splits upwards. |
Down Tilt | As Snake is in his army crawl position, he spin sweep kicks around on the ground. |
Dash Attack | Snake does a roll on the ground that delivers damage and goes straight into his army crawl position. |
Neutral Air | Snake does a series of three roundhouse kicks and one final kick upwards. |
Forward Air | Snake does an overhead axe kick that can spike his opponent. |
Back Air | Snake does a backwards dropkick. |
Up Air | Snake does an upwards dropkick. |
Down Air | Snake does a series of rapid downward kicks. |
Get Up Attack | As Snake gets back up, he does sort of a light breakdance, kicking from left to right upon recovery. |
Side Smash | Snake aims his rocket launcher downward and fires it onto the ground, causing a small explosion that can harm the opponent. |
Up Smash | Snake takes out a mortar and shoots a rocket up into the air that explodes upon contact with the opponent or the ground. |
Down Smash | In Brawl, Snake digs a claymore into the ground that explodes when Snake’s opponents touch it.
In Ultimate, Snake does two kicks to the ground from the left and right. |
Neutral Special | Snake takes out a grenade and throws it. |
Side Special | Snake takes out a rocket launcher and fires a nikita missile that is remote controlled and can explode upon contact. |
Up Special | Snake grabs onto a Cypher and it flies any direction upwards. |
Down Special | Snake arms C4 that can be stuck to any surface, including his opponent, and it explodes with a push of a button. |
Forward Throw | Snake grabs his opponent from behind with a rear naked choke and does a blood choke. Snake pushes his opponent forward onto the ground as they fly forwards from the impact. |
Back Throw | Snake sweeps his opponent as they fly backwards from the rear naked choke. |
Up Throw | Snake then does a belly to back suplex that makes his opponent fly upwards. |
Down Throw | Snake places his opponent onto the ground that leaves them open to an attack while on the floor. |
Final Smash | In Brawl, Snake gets onto the ladder of a helicopter and shoots his opponents with a grenade launcher from the front of the stage.
In Ultimate, Snake throws a flare grenade as an aiming cursor locks onto his opponents and rockets get fired away to whoever is targeted. |
Ike
Jab | A punch and kick followed by a sword swing. |
Side Tilt | A horizontal sword slash. |
Up Tilt | Ike raises the edge of his sword in the air to his enemies above him. |
Down Tilt | A low angled sword attack |
Dash Attack | A lunging sword slash. |
Neutral Air | Ike swings his sword around his body. |
Forward Air | A high to low sword slash. |
Back Air | A quick sword attack behind Ike. |
Up Air | An upwards sword slash in an arc. |
Down Air | A powerful downwards sword swing capable of slinging opponents. |
Get Up Attack | A sword sweep around Ike’s body. |
Side Smash | Ike swings his sword in front of himself with a heavy slam. |
Up Smash | Ike swings his sword upwards in a large area. |
Down Smash | Two low to the ground sword strikes to the left and right. |
Neutral Special | Eruption: Ike charges his sword with blue flame. When it strikes the earth the sword causes a large spire of blue flame. If charged a good amount a second, a smaller spire of flame will appear after the initial one and the attack will do more damage. Finally at full charge Ike will create a third small spire of fire with maximum damage at the cost of his own health. Tempest: Ike’s sword strike creates a gust of wind once it hits the ground. Furious Eruption: Ike’s spire of flames covers a wider area the more it’s charged, but does more damage on himself.
|
Side Special | Quick Draw: Ike charges up a slash. Once released the slash sends Ike rushing forward only stopping when slashing at an opponent. The longer it’s charged the further the move goes. Close Combat: A faster lunge that ends with a body blow that launches foes. Unyielding Blade: A lunge that has more super armor, but is slower and shorter.
|
Up Special | Aether: Ike throws his sword into the air causing it to spin and hit enemies. Ike will then jump the sword before crashing back down to earth. Enemies under Ike as he falls will be spiked. Aether Drive: Ike throws his sword diagonally upwards. Aether Wave: The sword creates a shockwave once it hits the ground, but it’s less powerful.
|
Down Special | Counter: Ike will block a melee hit before countering with a sword slash of blue flame. Paralyzing Counter: A counter that paralyzes the enemies instead of doing damage. Smash Counter: Delivers a slower, yet more powerful attack during the counter.
|
Forward Throw | Grabs a foe before kicking them away. |
Back Throw | Ike spins the enemy behind him followed by kicking them away. |
Up Throw | Does a two handed smack that hits enemies upwards. |
Down Throw | Ike tosses the enemy to the ground before performing a knee drop on them. |
Final Smash | Ike does a sword swing which launches multiple foes into the air. He will then hit them with multiple flaming slashes before sending them crashing down in a spiral of flame. |
Squirtle
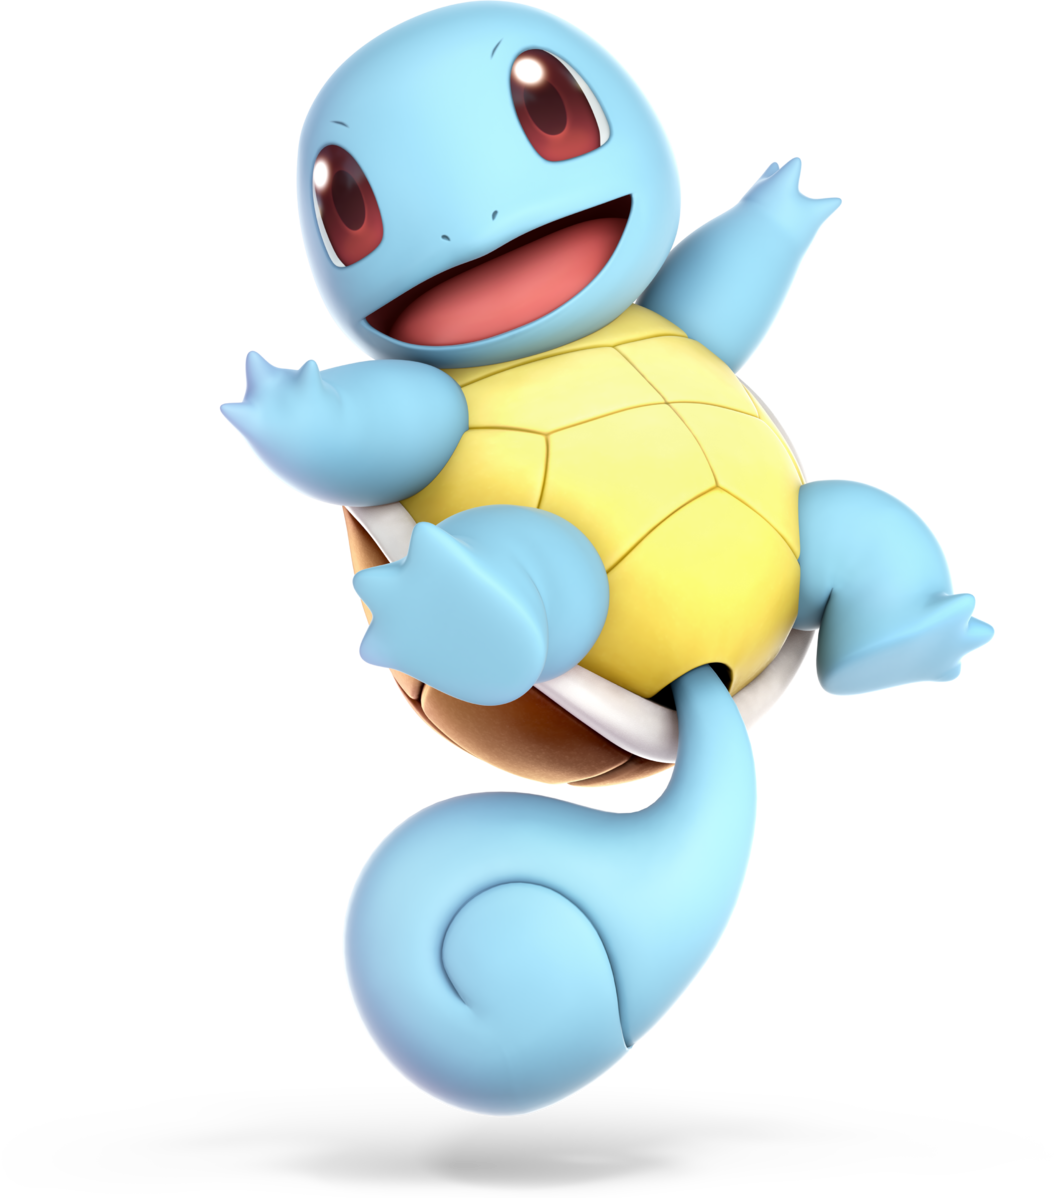
Jab | A combo of punches, kicks then finishes with a tail flip forwards. |
Side Tilt | Crouches and swings its tail forwards that could be angled. |
Up Tilt | Hops up and headbutts the foes.
|
Down Tilt | Spins and sweeps its tail forwards. |
Dash Attack | Leaps forward and does a drop kick. |
Neutral Air | Turns onto the side of his body and does a quick cartwheel. |
Forward Air | Dropkicks while spitting water. |
Back Air | Thrusts and spins around sideways moving his tail back. |
Up Air | Quickly flips upwards while using its tail to hit foes. |
Down Air | Thrust its tails downwards spinning in multi-hit. |
Get Up Attack | Spins around. |
Side Smash | Squirtle uses his iconic level up move Water Smash and spits water. |
Up Smash | Squirtle creates two geysers on both of his sides. |
Down Smash | Crouches down and spins on the back of his shell while spitting water. |
Neutral Special | Charges up in one second for his Water gun, then spits it out lakes of water. The water does not damage or flinch but instead pushes you back. |
Side Special | Squirtle withdraws into his shell and spins around and slides across the battlefield in said shell. Throughout the move Squirtle is invincible |
Up Special | Squirtle creates a wave of water and slides up it like a waterfall. |
Down Special | Swap between Pokemon. |
Forward Throw | Squirtle bashes his opponent forward with his shell. |
Back Throw | Squirtle throws his opponent to the opposite side. |
Up Throw | Squirtle headbutts his opponent upwards. |
Down Throw | Squirtle hops up and bashes his opponent with his shell. |
Final Smash | Pokemon Trainer uses Triple Finish, with all three Pokemon coming together to attack in one powerful blast. |
Ivysaur
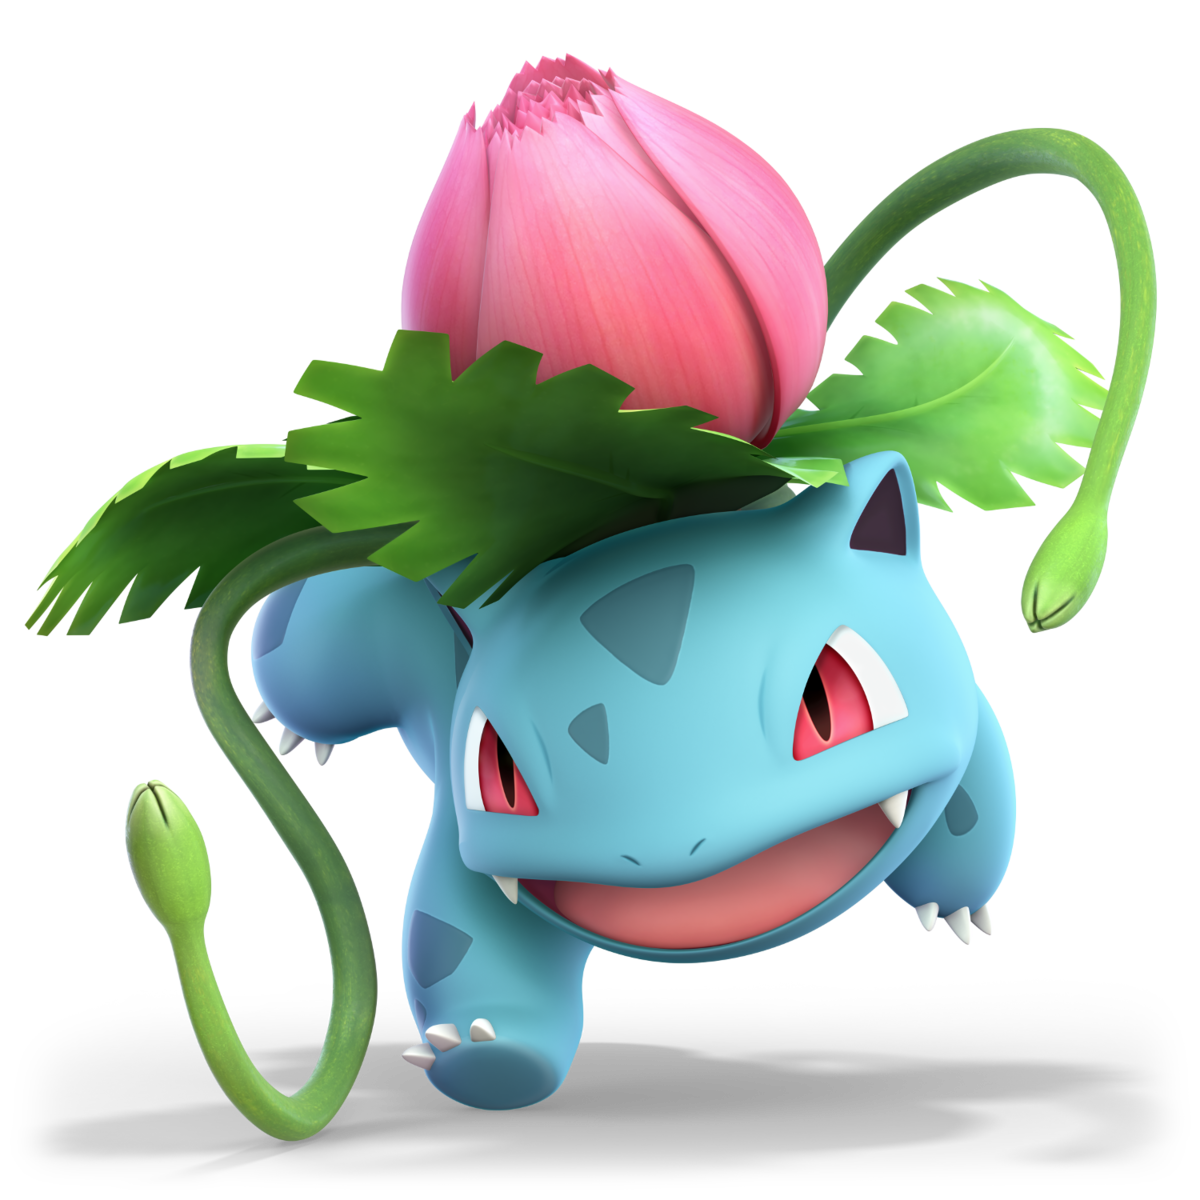
Jab | Ivysaur uses vines from its body to whip the opponent. |
Side Tilt | Ivysaur uses its bulb and leaves as a hurricane to hurt opponents. |
Up Tilt | Ivysaur performs a sick ass handstand, kicking the opponent. |
Down Tilt | Ivysaur uses its vines to perform a leg sweep. |
Dash Attack | Ivysaur does a sliding tackle right into the opponent. |
Neutral Air | Ivysaur does a spin and hits with its leaves. |
Forward Air | Ivysaur swings its vine in a dunk motion. |
Back Air | Ivysaur does a mid air backflip, attacking with its vines. |
Up Air | Invysaur expels a bunch of spores from his bulb, which makes Ivysaur move downwards slightly. If done in the middle of a hop, Ivysaur will not experience any downward movements. |
Down Air | The same as up air but upside down. |
Get Up Attack | Kicks or spins around with his vines. |
Side Smash | Plants his vines into the ground before lunging forward with a headbutt. |
Up Smash | Launches a blast of spores above him. |
Down Smash | Ivysaur wraps his vines across the ground from both sides of himself. |
Neutral Special | Ivysaur sends seeds launching from its bulb. |
Side Special | Ivysaur flings a single spinning leaf across the battlefield which can hit many foes at once. |
Up Special | Ivysaur whips his foes. Can also be a tether recovery. |
Down Special | Swap between Pokemon. |
Forward Throw | Ivysaur restrains his opponent with his vines and bashes his body forward to hit his opponent. |
Back Throw | Ivysaur throws his opponent in the opposite direction with his vines. |
Up Throw | Ivysaur throws and jumps upward to hit his opponent. |
Down Throw | Ivysaur throws his opponent to the ground with his vines. |
Final Smash | Pokemon Trainer uses Triple Finish, with all three Pokemon coming together to attack in one powerful blast. |
Charizard
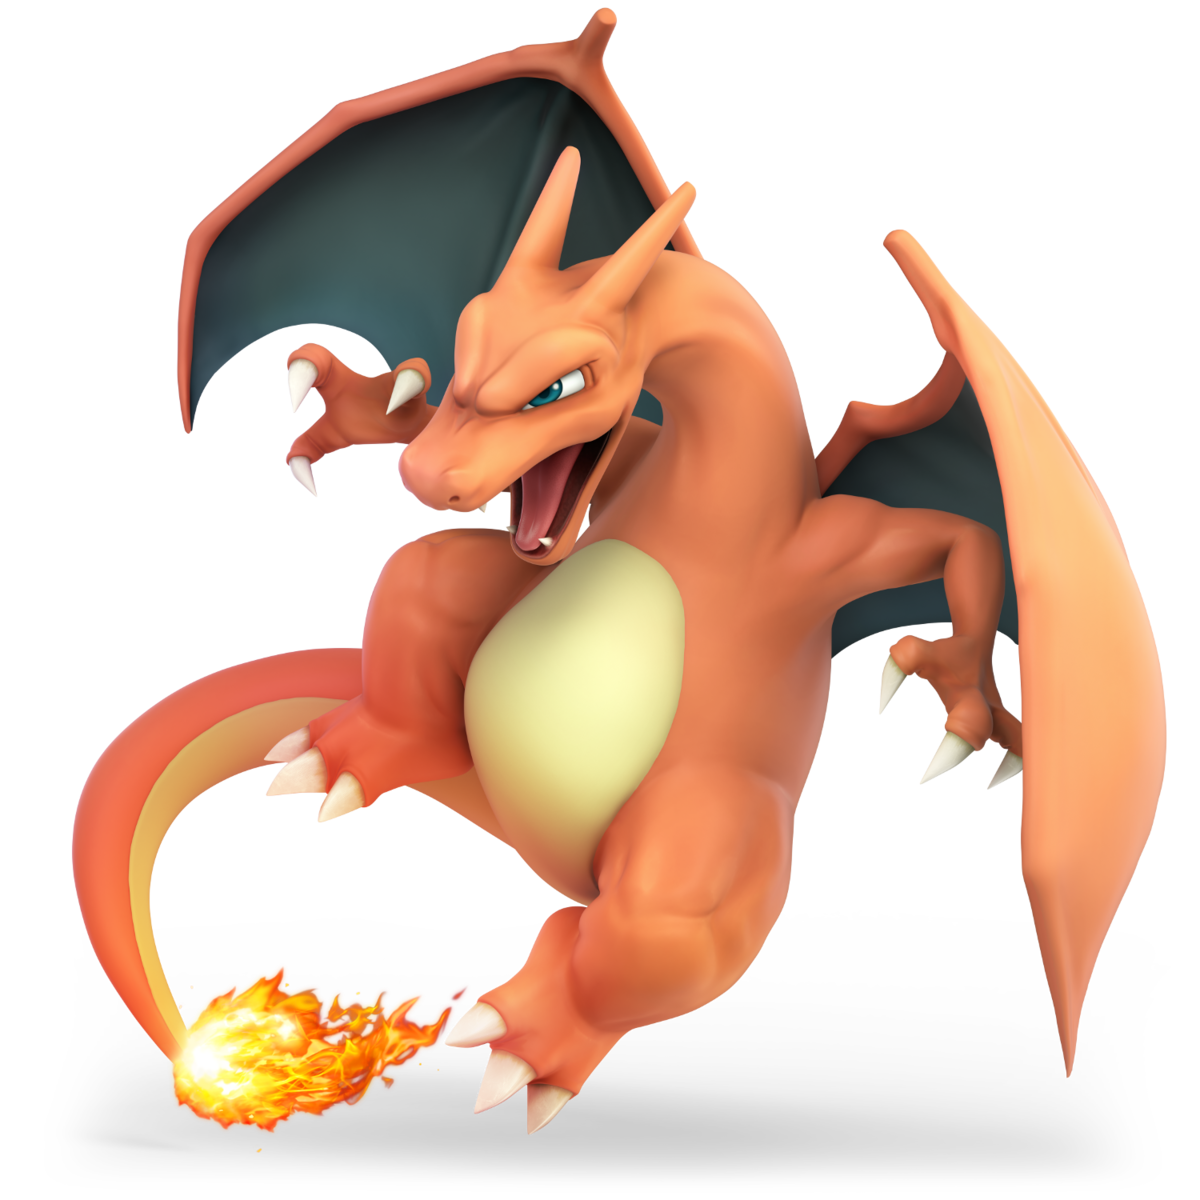
Jab | A sit of claw slashes and a whack with one of Charizard’s wings. |
Side Tilt | Charizard slaps foes with his tail, potentially burning them. |
Up Tilt | Charizard slaps upwards with his wings, hitting foes above him. |
Down Tilt | Charizard does a quick headbutt along the ground in front of him. |
Dash Attack | Charizard rushes forwards and kicks ahead. |
Neutral Air | A quick spinning attack that slaps foes with the dragon’s tail and wings. |
Forward Air | Charizard slashes forward in mid-air with his claws. |
Back Air | Charizard whips his tail backwards to deal damage. |
Up Air | A large arching upwards headbutt to damage foes above. |
Down Air | Charizard stomps the area beneath him, potentially acting as a Meteor Smash. |
Get Up Attack | Charizard strikes to both the sides around him as he gets up. |
Side Smash | A massive headbutt attack in front of the dragon. Extremely slow, but very powerful. |
Up Smash | A pair of upwards slashes with Charizard’s wings. |
Down Smash | Charizard stomps the ground around him and swings his wings down to hit anybody nearby. |
Neutral Special | Flamethrower: Charizard uses Flamethrower, dealing a steady stream of fire to anybody caught in it. Can be angled to aim better, but the flame will diminish in size the longer it is used. Fire Fang: A short range Flamethrower that does more damage. Fireball Cannon: Fireballs that travel farther, but don’t do a lot of damage.
|
Side Special | Flare Blitz: Charizard uses Flare Blitz to rush forwards and deal heavy damage to anybody hit. He does take some recoil, though. Blast Burn: A slower, but more powerful Flare Blitz. Dragon Rush: A less powerful flare blitz that doesn’t make you take damage.
|
Up Special | Fly: Charizard uses his wings to fly upwards in a spinning attack. Rising Cyclone: Doesn’t go as high, but it sucks opponents in. Fly High: Flight distance is increased, but does no damage.
|
Down Special | Pokemon Trainer switches Charizard out for Squirtle. Rock Smash: In Smash 4, Charizard smashes a giant rock, with the debris and attack itself dealing damage. The move also has Super Armor. Sinking Skull: Pounds opponents into the ground and buries them. Rock Hurl: The rock shards fly higher, but do less damage.
|
Forward Throw | Charizard bites his opponent and throws them forward. |
Back Throw | Charizard bites his opponent and throws them in the opposite direction. |
Up Throw | Charizard lifts his opponent into the air and slams them back down. |
Down Throw | Charizard places his opponent onto the ground and breaths fire onto them. |
Final Smash | In Smash 4, Charizard Mega Evolves into Mega Charizard X, where the big dragon is free to fly around the stage dealing heavy damage with fire and flight attacks for a limited amount of time.
In Brawl and Ultimate, Pokemon Trainer uses Triple Finish, with all three Pokemon coming together to attack in one powerful blast. |
Diddy Kong
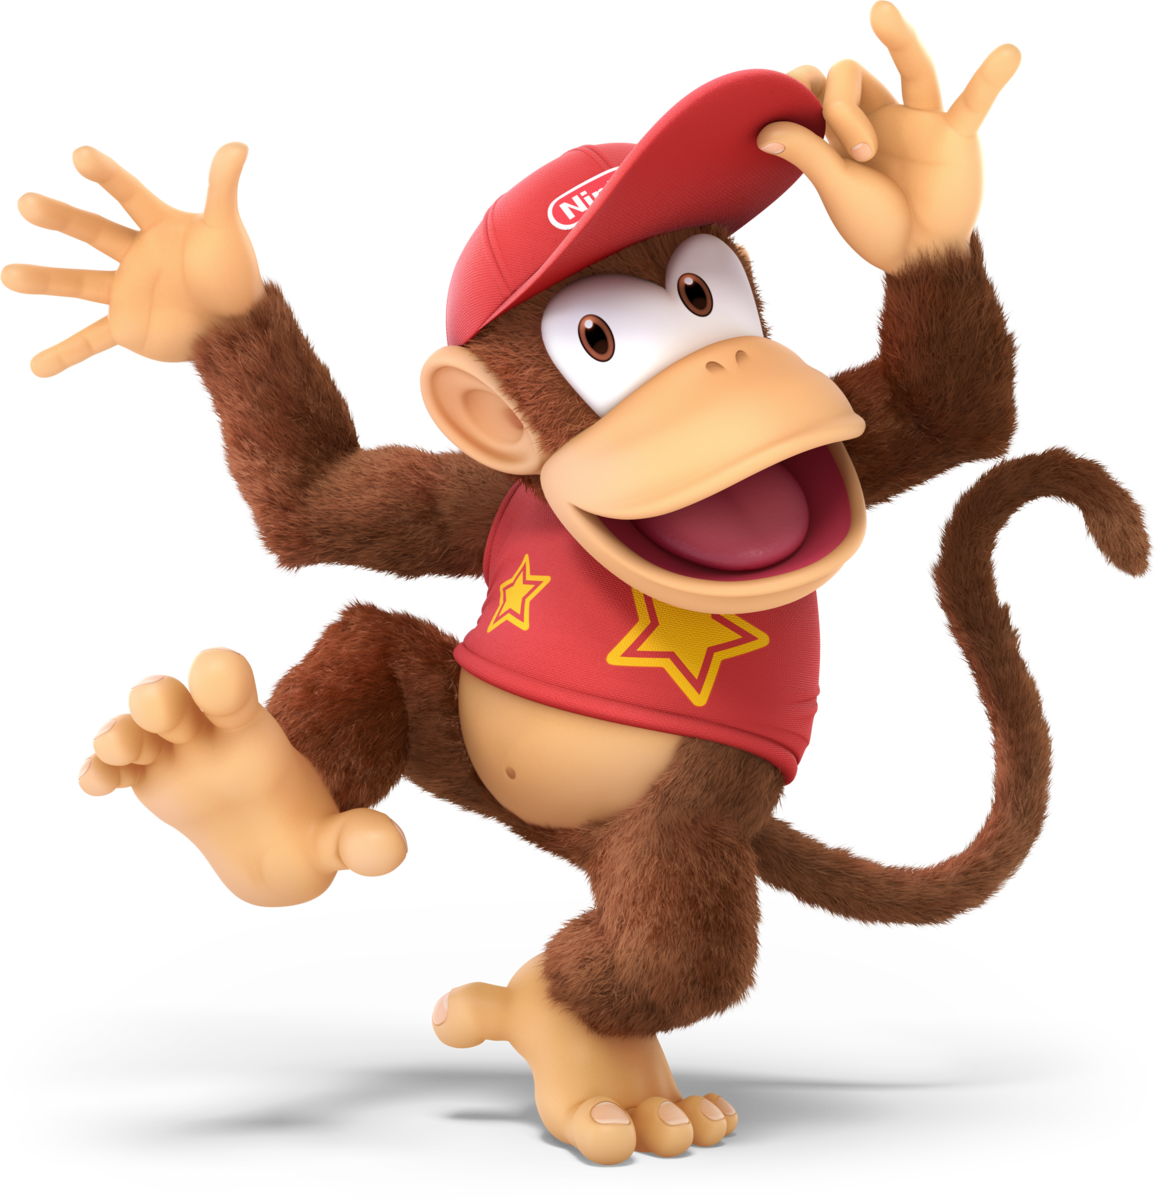
Jab | Two slaps followed by a sidekick. |
Side Tilt | Two outward hand strikes at the same time. |
Up Tilt | An overhead slap in an arc above Diddy Kong. |
Down Tilt | A low angled clap attack. |
Dash Attack | Diddy does a flip forward smacking his hands and feet into the ground for a multi-hit move. |
Neutral Air | Diddy extends his limbs out and does a wheel-like spin in the air. |
Forward Air | A swift drop kick. |
Back Air | A quick backwards kick. |
Up Air | A kick in an arc above Diddy. |
Down Air | A two handed club downwards with the ability to spike enemies. |
Get Up Attack | A kick on either side of Diddy Kong. |
Side Smash | A strong punch into a backhand combo. |
Up Smash | Diddy does 3 consecutive punches upwards sending any opponent hit by the move sky high. |
Down Smash | Diddy swings himself around on the ground like a breakdancer knocking away foes on either side of him. |
Neutral Special | Peanut Popgun: Diddy charges up a shot from his Peanut Popgun. The longer it is charged the faster the peanut projectile will fly. If the move is charged for two long the gun will blow up in Diddy’s face which actually doesn’t hurt him, but instead any poor soul nearby. Exploding Popgun: A popgun that explodes in front of the enemies and doesn’t fire any peanuts. Jumbo Peanuts: Shoots giant peanuts that don’t travel as far, but do more damage.
|
Side Special | Monkey Flip: Diddy flips forward towards an unsuspecting opponent. He then latches onto their face, clawing at the enemy before hitting them away. Back Flip: A backwards leap that goes into a flying forward kick. Flying Monkey Flip: A higher jump with a weaker kick, but the latch attack is stronger.
|
Up Special | Rocketbarrel Boost: Diddy charges up his rocket barrel Jetpack before launching himself high into the air. The longer the move is charged the further and faster Diddy flies. Diddy is able to control his flight path and deals damage to anyone he crosses him during the flight. If the move hits the ground before ending the barrels will cause a powerful explosion. Rocketbarrel Attack: Hits harder than Rocketbarrel Boost, but travels less distance. Rocketbarrel Kaboom: Charges faster and steers better, but will explode if you hit the ground.
|
Down Special | Banana Peel: Diddy tosses a banana peel behind himself. This can be left as a trap to trip enemies or Diddy can pick up the peel and throw it at others, causing them to trip by force. Shocking Banana Peel: A banana peel that paralyzes foes if stepped on. Battering Banana Peel: Throws a banana peel straight up and has more launch power.
|
Forward Throw | Chucks the grabbed foe forward. |
Back Throw | Tosses the enemy backwards. |
Up Throw | Lightly throws the opponent upwards before kicking them further up with both legs. |
Down Throw | Diddy jumps up and dunks the enemy into the floor causing them to bounce upwards. |
Final Smash | In Brawl and Smash 4, Diddy Kong equips his rocket barrel jetpack and flies around the stage, shooting peanuts from his popgun at his opponents.
In Ultimate, Diddy aimlessly flies around the stage with his rocket barrel jetpack damaging anyone who gets in his way. As the move ends Diddy will target the opponent he hit the most and give them one final barrel blast. |
Lucas
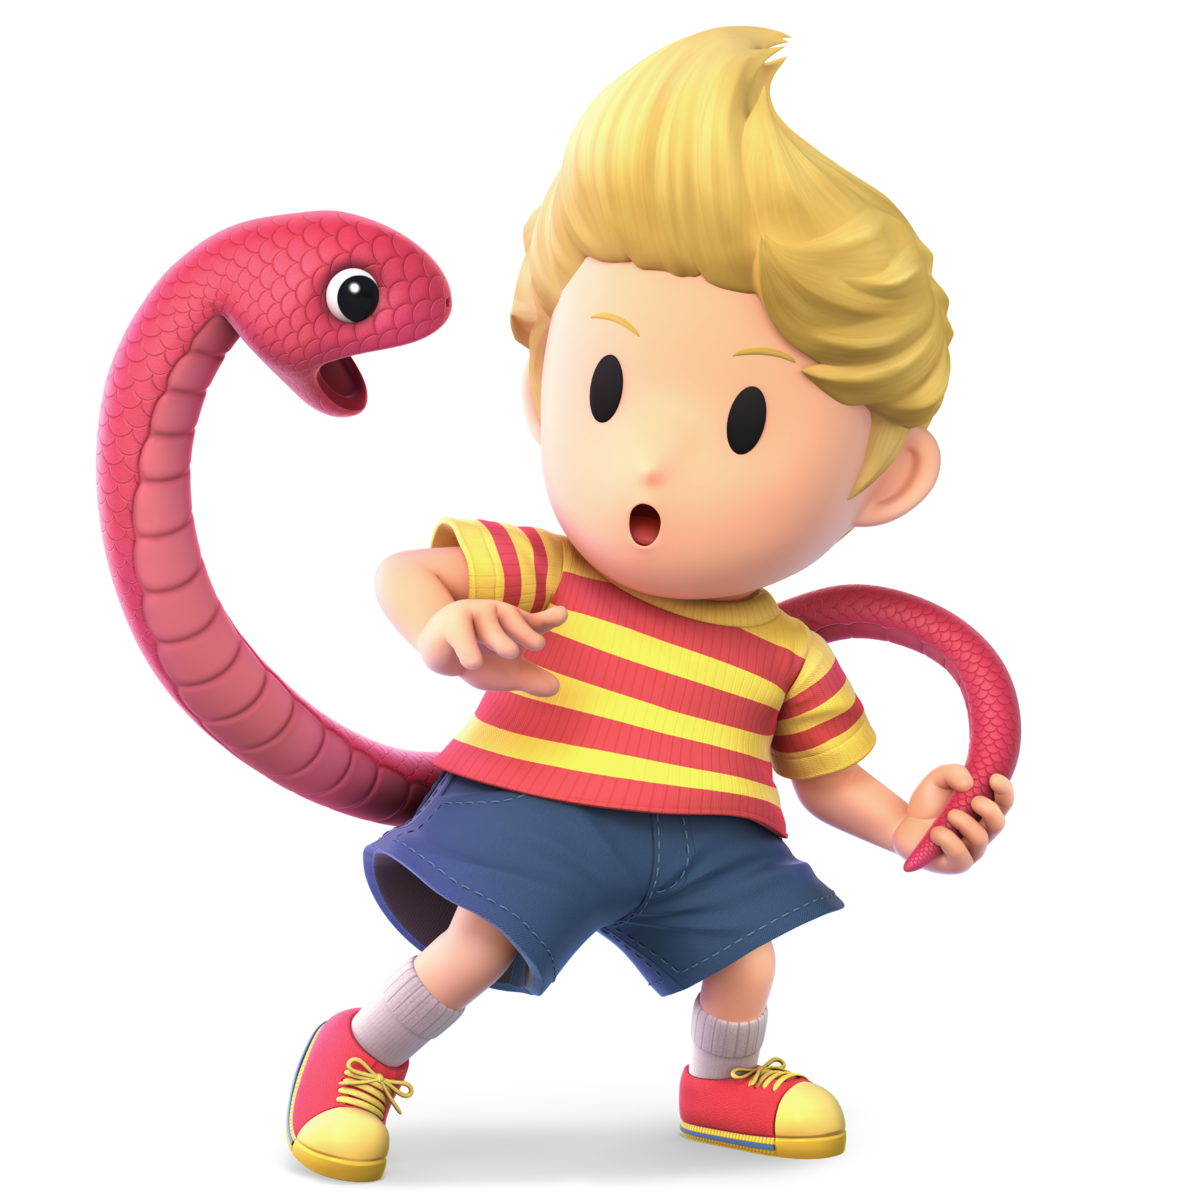
Jab | Lucas does a series of three kicks. |
Side Tilt | Lucas uses a small bit of his psychic energy to hit his opponent. |
Up Tilt | Lucas flip kicks upward with a bit of psychic energy in it. |
Down Tilt | Lucas does a sweeping trip kick. |
Dash Attack | Lucas runs toward his opponent and hits them a bit with his psychic energy. |
Neutral Air | Lucas spins his whole body around in the air with psychic energy emitting from him, landing a few hits on his opponent. |
Forward Air | Lucas does a jump kick with some psychic energy in it. |
Back Air | Lucas does sort of an aerial frontflip kick, with psychic energy in it. |
Up Air | Lucas does an aerial headbutt upwards. |
Down Air | Lucas does a series of stomps with psychic energy in them. |
Get Up Attack | As Lucas gets back up, he does two kicks from left to right. |
Side Smash | Lucas gets out a stick and swings it like a bat at his opponent. |
Up Smash | Lucas charges up a large amount of psychic energy and unleashes it to do devastating damage that launches the opponent sky high. |
Down Smash | Lucas charges up psychic energy into two of his fingers and fires it onto the ground multiple times. |
Neutral Special | Lucas uses PK Freeze, an attack that charges up a burst of ice that can freeze the opponent. The distance travelled can be altered. |
Side Special | Lucas uses PK Fire, an attack where Lucas quickly fires a small burst of fire that ignites on contact and does a small amount of damage. |
Up Special | Lucas fires a ball of thunder that can be controlled. Upon contact, it performs multiple hits on the opponent or if used on himself, Lucas becomes a human projectile that delivers devastating damage. |
Down Special | Lucas uses PSI Magnet, which is a field that Lucas emits in front of him that can absorb projectiles and heal him. |
Forward Throw | Lucas uses some of his psychic energy to throw his opponents over him and into the direction he’s facing forward. |
Back Throw | Lucas uses some of his psychic energy to throw his opponents to the opposite direction. |
Up Throw | Lucas uses some of his psychic energy to throw his opponents upwards. |
Down Throw | Lucas uses some of his psychic energy to throw his opponents downwards so hard, it sticks them to the ground. |
Final Smash | Lucas, with Kumatora and Boney by his side, uses PK Starstorm, which rains down meteors. The trajectory of the meteors can be adjusted. |
Miscellaneous | For Lucas’s grab, he uses his Snake (or Duster’s snake he took from him for this game) to grab his opponent from a distance, or grapple onto edges. |
Sonic
Jab | Sonic attacks with two punches and finishes up with a kick. This can be also used to just repeatedly punch. |
Side Tilt | A horse kick that can be angled. Hits opponents twice. |
Up Tilt | Sonic does a 540 kick that hits the opponent twice and sends them upwards. A good combo starter. |
Down Tilt | A leg sweep that sends opponents upwards. |
Dash Attack | Sonic runs up and attacks opponents with a flying kick, causing diagonal knockback. |
Neutral Air | Sonic spins around on the air, dealing damage to foes. |
Forward Air | Sonic does a corkscrew battering ram; a multi-hit attack with his head. Great for knockback. |
Back Air | A devastating hook kick, one of Sonic's most well known KO attacks because of the good damage and knockback it causes. |
Up Air | A scissor kick to send opponents upwards (look out, he uses the Spring to do another!). |
Down Air | A diagonal, stall-then-fall meteor smash flying kick. One of the coolest moments you'll see out of Sonic if they manage to land it. |
Get Up Attack | He either spin dashes around or performs a leg sweep. |
Side Smash | Sonic's iconic Wind-Up Punch, dealing impressive damage and sending opponents flying. |
Up Smash | A multi-hit jumping spin attack. Great finisher! |
Down Smash | In Brawl, Sonic spin dashes from left to right.
In Ultimate, Sonic does a split kick that sends opponents sideways. |
Neutral Special | Homing Attack: Sonic's Homing Attack. Automatically targets a foe and attacks it with a spin attack. Depending on how long Sonic charges, the better will be the damage and knockback. Stomp: Sonic jumps up before jumping down with a meteor smash. Surprise Attack: A faster homing attack that has less range and power.
|
Side Special | Spin Dash: The (infamous) Spin Dash, Sonic's signature move (and online Smash players’ biggest nightmare). By turning into a ball, Sonic begins charging his Spin Dash, and when unleashed, quickly rolls to foes and causes great damage. The longer the charge, the better damage and knockback. Hammer Spin Dash: Sonic hops up and then buries any opponents with his Spin Dash. Burning Spin Dash: A more powerful and fiery Spin Dash. The jumps are much lower with this version.
|
Up Special | Spring Jump: Sonic pulls a Spring that helps him recover back to the stage. When in the air, it disappears, but if used on the ground, it will be kept there for a few seconds. Double Spring: Doesn’t go as high, but Springs are used twice in a row without landing. Springing Headbutt: Sonic headbutts his opponent as he ascends, but the spring doesn’t stay on the ground.
|
Down Special | Spin Charge: ANOTHER SPIN DASH- I mean, the Spin Charge! It works essentially like the Spin Dash, but now you have to charge by continuously pressing the B button and instead of dealing great damage in one hit, the Spin Charge lets Sonic cause multi-hit damage that can lead to combos. Auto-Spin Charge: A Spin Charge that can be powered up by just holding the button. Gravitational Charge: Pulls in opponents, but needs more button presses to power up.
|
Forward Throw | Sonic kicks his opponent forward. |
Back Throw | Sonics spins backwards while in the air and throws his opponent in the opposite direction. |
Up Throw | Sonic uses his spikes to send his opponent upwards. |
Down Throw | Sonic spin dashes on his opponent while they’re on the ground. |
Final Smash | With the power of the seven Chaos Emeralds, Sonic turns into the unstoppable golden Super Sonic. Super Sonic becomes completely invulnerable to damage and can fly around the battlefield, causing massive damage to foes by making contact with them.
In Ultimate, Super Sonic becomes infinitely worse now attacks by rapidly zapping horizontally through the screen. The transformation lasts a few seconds. |
King Dedede
Jab | A few smacks with the hammer before finishing off with several hits from a hammer twirl. |
Side Tilt | A longer ranged hammer twirl. |
Up Tilt | Dedede performs a headbutt to catch airborne foes. |
Down Tilt | Dedede rolls forwards with surprising speed and distance. |
Dash Attack | The king’s signature tackle attack, while slow, it boasts remarkable range and devastating power. |
Neutral Air | Dedede poses mid-air, smacking enemies away. |
Forward Air | A massive forward vertical swing of the hammer. |
Back Air | A horizontal backwards swing, while its range isn’t stellar, it is surprisingly powerful. |
Up Air | An upwards hammer twirl, it comes with great airborne coverage. |
Down Air | The king brings his hammer crashing down on anybody stupid enough to be below him. Functions as a Meteor Smash. |
Get Up Attack | Dedede does two quick kicks to the sides as he rises. |
Side Smash | A nightmarishly powerful swing of the hammer that crushes all foolish enough to be in its path. |
Up Smash | An arcing hammer swing with excellent range and coverage of the area around Dedede. |
Down Smash | Dedede does a quick spin that sends foes around him flying, surprisingly fast. |
Neutral Special | Inhale: Dedede’s signature inhale. While he cannot copy powers like Kirby, the king is able to spit enemies away or into each other for surprising damage. This move can also intercept and reflect projectiles. Dedede Storm: A cyclone from Dedede’s mouth that pulls opponents in, hits them repeatedly, and launches them upwards. Taste Test: Dedede quickly inhales the opponent and spits them out instantly.
|
Side Special | Gordo Throw: This move sees Dedede attack with an indestructible Gordo. While the Gordo can be knocked around by attacks, it is quite powerful, and Dedede can also bonk it around himself. Topspin Gordo: Throws a Gordo that’s slow, but goes faster after it bounces. Bouncing Gordo: Throws a Gordo that bounces back and forth, which lasts a while but doesn’t do as much damage.
|
Up Special | Super Dedede Jump: The Super Dedede Jump. Dedede leaps incredibly high into the air, crashing down and crushing all below him with deadly force. This produces stars to the sides of him as well to also deal damage. Rising Dedede: Dedede’s jump does damage as it goes up, but not down. Quick Dedede Jump: Dedede quickly jumps and goes down extra fast, but doesn’t go that high or hit that hard.
|
Down Special | Jet Hammer: The Jet Hammer is unleashed, charging up power before releasing it all in a single strike that will demolish anybody hit by it. While extremely slow and leaving Dedede wide open to attacks, he can move about while charging, and has Super Armor while swinging. Armored Jet Hammer: Charging the hammer gives Dedede super armor, but hurts Dedede more and deals less damage. Dash Jet Hammer: Pushes Dedede backwards while charging and sends them forward upon attack.
|
Forward Throw | King Dedede hits his opponent forward with his hammer. |
Back Throw | King Dedede hits his opponent in the opposite direction with his hammer. |
Up Throw | King Dedede smacks his opponent upwards with both hands. |
Down Throw | King Dedede slams his opponent to the ground. |
Final Smash | In Brawl, Dedede does a dance where he summons Waddle Dees, Waddle Doos, and Gordos.
In Smash 4, he sucks the opponents close, hits them with his hammer, and blows them up with a bomb.
In Ultimate, Dedede powers up into his Masked Dedede form, trapping opponents in his iconic fighting ring before unloading a barrage of missiles into the prey. He then finishes them off with a spin attack, slamming into the target and sending them flying. |
Miscellaneous | Dedede has more jumps and is floatier than the average fighter. He also has a timer brooch that is branded with his face. These pins are capable of reversing transmutation, freeing fighters who are stuck as trophies after the timer is up. |
Olimar
Jab | A series of punch jabs. |
Side Tilt | A much more powerful punch with more range and damage. |
Up Tilt | Olimar does a quick spinning jump, dealing damage to those around him. |
Down Tilt | Olimar crawls forwards, dealing damage to those he runs into. |
Dash Attack | Olimar does a cartwheel forwards, dealing damage to those he rams into. |
Neutral Air | A quick mid-air spin that deals damage to those around him. |
Forward Air | Olimar smacks enemies with a Pikmin in front of him. |
Back Air | Olimar swings a Pikmin behind him in an upwards arc. |
Up Air | Olimar swings a Pikmin above him to deal damage. |
Down Air | Olimar slaps opponents with a Pikmin below him. Also functions as a Meteor Smash. |
Get Up Attack | Olimar punches opponents to both sides around him as he gets up. |
Side Smash | Olimar tosses a Pikmin in front of him to deal heavy damage. |
Up Smash | Olimar tosses a Pikmin above him to deal heavy damage. |
Down Smash | Olimar gives a command for a pair of Pikmin to charge forwards to the sides around him, dealing damage. |
Neutral Special | Pikmin Pluck: Olimar plucks a Pikmin. These can have a maximum of 3 (6 in Brawl) active at a time. Hardy Pikmin Pluck: The Pikmin have more durability, but take longer to pluck out. Explosive Pluck: Triggers an explosive when Pikmin were plucked, but they are less resilient.
|
Side Special | Pikmin Throw: Olimar tosses a Pikmin forwards. Pikmin that hit an opponent will cling to the enemy, dealing a continuous stream of damage until they are removed in some way. Sticky Pikmin Throw: Pikmin thrown are harder to shake off, but they do less damage. Tackle Pikmin Throw: All Pikmin will slam into their opponents, but won’t stick.
|
Up Special | Winged Pikmin: Olimar has a team of Winged Pikmin carry him around in the air. Deals no damage, but it has excellent range to get around. Winged Pikmin Jump: The Winged Pikmin pull Olimar up very quickly, pushing opponents away. Mighty Winged Pikmin: Olimar flies just as far with Pikmin as without, but doesn’t get as much distance.
|
Down Special | Pikmin Order: Olimar blows his whistle. This gathers all Pikmin on the field back to their leader, and changes their order for attacks. Order Tackle: Recalled Pikmin will deal damage upon returning, but Olimar is left vulnerable. Dizzy Whistle: Opponents near Olimar get spun around as his Pikmin are recalled, but he’s left vulnerable.
In Brawl, Olimar uses his Pikmin like a tether to grab onto ledges. |
Forward Throw | Olimar uses his Pikmin to throw his opponent forward. |
Back Throw | Olimar uses his Pikmin to throw his opponent in the opposite direction. |
Up Throw | Olimar uses his Pikmin to throw his opponent upward. |
Down Throw | Olimar uses his Pikmin to throw his opponent to the ground. |
Final Smash | The day ends, and Olimar escapes the planet on the Hocotate Ship. As night falls, a horde of hungry Bulborbs appear, ready for their midnight snack, and maul the enemies to bits as they enjoy their tasty treat. Once the Bulborbs are done and go back to bed, the day begins and the ship returns, crashing onto enemies with a huge explosion as Olimar returns to the fight. |
Lucario
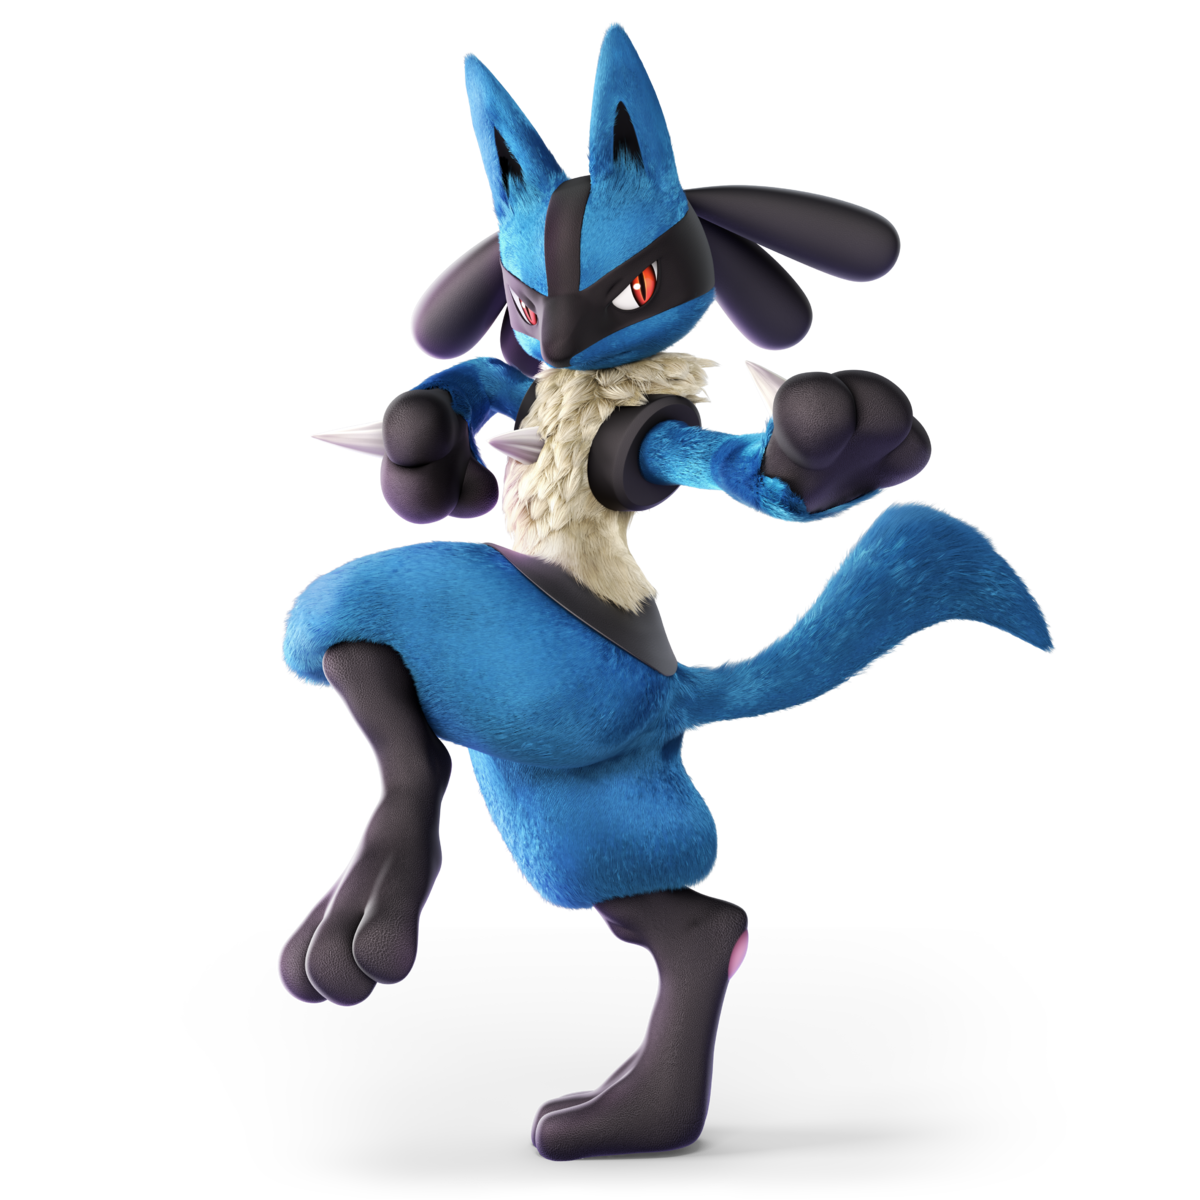
Jab | An overhead attack followed by a palm strike followed by a high kick. |
Side Tilt | An Aura fueled palm strike. |
Up Tilt | An upwards roundhouse kick. |
Down Tilt | A swift leg strike. |
Dash Attack | A lunging kick. |
Neutral Air | Lucario extends his arms fueled with Aura to hurt enemies around him. |
Forward Air | An aerial kick. |
Back Air | A small burst of aura fired behind Lucario from his hand. |
Up Air | A backflip kick. |
Down Air | Lucario shoots two tiny Aura explosions from his hands downwards. |
Get Up Attack | A leg sweep around Lucario. |
Side Smash | A strong forward burst of Aura. |
Up Smash | A large upwards blast of Aura. |
Down Smash | Two low to the ground Aura explosions on both sides of Lucario. |
Neutral Special | Aura Sphere: Lucario fills a ball with Aura and charges the attack up. The attack becomes bigger and stronger as it charges and the sphere can even hit enemies before releasing. The attack also increases in power, speed and size as Lucario gains Aura. Snaring Aura Sphere: Lucario’s Aura Sphere is more slow moving, but draws opponents in and damages them. Piercing Aura Sphere: Charges a weaker Aura Sphere that passes through multiple foes.
|
Side Special | Force Palm: Lucario attempts to grab the opponent before firing a large cone of Aura out against the foe. Advancing Force Palm: Lucario dashes forward using Force Palm. Long-Distance Force Palm: A Force Palm that has more range, but does less damage.
|
Up Special | Extreme Speed: Lucario quickly dashes in any given direction and can curve while moving, it also ends in an attack. The distance the move travels is dependent on Lucario’s Aura. Ride The Wind: Lucario flies in the air longer, but it’s slower than Extreme Speed and does no damage. Extreme Speed Attack: Has a slow startup, but launches opponents far as the dash happens.
|
Down Special | Double Team: Lucario enters a counter pose and if they are hit Lucario will dodge the attack and kick the opponent. Glancing Counter: Lucario strikes back with a strong punch. Stunning Double Team: A counter that can paralyze the opponent.
|
Forward Throw | Lucario grabs and then palm strikes the enemy away. |
Back Throw | A backwards slam to knock the foe behind Lucario. |
Up Throw | An Aura filled upwards fling. |
Down Throw | Lucario slams the enemy into the ground, launching them up and away. |
Final Smash | In Brawl, Lucario leaps into the sky as it fires a beam of Aura downwards that can be angled left or right to deal significant damage.
In Smash 4, Lucario evolves into Mega Lucario, doing maximum damage to his opponents as he runs around the stage.
In Ultimate, his Final Smash is the same as his Brawl one, only he evolves into Mega Lucario. |
Miscellaneous | As Lucario takes damage he will gain “Aura”. The more aura Lucario has the stronger his moves become. |
R.O.B.
Jab | R.O.B. does two jabs. |
Side Tilt | R.O.B. does a hook jab. |
Up Tilt | R.O.B. raises both of his arms in the air. |
Down Tilt | R.O.B. thrusts both of his arms onto the ground. |
Dash Attack | R.O.B. runs towards the opponent and does a double overhead attack with both of his arms. |
Neutral Air | R.O.B. uses his thrusters to flip his whole body around and deliver damage with them. |
Forward Air | R.O.B. does an overhead attack with both of his arms. |
Back Air | R.O.B. uses his thrusters to propel himself forward and hit any opponents behind him in the air. |
Up Air | R.O.B. swings both of his arms around in the air upwards, delivering multiple hits. |
Down Air | R.O.B. uses his thrusters to hit his opponents below him, as well as spike them. |
Get Up Attack | As R.O.B. gets up, he uses one of his arms to hit his opponents from left to right. |
Side Smash | R.O.B. charges up a laser from his eyes and fires a short burst of it. |
Up Smash | R.O.B. goes into a handstand and uses his thrusters to send the opponent upwards. |
Down Smash | R.O.B. spins around and uses both of his arms to sweep the ground. |
Neutral Special | Robo Beam: R.O.B. fires a laser from his eyes. The blinking red light on his head indicates how powerful the laser will be. Wide-Angle Beam: A robo beam that can be fired at various angles, but doesn’t do as much damage. Infinite Robo Beam: The robo beam never runs out of charge, but isn’t as strong.
|
Side Special | Arm Rotor: R.O.B. spins around and uses both of his arms to hit his opponent multiple times. Reflector Arm: A longer arm spin that reflects projectiles, but it doesn’t move R.O.B. forward. Backward Arm Rotor: R.O.B. spins opponents around while knocking them away, but it has a slow start.
|
Up Special | Robo Burner: R.O.B. uses his thrusters to fly back onto the stage. The blue lines on his chassis is a gauge for how much fuel he has left. Robo Rocket: It quickly sends R.O.B. into the air, but it doesn’t hover. High-Speed Burner: R.O.B. flies around faster, but it burns through his fuel quickly.
|
Down Special | Gyro: R.O.B. winds up a gyro and lets it go, making it spin around on the ground as it delivers damage to anyone who makes contact with it. Fire Gyro: The gyro is lit on fire and it deals more damage, but doesn’t travel as far. Slip Gyro: The gyro makes opponents slip instead of bouncing onto them.
|
Forward Throw | R.O.B. grabs his opponent and does an overhead throw that makes them fly forward. |
Back Throw | R.O.B. spins to the opposite direction, throwing their opponent that way. |
Up Throw | R.O.B. flies up a bit and slams their opponent back down to the ground. |
Down Throw | R.O.B. bashes the opponent onto the ground multiple times and it buries them to the ground. |
Final Smash | In Brawl, R.O.B. activates a spiral shaped laser that fires out of his eyes for a short time as he runs around the stage. It’s kind of the same as the Superspicy Curry item.
In Smash 4, R.O.B. activates Super Diffusion Beam, where he fires a yellow colored laser out of his eyes that splits into three directions.
In Ultimate, R.O.B. activates Guided Robo Beam, where he locks onto multiple opponents, firing multiple homing lasers at them, all while charging up one giant beam from his eyes that R.O.B. unleashes to do a devastating amount of damage. The laser beam can be adjusted up or down. |
Toon Link
Jab | A pair of swipes with the Master Sword, followed by a forward stab. |
Side Tilt | A downwards swing with the Master Sword. |
Up Tilt | An upwards sword swing that covers a wide arc above Link. |
Down Tilt | A sweeping sword swipe along the ground. |
Dash Attack | A forwards slash with the Master Sword while he rushes forwards. |
Neutral Air | A pair of slashes forwards and then backwards to both sides. |
Forward Air | A large forwards swing with the Master Sword in the air. |
Back Air | A quick backwards swipe in mid-air to hit people behind Link. |
Up Air | A powerful upwards stab that deals significant damage to those above Link. |
Down Air | Toon Link drops to the ground with the Master Sword below him, Meteor Smashing anyone below him to their doom. |
Get Up Attack | A pair of slashes to the sides as Link gets back up. |
Side Smash | A powerful upwards slash that covers a large arc in front of Link. |
Up Smash | An upwards arc all around Link that covers a huge area above him with ease. |
Down Smash | Link slashes to both sides around him with the Master Sword along the floor. |
Neutral Special | Hero’s Bow: Link uses his bow to fire off arrows. This can be charged for more distance and power, or charged indefinitely to wait for opponents to give an opening. Fire Arrow: The arrow does fire damage, but the range is reduced. Piercing Arrow: Fires an arrow at a high speed, but does less damage.
|
Side Special | Boomerang: Link tosses his boomerang into the fray. This attack can be angled to change its trajectory. Floating Boomerang: A boomerang that moves slowly and will vanish if it hits anything on its way back. High Speed Boomerang: A boomerang that passes through fighters, but deals less damage.
|
Up Special | Spin Attack: Link does a spin attack, trapping enemies in a tornado of slashes or even rising into the skies like a little green helicopter. Sliding Spin Attack: Slides forward while spinning, even in the air. Flying Spin Attack: A spin attack that ends with an upward slash that sends both Link and the opponent into the air.
|
Down Special | Bomb: Link takes out a small bomb. This can be used to blast enemies, tossing it about at Link’s leisure. It does have a timer though, so be careful! Time Bomb: The bomb only explodes when the fuse runs out, it does less damage, but it launches opponents more effectively. Short-Fuse Bomb: A bigger, more powerful bomb that has a short fuse.
|
Forward Throw | Toon Link uses his hookshot and then uses his shoulder to bash his opponent forward. |
Back Throw | Toon Link throws his opponent backwards Judo Style. |
Up Throw | Toon Link slashes his opponent upwards. |
Down Throw | Toon Link elbow drops his opponent. |
Final Smash | Link traps his enemies in the might of the Triforce of Courage. From there, his prey is helpless to be slashed constantly with the full power of the Master Sword, before finishing them off with a powerful stab that sends them flying. |
Miscellaneous | Toon Link's miniature shield is able to deflect small projectiles. |
Wolf
Jab | A left forward slash, followed by a quick right handed slash. The last hit is short ranged compared to most jabs |
Side Tilt | Wolf lunges forward to you with a two handed outward slash. |
Up Tilt | A kick with a fast startup and high power when hit the sweet spot of Wolf’s toes and will KO earlier. |
Down Tilt | Low-level quick crouching roundhouse kick. Yeah. |
Dash Attack | A frontal kick propels Wolf forwards considerably, which by itself is a good burst option. |
Neutral Air | A flying kick that’ll hit foes hard and knock them back. |
Forward Air | The Iconic Quick slash, It’s a wide vertical, downward arcing slash that can combo into anything. |
Back Air | A back kick. |
Up Air | A quick overhead arcing slash. |
Down Air | Two-handed slash below himself. |
Get Up Attack | He kicks really hard. |
Side Smash | A slow start-up but difficult to punish arm thrust that can be relatively safe on shields. |
Up Smash | Wolf quickly breakdances catching the opponent before springing upwards with a powerful scissor kick! |
Down Smash | Kneeling down for a one-handed slash in front and behind of himself. |
Neutral Special | Gun. |
Side Special | Dashes quickly leaving purple claw marks behind him. The dash itself is weak but the final hit of the dash is the winner's hit! |
Up Special | An Energy flying kick that propels Wolf in a chosen direction, though it is a pretty lame recovery option. |
Down Special | Reflector similar to Fox and Falco |
Forward Throw | An inward slash which is just like the inward work Tru has been doing for Doomsday Duel |
Back Throw | Unlike Tru, Wolf remembers to grab his foes and throw them above him. |
Up Throw | Wolf slashes his opponent upwards. |
Down Throw | A spinning chokeslam which I want to do to Tru for making me do the grabs and not do it himself. |
Final Smash | In Brawl, Wolf gets into his Landmaster tank. A giant tank that takes up a majority of the stage. In it, Wolf can fire lasers from its cannon and can do barrel rolls to damage opponents. that get onto the landmaster. The landmaster also has jets to lift it up into the air.
In Ultimate, he calls in his gang Star wolf to gun down the opposing foes with their ships very similar to Fox and Falco. |
Villager
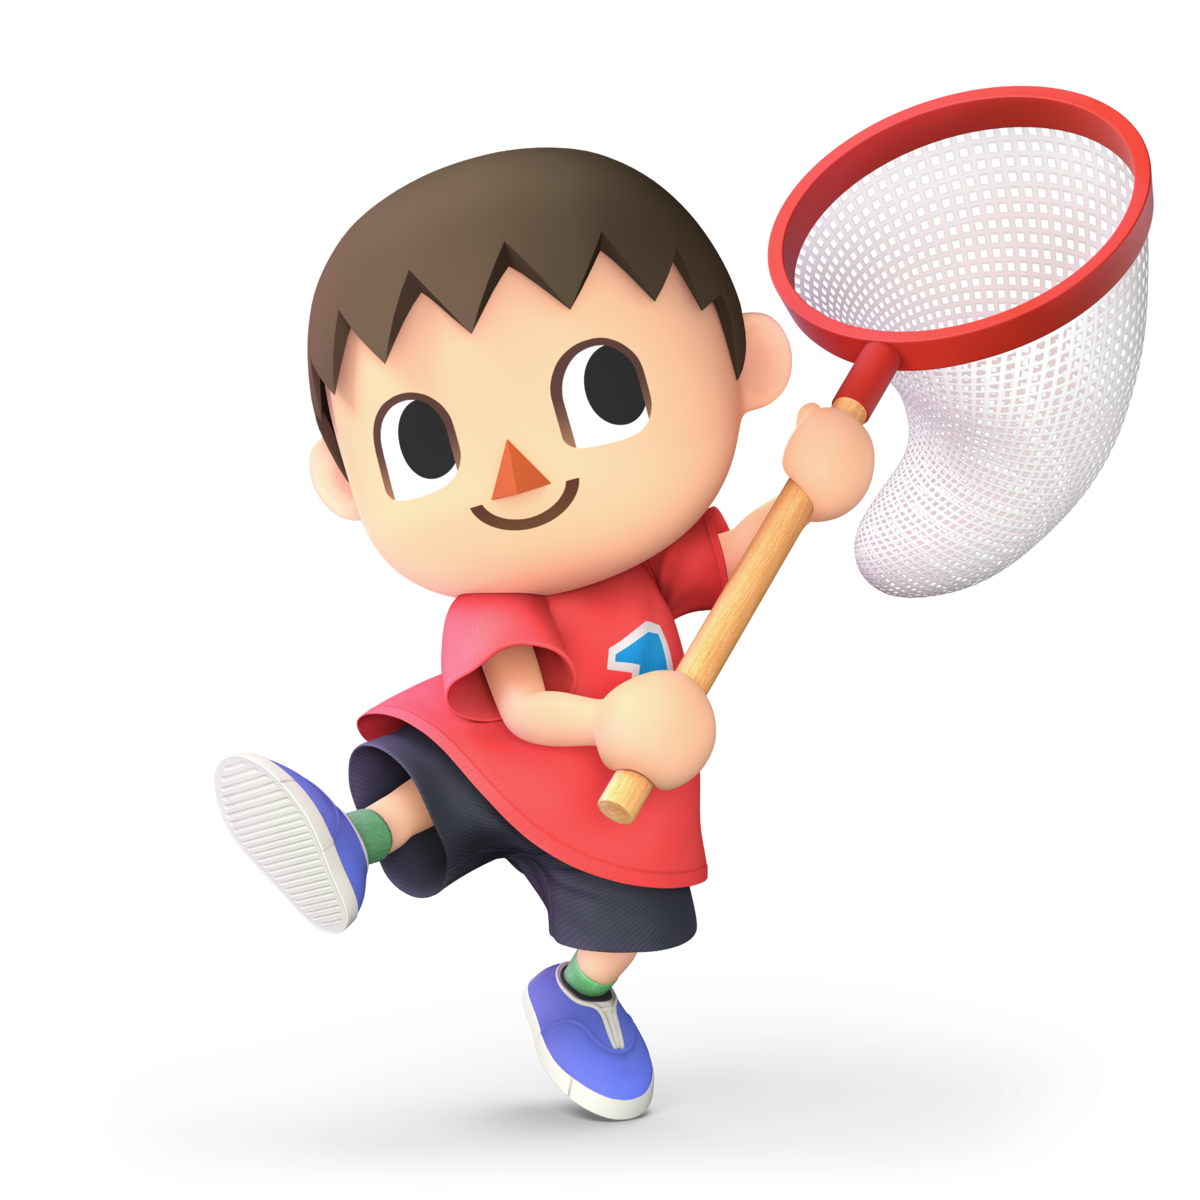
Jab | A series of jabs and hooks with boxing gloves. |
Side Tilt | A quick swipe with an umbrella to knock foes away. |
Up Tilt | Villager twirls a stick upwards, limited range but a safe, quick move. |
Down Tilt | Villager plucks one of those wretched weeds that are the bane of existence for all Animal Crossing players. Somehow deals damage. |
Dash Attack | Villager trips and falls while carrying a flower pot, bashing into opponents in the process. |
Neutral Air | A quick midair spin that can kick enemies away. |
Forward Air | Villager attacks foes with his trusty slingshot. Very small projectile, but quite fast and easy to spam. |
Back Air | Another slingshot attack. |
Up Air | Villager smacks enemies with turnips. The attack randomly hits with 1 to 3 turnips, with 3 being the most powerful. |
Down Air | Same as the up air. Here, the turnips can potentially deal a Meteor Smash with good luck. |
Get Up Attack | Swings about a stick on both sides, or possibly a kick attack, while getting up. |
Side Smash | Villager drops a bowling ball in front of himself. This can be dropped down ledges for an edgeguarding tactic as well, giving it plenty of use, even if its normal range isn’t the best. |
Up Smash | The Villager utilizes a Fountain Firework, dealing damage to those caught in the blast. |
Down Smash | Digs a bunch of holes with the shovel. Can bury enemies caught by the attack, leaving them wide open for further damage or potentially opening them up to be finished off by a powerful attack. |
Neutral Special | Pocket: The Pocket mechanic from the Animal Crossing games. This allows Villager to collect and store items or projectiles, bringing them out later as one may please. Functions like a reflector, but usable whenever instead of immediately, and also for storing items. Garden: Villager can only pocket items in front of them, but opponents hit with them receive the flower status effect. Pocket Plus: Items and projectiles can be more reliably stashed, but are less effective.
|
Side Special | Lloid Rocket: The Villager pulls out Lloid the Gyroid and uses him as a rocket, firing him forwards to deal damage. The Villager can also ride atop Lloid for transportation, dealing more damage than usual and helping with recoveries. Liftoff Lloid: Lloid is fired forward, but then goes straight up. Pushy Lloid: Lloid hits opponents multiple times before exploding.
|
Up Special | Balloon Trip: Balloon Flight makes tribute to the Nintendo classic, Balloon Fight (or Balloon Trip if you’re cool). Using a pair of balloons, the Villager flies about, being a great recovery option with incredible range. That said, the move cannot deal damage and if both balloons are popped, you can kiss your stock goodbye. Extreme Balloon Trip: The balloons don’t rise as fast, but they cause an explosion when they burst. Balloon High Jump: The Balloon Trip rises higher and deals damage to any foes it hits.
|
Down Special | Timber: The Villager plants a very lovely tree, grows it, and then cuts it down. This move is a lengthy process, but the tree’s damage is devastating should it connect, and it can also be used to block attacks. The axe itself is also quite powerful, so this is definitely a useful move to utilize. Timber Counter: The sprout trips opponents and the fully grown tree lands on the opponent if attacked. Super Timber: Requires more water for the tree to grow. But the tree is huge and the axe has higher launch power.
|
Forward Throw | Villager uses his net to throw his opponent forwards. |
Back Throw | Villager uses his net to throw his opponent in the opposite direction. |
Up Throw | Villager uses his net to throw his opponent upwards. |
Down Throw | Villager uses his net to throw his opponent to the ground. |
Final Smash | Tom Nook enters the fight to build a very nice house, fills it with all the fixings, and then it blows up, somehow. The blast can also damage opponents not caught in the initial trap, so it has plenty of ranged use. |
Mega Man
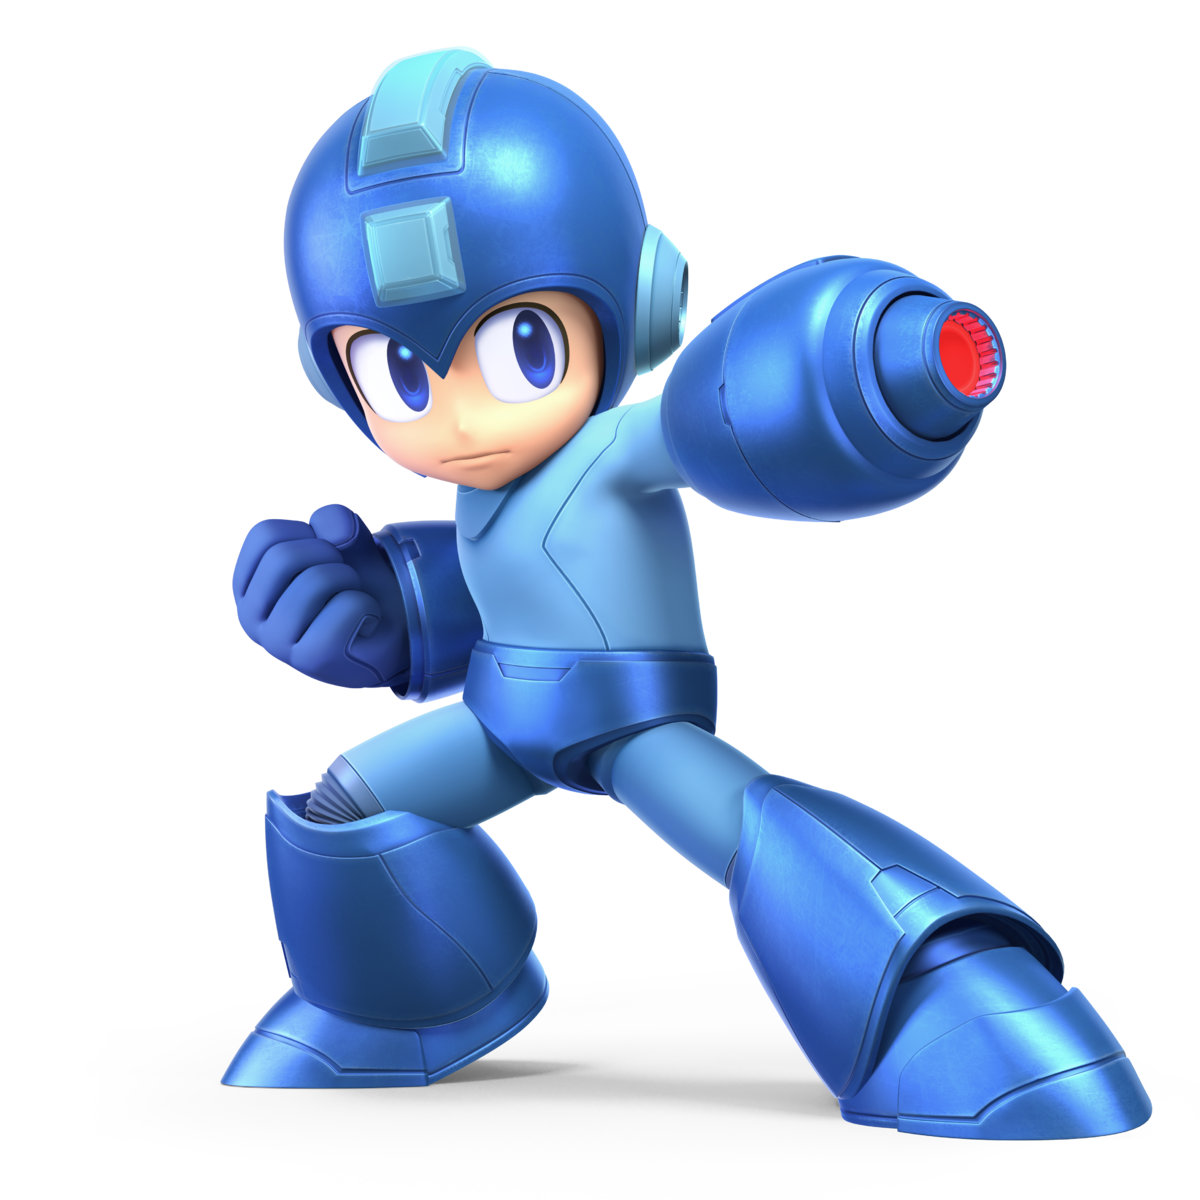
Jab | The Blue Bomber fires a few shots from the Mega Buster. |
Side Tilt | Same as above, but now he’s walking forwards! |
Up Tilt | The Mega Upper jumps from Marvel vs. Capcom to Super Smash Brothers! It boasts little range, but incredible launching power should it connect. |
Down Tilt | Mega Man’s classic slide move that debuted in Mega Man 3, and has since become a beloved staple of the series. |
Dash Attack | DWN.021 Top Man - Top Spin: A forward rushing attack that sees Mega Man spinning forward to trap opponents in the spin before launching them. |
Neutral Air | More Mega Buster shots, now in mid-air. |
Forward Air | DWN.059 Sword Man - Flame Sword: A swift and well-ranged strike with a flaming blade, great for air coverage. |
Back Air | DWN.054 Slash Man - Slash Claw: A multi-hitting strike with numerous energy claws that sends foes flying. |
Up Air | DWN.010 Air Man - Air Shooter: An extremely dangerous tornado attack that pushes enemies potentially off the top of the screen, it has excellent range. |
Down Air | DWN.020 Hard Man - Hard Knuckle: A powerful attack where Rock launches his fist towards those below, Meteor Smashing them to the abyss below. |
Get Up Attack | Rock kicks his enemies to the sides as he rises up. |
Side Smash | A powerful charge shot from the Mega Buster, it takes a while to charge but is very powerful. |
Up Smash | DWN.023 Spark Man - Spark Shock: An upwards jolt of electric energy that zaps foes away. |
Down Smash | DWN.043 Flame Man - Flame Blast: Rock generates two enormous blasts of fire into the ground around him, incinerating enemies with incredible power. |
Neutral Special | DWN.009 Metal Man - Metal Blade: The most overpowered special weapon in Mega Man 2, and the one we all use to break that game. In Smash Bros., Metal Blade returns as a useful projectile that can be fired in 8 different directions, and can also be picked up off the ground and fired again. DLN.006 Bomb Man - Hyper Bomb: Mega Man throws a bomb in an arc that explodes upon contact. DWN.024 Shadow Man - Shadow Blade: Mega Man throws a big shuriken that flies and comes back to him.
|
Side Special | DWN.013 Crash Man - Crash Bomber: A sticky bomb that attaches to enemies for a while before exploding. DLN.005 Ice Man - Ice Slasher: Mega Man fires an ice projectile that freezes enemies. DWN.051 Burst Man - Danger Wrap: Mega Man fires an explosive projectile in a bubble that travels upwards.
|
Up Special | Rush Coil: Mega Man’s faithful friend Rush joins the fight, allowing Rock to use the Rush Coil to reach new heights and battle in the air. Also great for reaching E-Tanks that are just out of normal reach. DWN.057 Tengu Man - Tornado Hold: A tornado fan that blows Mega Man upwards and damages enemies from below. Beat: Mega Man summons his robotic bird companion to carry him upwards.
|
Down Special | DWN.016 Wood Man - Leaf Shield: Mega Man forms a barrier of leaves around him that can block attacks or be fired forwards as a projectile. DWN.032 Skull Man - Skull Barrier: Mega Man forms a barrier of skulls that can reflect projectiles. DWN.045 Plant Man - Plant Barrier: Mega Man forms a barrier of petals that provide good protection, but don’t travel far when fired.
|
Throw | DLN.004 Guts Man - Super Arm: Mega Man picks up his opponent with one hand |
Final Smash | DLN.072 Galaxy Man - Black Hole Bomb: Mega Man fires the Black Hole Bomb forwards, trapping all foes caught in it with ease. From there, the heroes of the Mega Man series, X, Volnutt, EXE, Star Force, Proto Man, and Bass join Mega Man for one incredibly powerful joint charged attack, pulverizing anybody caught within it and giving a grand display of the heroes’ continued fight for everlasting peace. |
Wii Fit Trainer
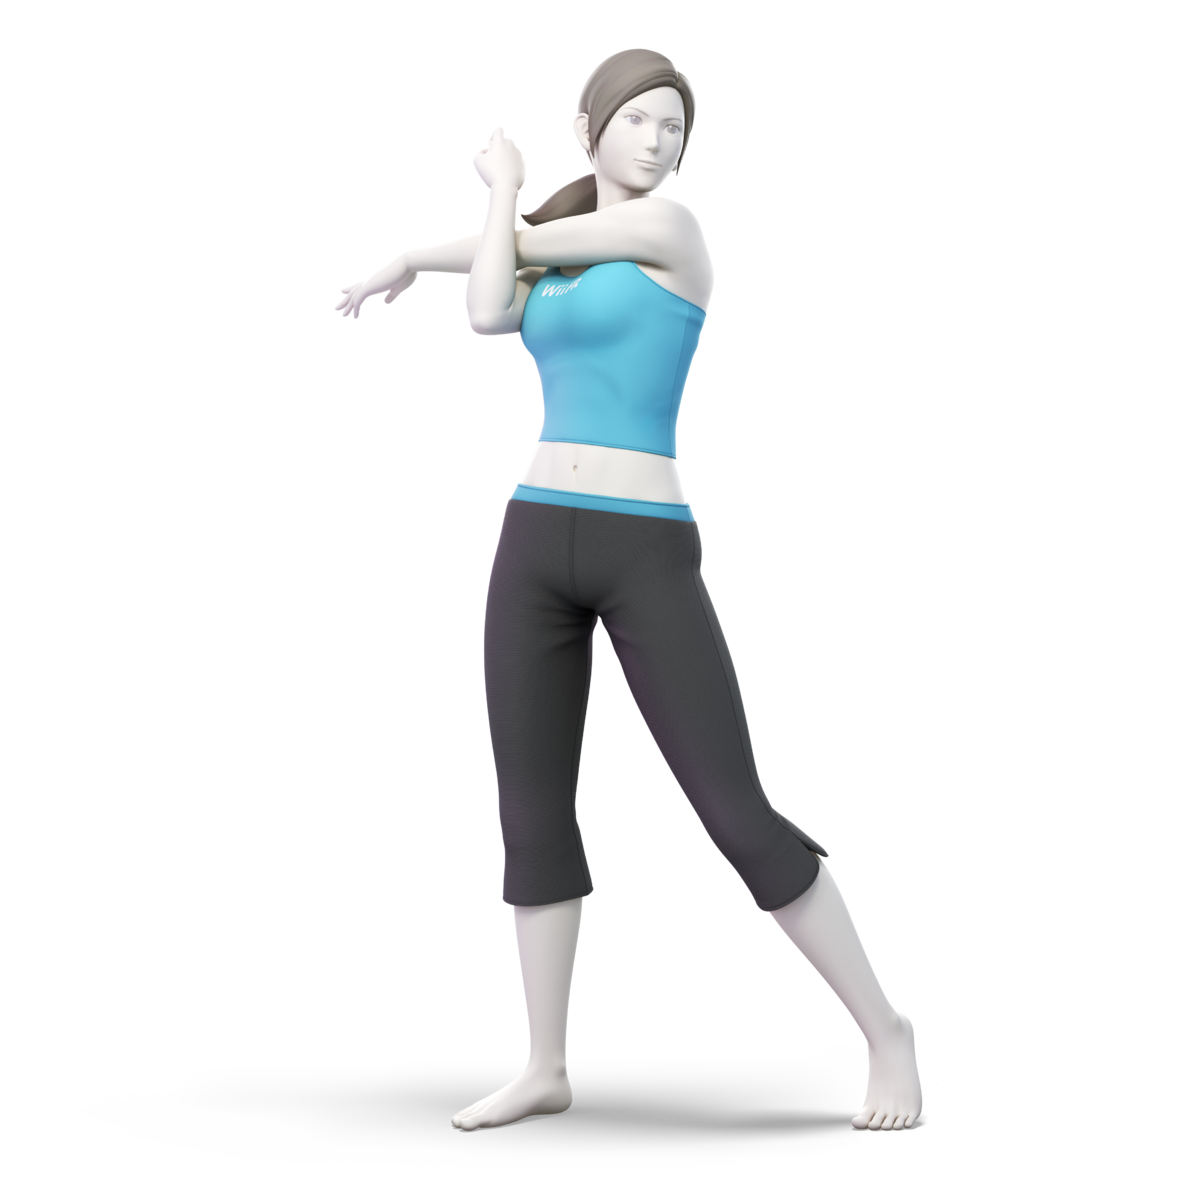
Jab | Does three stretches capable of damaging foes. The first stretch includes a kick that hits behind Wii Fit Trainer. |
Side Tilt | Extends her arm out to attack opponents. |
Up Tilt | Extends an arm up to deal damage. |
Down Tilt | Wii for stretches their back while lying down, using their knees to knock away enemies. |
Dash Attack | Lunges forward while stretching. |
Neutral Air | Stretches their arms and legs, touching them together. This move can hit twice, one for the initial stretch and one for the convergence. |
Forward Air | Extends one arm up and one foot down. The hitbox of the foot is capable of spiking opponents. |
Back Air | Kicks both legs backwards. |
Up Air | Does a small stretch above themself in a small arc. |
Down Air | Kicks both legs down. If this move hits ima sweet spot it is capable of spiking. |
Get Up Attack | Wii Fit Trainer sweeps their legs around themself. |
Side Smash | Hits a powerful stretch that moves their arm outwards for strong knockback. |
Up Smash | Wii Fit clasps their hands, stretching upwards to launch anyone over them. |
Down Smash | Wii Fit gets on their knees doing a low arm stretch forward and a leg stretch backwards. |
Neutral Special | Sun Salutation: Wii Fit Trainer creates a ball of light that they begin to charge up becoming bigger and stronger. If this move is fully charged it will heal Wii Fit on release. Enriched Sun Salutation: The ball of light condenses while charging, but it won’t heal Wii Fit upon release. Sweeping Sun Salutation: The ball of light travels slowly, but hits the opponents multiple times.
|
Side Special | Header: Wii Fit kicks up a soccer ball before head butting it as a fast moving projectile. Huge Header: Wii Fit hits a larger ball that goes slower and is less powerful, but the attack window is much larger. Weighted Header: Wii Fit hits a heavy ball that’s more powerful, but falls to the ground easier.
|
Up Special | Super Hoop: Wii Fit hula hoops fast enough to begin floating in the air. The hula hoops around them do weak multi-hit damage. Jumbo Hoop: Larger hoops spin around Wii Fit and deal wider damage, but Wii Fit doesn’t go as high. Hoop Hurricane: Wii Fit pulls in opponents while rising for them to get knocked upwards.
|
Down Special | Deep Breathing: Wii Fit Trainer takes a deep breath. If the exhale is properly timed this breath will heal Wii Fit, increase their movement speed and power them up for a short amount of time. Volatile Breathing: A deep breath that causes an explosion, though it doesn’t heal or power up Wii Fit. Steady Breathing: If successful, Wii Fit becomes briefly impossible to launch. Though it takes a while to recharge.
|
Forward Throw | A volleyball serve that launches the opponent away. |
Back Throw | Wii Fit sets their foe behind them before jumping off them, sending the enemy away. |
Up Throw | A light throw upwards followed by a push to knock the enemy up higher. |
Down Throw | Wii Fit slams the enemy into the ground hard enough to send them towards the sky and backwards. |
Final Smash | Wii Fit sends out a bunch of growing pose silhouettes to deal damage to enemies. |
Rosalina & Luma
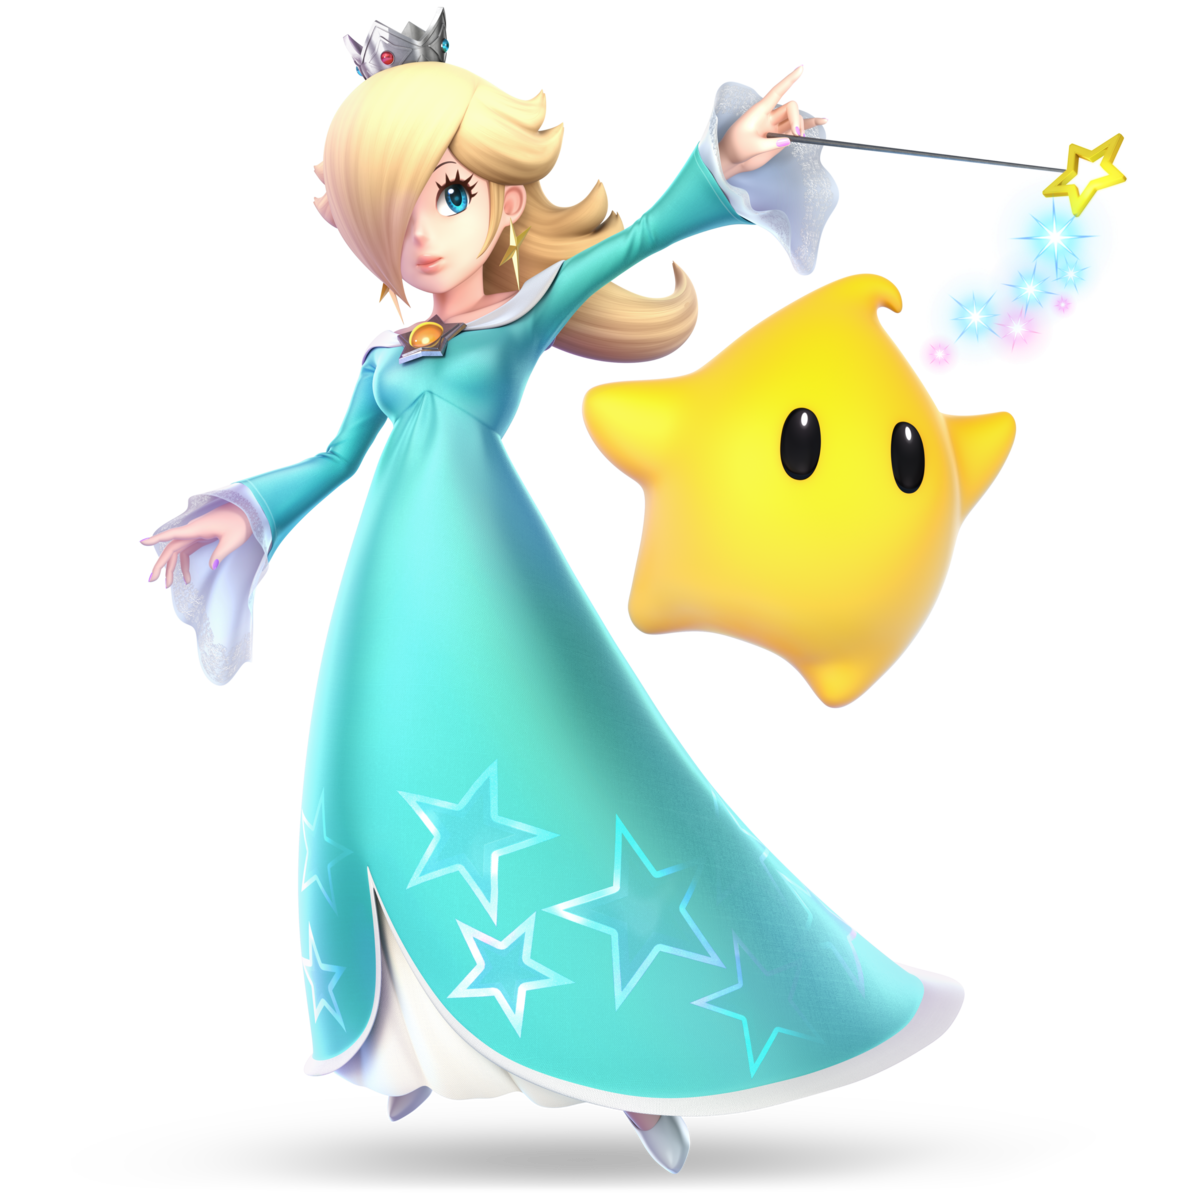
Jab | A set of attacks with Rosalina’s wand while the Luma jabs. This is ultimately ended with a chain of wand attacks while the Luma performs a continuous spinning attack. |
Side Tilt | The Luma performs a quick forwards attack while Rosalina performs a hovering sweep kick forwards. |
Up Tilt | Rosalina generates a halo of sorts above herself to damage foes, while the Luma strikes upwards. |
Down Tilt | Rosalina performs a sweeping attack along the ground in front of her. |
Dash Attack | Rosalina rushes forwards to deal a string of damage with cosmic energy. |
Neutral Air | A pair of cosmic attacks both in front of and behind Rosalina, with the Luma doing the same. |
Forward Air | Rosalina unleashes a stream of cosmic energy in a massive upwards arc in front of her. Provides remarkable range and coverage. |
Back Air | A quick backwards kick or punch from both sides. |
Up Air | Rosalina generates another halo attack directly above her to attack, while the Luma punches upwards. |
Down Air | Rosalina creates a halo below her to deal damage, while the Luma attacks downwards. Functions as a Meteor Smash on the sweet spot. |
Get Up Attack | A pair of strikes to both sides while both get up. |
Side Smash | Rosalina unleashes a powerful blast of cosmic energy directly in front of her, while the Luma delivers a powerful forward punch. |
Up Smash | Rosalina does an upwards headbutt laced with cosmic energy, while Luma does a quick uppercut to damage foes around them. |
Down Smash | The pair attacks on both sides around them, Rosalina generating energy attacks on both sides while Luma punches. |
Neutral Special | Luma Shot: Charging up energy, Rosalina launches Luma forwards, dealing damage to anybody who is hit. This also allows Luma to attack from afar while Rosalina is outside of the battle. Luma Warp: Roslina warps Luma forward, while it does less damage, it’s much faster. Power Luma Shot: Rosalina spins Luma forward like a drill, while it doesn’t travel as far, it has serious power.
|
Side Special | Star Bits: Luma fires some Star Bits at the enemy. While not very powerful, it is a good, quick attack that can stop enemy movement. Floaty Star Bit: Luma fires one slower star bit, it doesn’t go far, but helps block damage. Shooting Star Bit: Luma fires a single high powered star bit in a straight line that goes a good distance.
|
Up Special | Launch Star: The pair launches forwards with a Launch Star. This can be angled to adjust the flight trajectory. Launch Star Plus: Sends Rosalina to the air faster, but the angle she ascends can’t be controlled. Launch Star Attack: Rosalina travels a shorter distance, but she can hit opponents.
|
Down Special | Gravitational Pull: Using the Star Cursor, Rosalina summons any items or projectiles around her directly to her, canceling out enemy attacks or making it easier to use items. Guaranteed to make the lives of all Ness and Lucas players a living nightmare. Catch & Release: Rosalina pulls opponents in to damage them, but can’t cancel projectiles or draw in items. Guardian Luma: Rosalina causes Luma to grow bigger to help protect her and do more damage.
|
Forward Throw | Rosalina throws her opponent forward with her wand. |
Back Throw | Rosalina throws her opponent in the opposite direction with her wand. |
Up Throw | Rosalina throws her opponent upward with her wand. |
Down Throw | Rosalina throws her opponent to the ground with her wand. |
Final Smash | Rosalina generates a Grand Star on the battlefield, where it unleashes a continuous stream of damage to anybody caught in it or firing off projectiles. Rosalina and Luma are free to keep acting while the Grand Star is out to potentially throw opponents into it, and the Grand Star explodes after a while to deal huge damage. |
Miscellaneous | Rosalina and Luma operate with a unique team dynamic. Both sides have different attacks for inputs, Rosalina usually utilizing magic while Luma attacks directly. Lumas can be defeated, but a new one will always respawn for Rosalina shortly after. |
Little Mac
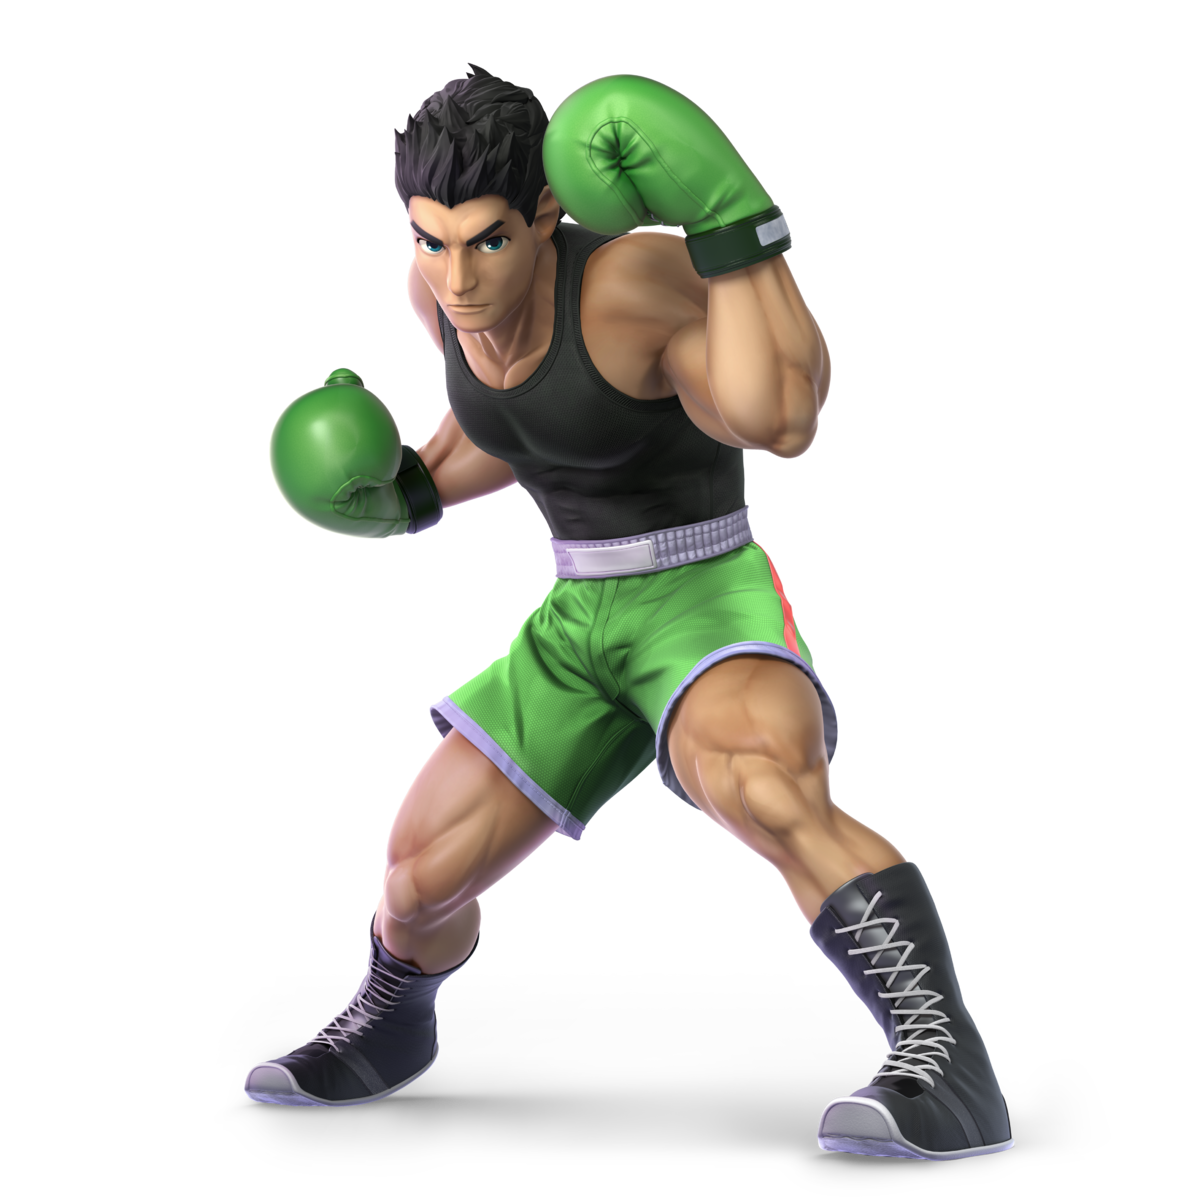
Jab | A straight punch, overhead, uppercut combo that can be turned into a rapid jab that ends in an uppercut. |
Side Tilt | Two straight punches. |
Up Tilt | A backhand in an upwards arc. |
Down Tilt | A low to the ground punch. |
Dash Attack | A running overhead punch. |
Neutral Air | A low angled aerial punch. |
Forward Air | A low to high punch. |
Back Air | An aerial backhand. |
Up Air | A back to front punch above Little Mac. |
Down Air | A straight downwards punch. |
Get Up Attack | Punches done on both sides of Little Mac as he scrambles to his feet. |
Side Smash | Little Mac puts all of his power into a strong punch. |
Up Smash | A flaming uppercut. |
Down Smash | A low punch that sweeps around Little Mac to hit both his front and back sides. |
Neutral Special | Straight Lunge: Little Mac charges up a powerful punch that does more damage the longer it’s held. Once released Little Mac will punch forward sending him across the stage for a high damage blow. Flaming Straight Lunge: Little Mac punches forwards with a flaming punch that hits enemies multiple times. Stunning Straight Lunge: A high speed punch that stuns and launches opponents at full charge.
|
Side Special | Jolt Haymaker: A leaping punch Little Mac performs while flying forwards. Grounding Blow: Little Mac jumps high into the air to whack opponents downwards and bury them. Guard Breaker: A slower, but more powerful Jolt Haymaker that brakes shields.
|
Up Special | Rising Uppercut: A rising, multi-hit uppercut sending Little Mac into the air (aka his worst nightmare). Tornado Uppercut: An uppercut that goes higher, but only hits opponents once. Rising Smash: Little Mac leaps up to deliver an extra powerful punch, but it doesn’t go very high.
|
Down Special | Slip Counter: Little Mac sets up a counter where if he is attacked he will dodge the opponents blow and punish them with an uppercut. Compact Counter: A weaker counter that doesn’t launch opponents far, but makes it easier to set up more combos. Dash Counter: The window for the counter is shorter, but dashes farther during the strike.
|
Forward Throw | Little Mac punches his opponent forwards. |
Back Throw | Little Mac punches his opponent in the opposite direction. |
Up Throw | Little Mac uppercuts his opponent into the air. |
Down Throw | Little Mac spikes his opponent downwards with a hammerfist. |
Final Smash | Little Mac grows into Giga Mac. This form is larger and stronger than regular Little Mac. Little Mac uses this form to unleash a flurry of straight punches at any foe caught in front of him. This attack starts and ends with an uppercut. |
Miscellaneous | After dealing or receiving enough damage Little Mac’s neutral special turns into K.O. Punch. This super armored uppercut is extremely fast and dangerous, not being able to be blocked or countered. |
Greninja
Jab | Two forward strikes followed by either rapid water strikes or a big water explosion. |
Side Tilt | A quick kick forward. |
Up Tilt | An overarching tongue strike. |
Down Tilt | A low angled arm sweep. |
Dash Attack | A low to the ground slide kick. |
Neutral Air | Greninja creates an explosion of water around itself. |
Forward Air | Greninja makes a water kunai to slash forward. |
Back Air | A flurry of kicks behind Greninja. |
Up Air | An upwards facing drill kick. |
Down Air | Greninja drops down at high speeds. If it collides with an opponent Greninja will bounce off the enemy. |
Get Up Attack | A 360 degree leg sweep |
Side Smash | Greninja creates a large kunai out of water and swings it forward. |
Up Smash | Greninja forms a water kunai in each hand stabbing up before moving the kunai outwards |
Down Smash | Two low kunai attacks on each side of Greninja. |
Neutral Special | Water Shuriken: Greninja forms and charges up a water shuriken. The longer the attack is charged the bigger, stronger and more times the shuriken will hit the opponent. However, smaller shuriken are faster. Stagnant Shuriken: Fires a water shuriken that hovers in place. Shifting Shuriken: Fire two types of shurikens depending if shot or charged.
|
Side Special | Shadow Sneak: A shadow will appear on the ground and mimic Greninja’s movements. After a moment Greninja will teleport to the shadow and kick anyone close by. Shadow Strike: A slower, more powerful Shadow Sneak that delivers a more powerful attack. Shadow Dash: Greninja instantly warps a set distance.
|
Up Special | Hydro Pump: Using high pressure water. Greninja pushes itself in any direction it wishes and if the enemy is hit with water they take small damage and are pushed away. High-Capacity Pump: Fires two jets of water for a bigger boost. Single-Shot Pump: Rockets upwards with a single short blast that travels higher, but the direction can’t be changed.
|
Down Special | Substitute: Greninja enters a counter stance. If he is hit Greninja is replaced with a substitute while he teleports behind the enemy for a kick. Exploding Attack: Not a counterattack, but Greninja vanishes and then reappears with an explosion. Substitute Ambush: A slower, but more powerful counter.
|
Forward Throw | Greninja traps enemies in a whirlpool before pushing them to the side. |
Back Throw | Greninja throws the enemy behind and over its head. |
Up Throw | Greninja launches the foe upwards. |
Down Throw | Greninja slams the enemy into the ground. |
Final Smash | Greninja flips the enemy into the air with a mat. It then leaps into the air and performs a flurry of strikes against the opponent before spiking them at the ground.
In Ultimate, Greninja transforms into Ash Greninja as he does this. |
Palutena
Jab | Thrust her staff called the Palutena staff forwards which emits a blast of light. Then repeats it finished by swinging her staff up to flash bang her foes. |
Side Tilt | Snaps her staff right in front of herself. |
Up Tilt | Kneels and snaps her staff above her spinning it around. |
Down Tilt | Kneels and spins her staff along the ground in front of her. |
Dash Attack | Charges forward with her shield. |
Neutral Air | Spins her staff around it and adjoins her right arm. |
Forward Air | A long distance kick. |
Back Air | A back hit with her shield. |
Up Air | Twirls as lights form into a halo above her head. |
Down Air | A downward roundhouse kick. |
Get Up Attack | Swings her staff around her. |
Side Smash | Flaps a pair of ethereal wings forward |
Up Smash | Raises her staff up to generate a beam of light that erupts from the ground. |
Down Smash | Flaps a pair of ethereal wings downwards on both sides. |
Neutral Special | Autoreticle: Illuminates her staff’s orb to aim a Autoreticle above the opponent then fires three energy blasts. Explosive Flame: Creates a multi hitting explosion. Heavenly Light: Palutena surrounds herself in rays of light that damages opponents.
|
Side Special | Reflect Barrier: Palutena casts a reflective wall that reflects projectiles and pushes her opponents. Angelic Missile: Palutena launches herself forward and collides with enemies. Super Speed: Palutena dashes headfirst into her opponents, she can also jump and attack during this.
In Ultimate, her side special is Explosive Flame. |
Up Special | Warp: Disappears then reappears in a chosen direction. Jump Glide: Palutena jumps into the air and slowly glides down. Rocket Jump: Palutena jumps into the air with an explosion that also damages opponents around her.
|
Down Special | Counter: It’s a counter alright. Lightweight: Makes Palutena faster and lighter, but that makes her easier to launch. Celestial Firework: Palutena shoots a firework into the air that explodes after a short time.
In Ultimate, Palutena’s counter also doubles as a reflector. |
Forward Throw | Palutena uses her magic to throw her opponent forwards. |
Back Throw | Palutena uses her leg to throw her opponent in the opposite direction. |
Up Throw | Palutena uses her magic to throw her opponent into the air. |
Down Throw | Palutena uses her magic to throw her opponent to the ground. |
Final Smash | Palutena twirls around as she opens a black hole from her staff which she’ll quickly retreat off stage. Then immediately fires a Mega Laser to burn those who were caught in the laser. |
Pac-Man
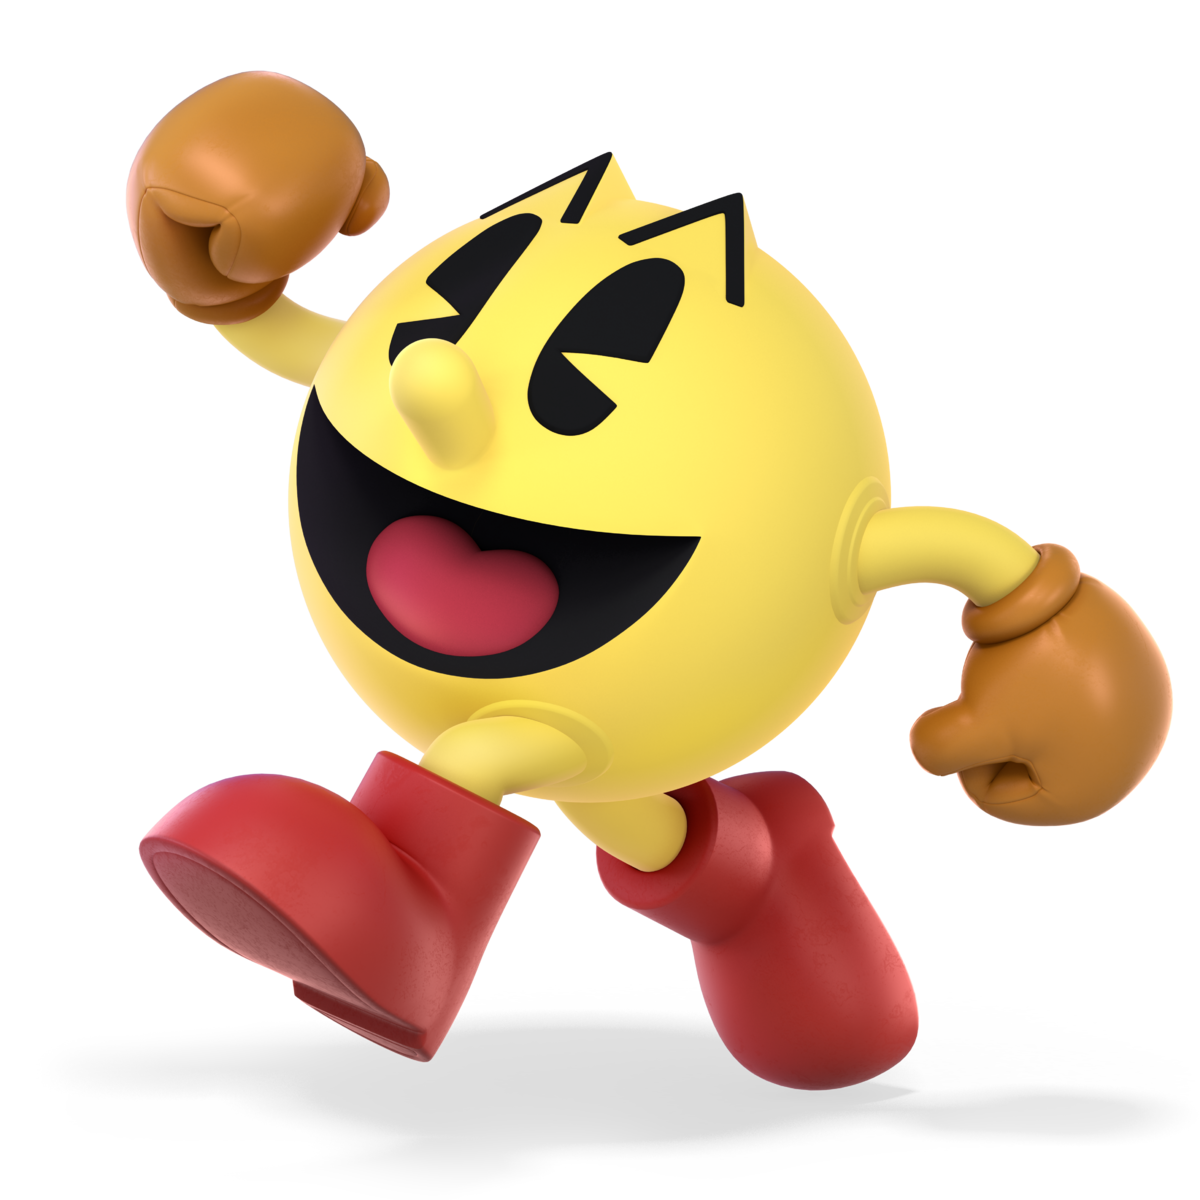
Jab | A pair of punches followed by a looping kick. |
Side Tilt | A forwards aimed kick. |
Up Tilt | A quick, upwards aimed headbutt. |
Down Tilt | Pac-Man turns into his classic form, chomping forwards along the ground. |
Dash Attack | Pac-Man’s classic form appears again, chomping foes numerous times in succession as he rushes forwards. Wakka Wakka! |
Neutral Air | The classic form does a quick mid-air spin, chomping foes caught in the attack. |
Forward Air | A quick forwards kick that doesn’t deal too much damage, but is very quick and good for combos. |
Back Air | A backwards kick with both feet that can send foes flying a good distance. |
Up Air | An upwards looping kick that damages those above Pac-Man. |
Down Air | A set of downwards stomps that lasts a good while to deal consistent damage. |
Get Up Attack | Pac-Man does a set of kicks around him as he gets up. |
Side Smash | Pac-Man calls upon the aid of Blinky, the leader of the Ghostly Gang, to deal heavy damage in front of him. |
Up Smash | This upwards attack unleashes Inky, the shy member of the Ghostly Gang, dealing excellent damage and covering a good amount of area above the dot chomper. |
Down Smash | Pac-Man brings in Pinky and Clyde, the strategist and goofball of the Ghostly Gang, dealing heavy damage to anyone caught by their paranormal power. |
Neutral Special | Bonus Fruit: Pac-Man cycles through the lineup of Bonus Fruit that he so often seeks in his maze treks. From strawberries, to apples, to even a key, each item comes with a different effect and level of power. Most of them come in different trajectories or speeds as well, such as the melon being slow but powerful. The Boss Galaxian follows a unique looping pattern, the Bell can paralyze enemies it hits, and the Key rapidly flies forwards to deal huge damage. Freaky Fruit: Pac-Man’s fruit moves in strange and unpredictable ways, even travelling farther. Lazy Fruit: Pac-Man’s fruit moves slower, but sticks around longer.
|
Side Special | Power Pellet: Pac-Man summons a line of Pac-Dots and a Power Pellet, then chomps forwards along the line to munch on anybody caught in the path. Also really good for recoveries and the like. Distant Power Pellet: Pac-Man summons Pac-Dots that go faster and farther, but he travels slower. Enticing Power Pellet: The Pac-Dots pull his opponents closer.
|
Up Special | Pac-Jump: Pac-Man creates a trampoline of sorts to bounce on, each bounce going higher than the last. After the third bounce though, landing on the trampoline will send anybody who touches it down to their likely doom, and other characters are capable of using the trampoline. Power Pac-Jump: The trampoline bounces Pac-Man higher, but doesn’t stick around for as long. Meteor Trampoline: The trampoline bounces Pac-Man less high, but when it’s red, it has a meteor effect, as well as burying its opponents.
|
Down Special | Fire Hydrant: Pac-Man drops a fire hydrant onto the field. The water it fires can push enemies away with ease to help control the stage, and the hydrant can also be knocked away as a powerful projectile. On-Fire Hydrant: The fire hydrant unleashes actual fire that can harm the opponents, but it can also harm Pac-Man. Dire Hydrant: The fire hydrant explodes after a while or when it hits the ground if in the air.
|
Forward Throw | Pac-Man uses a beam from Galaga to grab his opponent, he then pushes them forward. |
Back Throw | Pac-Man spins around and throws his opponent in the opposite direction. |
Up Throw | Pac-Man throws his opponent upwards. |
Down Throw | Pac-Man turns into his classic form to chomp on his opponent while on the ground. |
Final Smash | Pac-Man chows down on a Power Pellet and a Super Pellet, transforming him into his classic form and making him absolutely enormous as he rushes across the screen in a loop to chomp down on anybody he catches. The attack can be angled to hit those trying to dodge, and those that are chomped can be knocked away or potentially caught again to deal more damage or KO. |
Robin
Jab | Robin does two sword swipes and then either does a fiery explosion with his Arcfire Tome or does a flurry of wind blade attacks with his Elwind Tome. |
Side Tilt | Robin does a sword swipe. |
Up Tilt | Robin does an overhead sword swipe. |
Down Tilt | Robin does a sweeping sword swipe. |
Dash Attack | Robin does a low dashing sword strike. |
Neutral Air | Robin does two sword swings from left to right in the air. |
Forward Air | Robin does a forward sword swipe with his Levin Sword. |
Back Air | Robin does a sword swipe with his Levin Sword from behind. |
Up Air | Robin does an upwards sword swipe with his Levin Sword. |
Down Air | Robin does a downward sword swipe with his Levin Sword that can spike his opponent. |
Get Up Attack | As Robin gets back up, he does two sword swipes from left to right. |
Side Smash | Robin charges up his Levin Sword and does an electrical strike with it that does a lot of damage. |
Up Smash | Robin charges up his Levin Sword and throws it upwards, it spins around in the air for a bit and does electrical damage. |
Down Smash | Robin charges up his Levin Sword and swings it down to the ground. |
Neutral Special | Thunder: Robin uses his Thunder Tome to charge up a thunder spell that has four forms as it charges up.
The first is Thunder, which fires a small and weak thunder projectile. The second is Elthunder, which is a small and quick projectile that does a decent amount of damage. The third is Arcthunder, which is a red ball of thunder that travels slowly, but does a lot of damage upon contact. The fourth and final is Thoron, which is a fully charged beam of thunder that travels across the stage, dealing a great amount of damage. Thunder+: The thunder spell is stronger, but can’t be used as many times in a row. Speed Thunder: it charges and travels faster than Thunder, but isn’t as strong.
|
Side Special | Arcfire: Robin casts Arcfire from the Arcfire Tome, which is a fireball that travels a short distance to the ground and bursts into a small pillar of flame. Arcfire+: Arcfire causes a large explosion when it lands, but the cast is slower. Fire Wall: Arcfire becomes a giant flame pillar that can help guard against attacks.
|
Up Special | Elwind: Robin casts Elwind from the Elwind Tome, which are two blades of wind that can propel Robin upwards and deal damage to fighters if the blades hit them. Soaring Elwind: The second Elwind sends Robin higher than the first. Gliding Elwind: The first Elwind shot sends Robin at a forward angle, then the second fires straight down.
|
Down Special | Nosferatu: Robin casts Nosferatu, where Robin uses dark magic to drain the opponent of their health and heal Robin with it. Distant Nosferatu: A farther reaching Nosferatu, but it does less damage. Goetia: Pulls opponents in before trapping them. It doesn’t heal, but it does more damage.
|
Forward Throw | Robin uses a whirling stream of magic to grab his opponent. Robin then throws them forward with it. |
Back Throw | Robin throws his opponent in the opposite direction with his magic. |
Up Throw | Robin throws his opponent upwards with his magic. |
Down Throw | Robin throws his opponent to the floor with his magic, it makes them bounce up into the air. |
Final Smash | Robin summons Chrom to dash forward and hit their opponent. Robin and Chrom then do a team attack on their opponent that involves both of them slicing up and using magic on their opponent. Robin and Chrom finish them off with a fire spell and a sword strike respectively that sends their opponent crashing to the ground. All of Robin’s Tomes and Levin Sword get fully recharged after this Final Smash. |
Miscellaneous | Robin is a more magic based fighter compared to other Fire Emblem characters, but his Tomes and Levin Sword don’t last and need to be recharged after a number of uses. |
Shulk
Jab | Shulk does a punch, then a kick, then an upward slice with the Monado. |
Side Tilt | Shulk does a downward slice with the Monado. |
Up Tilt | Shulk does an overhead swipe above him with the Monado. |
Down Tilt | Shulk does a sweeping slice on the ground with the Monado. |
Dash Attack | Shulk swipes the Monado horizontally as he finishes running. |
Neutral Air | Shulk swipes the Monado in a moon-like motion. |
Forward Air | Shulk does an overhead swipe with the Monado. |
Back Air | Shulk stabs the Monado to his backside. |
Up Air | Shulk stabs the Monado upwards. |
Down Air | Shulk stabs the Monado downwards. |
Get Up Attack | Shulk swipes the Monado from left to right as he gets up. |
Side Smash | Shulk stabs the Monado forward. |
Up Smash | Shulk stabs the Monado upwards. |
Down Smash | Shulk spins on the ground, sweeping the Monado in a circular direction. |
Neutral Special | Monado Arts: Shulk uses Monado arts, which he can quickly cycle through, or choose which one to use.
Jump enhances Shulk’s jump height. Speed enhances Shulk's running speed. Shield makes Shulk heavier, but increases his defense. Buster lowers knockback, allowing for more combos. Smash enhances Shulk’s smash attacks to do devastating damage. A drawback to this is that Monado arts don’t last and need some time to regenerate before use again. But Shulk can cancel them. Decisive Monado Arts: Monado arts last longer, but can’t be cancelled. Hyper Monado Arts: Monado arts are much stronger, but don’t last as long.
|
Side Special | Back Slash: Shulk does Back Slash, leaping forward with the Monado as he slams it down to the ground. Back Slash Leap: Shulk leaps higher into the air to deliver a powerful descending slice. Back Slash Charge: Shulk leaps forward and shrugs off opponents attacks to deliver a more powerful attack.
|
Up Special | Air Slash: Shulk does Air Slash, jumping upwards as he does a sword slash with the Monado and finishes with another slice while in the air. Advancing Air Slash: Shulk slashes upwards to launch foes, the button has to be pressed again to deliver a second strike. Mighty Air Slash: A more focused version of Air Slash that does more damage at the cost of range.
|
Down Special | Vision: Shulk foresees his opponent about to attack him with a Vision. Shulk then counterattacks the opponent using the Monado with the damage they were going to deliver to him. Dash Vision: Counters enemies' attacks while moving past them swiftly. Power Vision: A more powerful counter that becomes less effective when used repeatedly.
|
Forward Throw | Shulk slices the opponent forward, propelling them in that direction. |
Back Throw | Shulk throws his opponent backwards as he stabs them with the Monado. |
Up Throw | Shulk throws his opponent upward and stabs them with the Monado in that direction. |
Down Throw | Shulk places the opponent onto the ground and stabs them with the Monado while on the ground. |
Final Smash | Shulk summons Dunban, Riki, and Fiora as they do a Chain Attack, which involves hitting them with all of their attacks as Shulk finishes them off with the Monado. |
Miscellaneous | Shulk is shown to have precognition in the intro to World of Light. This allowed him to see the death of every fighter before Galeem began their attack. |
Bowser Jr.

Jab | Two boxing glove punches from the Clown Car before transition into a barrage of punches that end in an uppercut. |
Side Tilt | A forward fork stab. |
Up Tilt | A fork attack that starts from the side before stabbing up. |
Down Tilt | Freaky ahhhh Car does a low hitting multi-hit lick attack. |
Dash Attack | Jr. and the Car glide forward as buzzsaws appear from the Cars mouth to chop up anyone in the way. |
Neutral Air | The Clown Car spins around with boxing gloves on both sides of it. |
Forward Air | The Clown Car throws at a wrecking ball to smack away foes. |
Back Air | Swings the wrecking ball backwards this time. |
Up Air | Jr. himself pulls out a hammer to bash anyone above him. |
Down Air | A drill appears from the bottom of the Clown Car that hits enemies multiple times. |
Get Up Attack | The Clown Car extends fists out on both sides of it. |
Side Smash | Two drills come out of the Clown Car and hit any enemy caught in them multiple times before a powerful final hit. |
Up Smash | Jr. flips the car upside down allowing the propeller blades below to chop up anyone above the Clown Car. |
Down Smash | Two wrecking ball slams left and right of the Clown Car. |
Neutral Special | Clown Cannon: A cannonball is fired from the mouth of the Clown Car. Its speed and power is determined by how long the attack is charged. Piercing Cannon: A less powerful cannonball that can pierce through multiple fighters. Air Cannon: Blasts opponents with wind, propelling Bowser Jr. backwards while in the air.
|
Side Special | Clown Kart Dash: Jr. activates the car's wheels and engines to ram forward at high speeds damaging any opponent in his path. Koopa Drift: While spinning after ramming forward, the kart careens forward, hitting opponents multiple times. Grounding Dash: The dash doesn’t go as far, but it buries foes.
|
Up Special | Abandon Ship!: Bowser Jr. ejects from the Clown Car sending him upwards. As Jr falls back to the ground he can swing his hammer around to defend himself. Once he hits the ground the Clown Car will suddenly materialize. Meteor Ejection: The Clown Car gets sent crashing to the ground. Koopa Meteor: The Clown Car launches itself high into the air before it explodes, sending Jr. downwards.
|
Down Special | Mechakoopa: The Clown Car drops a Mechakoopa on the ground. This tiny explosive will detonate after a short amount of time or when it latches onto an enemy. Jr can also grab the Mecha Koopa and throw it for an immediate explosion upon contact with anything. Impatient Mechakoopa: The Mechakoopa explodes shortly after landing. Big Mechakoopa: A larger Mechakoopa walks past enemies and then explodes.
|
Forward Throw | The Clown Car latches onto a target with a claw while Jr. pummels them with a toy hammer. Once it’s time to throw a boxing glove hits the opponent in the gut and launches them away. |
Back Throw | The Clown Car spins around before throwing the enemy backwards. |
Up Throw | The Car chucks the opponent upwards. |
Down Throw | The Clown Car tosses the foe to the ground before violently drilling into them. |
Final Smash | Jr. turns into Shadow Mario, and then paints the screen making it very difficult to see what you’re doing. The paint also hurts anyone who walks into it. |
Duck Hunt
Jab | The Dog does two jabs with his palms and the duck does a flurry of pecks on their opponent. |
Side Tilt | The Duck thrusts their beak forward for a peck. |
Up Tilt | The Duck raises their wings upwards. |
Down Tilt | The Duck sweep pecks their beak. |
Dash Attack | The Dog runs towards the opponent and the Duck pecks their beak as they attack. |
Neutral Air | The Dog spins their whole body around. |
Forward Air | The Duck flies forward a bit and does a peck. |
Back Air | The Duck flies backwards a bit and does a peck. |
Up Air | The Duck does multiple pecks upwards in the air. |
Down Air | The Dog uses The Duck to spike the opponents onto the ground. |
Get Up Attack | As The Dog gets back up, The Duck does two pecks from left to right. |
Side Smash | The player with the NES Zapper shoots three shots to the direction Duck Hunt is facing. |
Up Smash | The player with the NES Zapper shoots three shots upwards. |
Down Smash | The player with the NES Zapper shoots three shots from left to right. |
Neutral Special | Trick Shot: The Dog kicks a can from Hogan’s Alley that can be shot upwards by the player with the NES Zapper, the can explodes upon anyone that makes contact with it or on its own if left idle for too long. High-Explosive Shot: Kicks the can into the air more quickly and explodes as soon as it's shot. Zigzag Shot: The can moves back and forth as it’s shot.
|
Side Special | Clay Shooting: The Dog throws a Clay Pigeon like a frisbee and the player with the NES Zapper shoots the Clay Pigeon, delivering damage to anyone who is near it. Rising Clay: The Clay Pigeon can’t be shot, but it does more damage the farther it goes. Clay Break: The Clay Pigeon is harder to shoot, but each shot does more damage.
|
Up Special | Duck Jump: The Duck grabs The Dog and they fly upwards to recover onto the stage. Duck Jump Snag: The Duck flies a shorter distance, but The Dog bites nearby fighters. Super Duck Jump: The Duck creates gusts of wind that push the opponents aside as they fly up.
|
Down Special | Wild Gunman: Duck Hunt summons one of the five gunmen from Wild Gunman to fire a shot at their opponent. Quick Draw Aces: The gunmen fire quickly, but their shots don’t travel far. Mega Gunman: The gunmen are bigger and fire slower, but have very high defense.
|
Forward Throw | The Dog bites the opponent to grab them and they throw them forwards. |
Back Throw | The Dog throws their opponent backwards after biting them. |
Up Throw | The Dog kicks the opponent upwards with both feet. |
Down Throw | The Dog slams their opponent onto the ground after biting them. |
Final Smash | Duck Hunt summons a wave of ducks to hit their opponents, if they get caught in it, they land in front of the firing squad from Wild Gunman as they proceed to shoot them, landing shots on Duck Hunt’s opponents as well as also shooting at cardboard cutout gangsters and tin cans from Hogan's Alley. |
Ryu
Jab | Ryu does three punches, his light, medium, and heavy punches in quick succession. |
Side Tilt | Ryu’s light side tilt has him do a quick little kick. Ryu’s heavy side tilt has him do his collarbone breaker, which can break shields. |
Up Tilt | Ryu’s light up tilt has him do an elbow jab, Ryu’s heavy up tilt has him do an upwards punch. |
Down Tilt | Ryu’s light down tilt makes him do his crouching light kick, Ryu’s heavy down tilt has him doing his crouching medium kick. |
Dash Attack | Ryu does a jump kick as he dashes towards his opponent |
Neutral Air | Ryu does his light air kick with his knee. |
Forward Air | Ryu does his heavy air kick with a jump kick. |
Back Air | Ryu does his medium air kick with a backwards jump kick. |
Up Air | Ryu does his heavy air punch with an upwards punch that can hit his opponent twice. |
Down Air | Ryu does his medium air punch that has him punching downwards and can potentially spike the opponent. |
Get Up Attack | As Ryu gets up, he does two sweeping kicks. |
Side Smash | Ryu does his Joudan Sokutogeri, sending his opponents flying forwards. |
Up Smash | Ryu does his crouching heavy punch, uppercutting his opponents up into the air. |
Down Smash | Ryu does his crouching heavy kick, sweeping his leg around the floor. |
Neutral Special | Ryu does a Hadoken, which can be slower or faster depending on how long the button is held. But using Ryu’s iconic quarter forward command input, his Hadoken becomes even stronger. And when doing a half circle forward command input, Ryu fires a Shakunetsu Hadoken, which is basically a fiery Hadoken. |
Side Special | Ryu does a Tatsumaki Senpukyaku, where he does a spinning kick that sends him forward depending on the distance with the button held. Using Ryu’s quarter back command input, his Tatsumaki Senpukyaku becomes even stronger and goes even farther |
Up Special | Ryu does a Shoryuken, an uppercut that launches the opponent upward and sends Ryu upwards as well. Using the Shoryuken command input, Ryu’s Shoryuken becomes even stronger. |
Down Special | Ryu does a focus attack, an attack that can absorb damage from fighters and hits them with a punch that leaves the opponent open in a crumple state. Ryu can even reverse it in the opposite direction in case his opponent dodges it and goes behind him. |
Forward Throw | Ryu does his Forward Throw, which is him throwing the opponents overhead. |
Back Throw | Ryu does his Back Throw, which is him throwing the opponent in the opposite direction, Judo style. |
Up Throw | Ryu throws his opponent upward with an axe kick. |
Down Throw | Ryu karate chops his opponent while they’re down on the ground, sending them into the air. |
Final Smash | Ryu’s first Final Smash, Shinku Hadoken, is where he fires a giant Hadoken that travels across the screen and sucks the opponent in for some hits. Ryu’s second Final Smash, Shin Shoryuken, is where Ryu catches the opponent and sets them up for an even more powerful Shoryuken that launches them sky high. |
Miscellaneous | Ryu has the ability to make his specials stronger using his Street Fighter command inputs. |
Ken
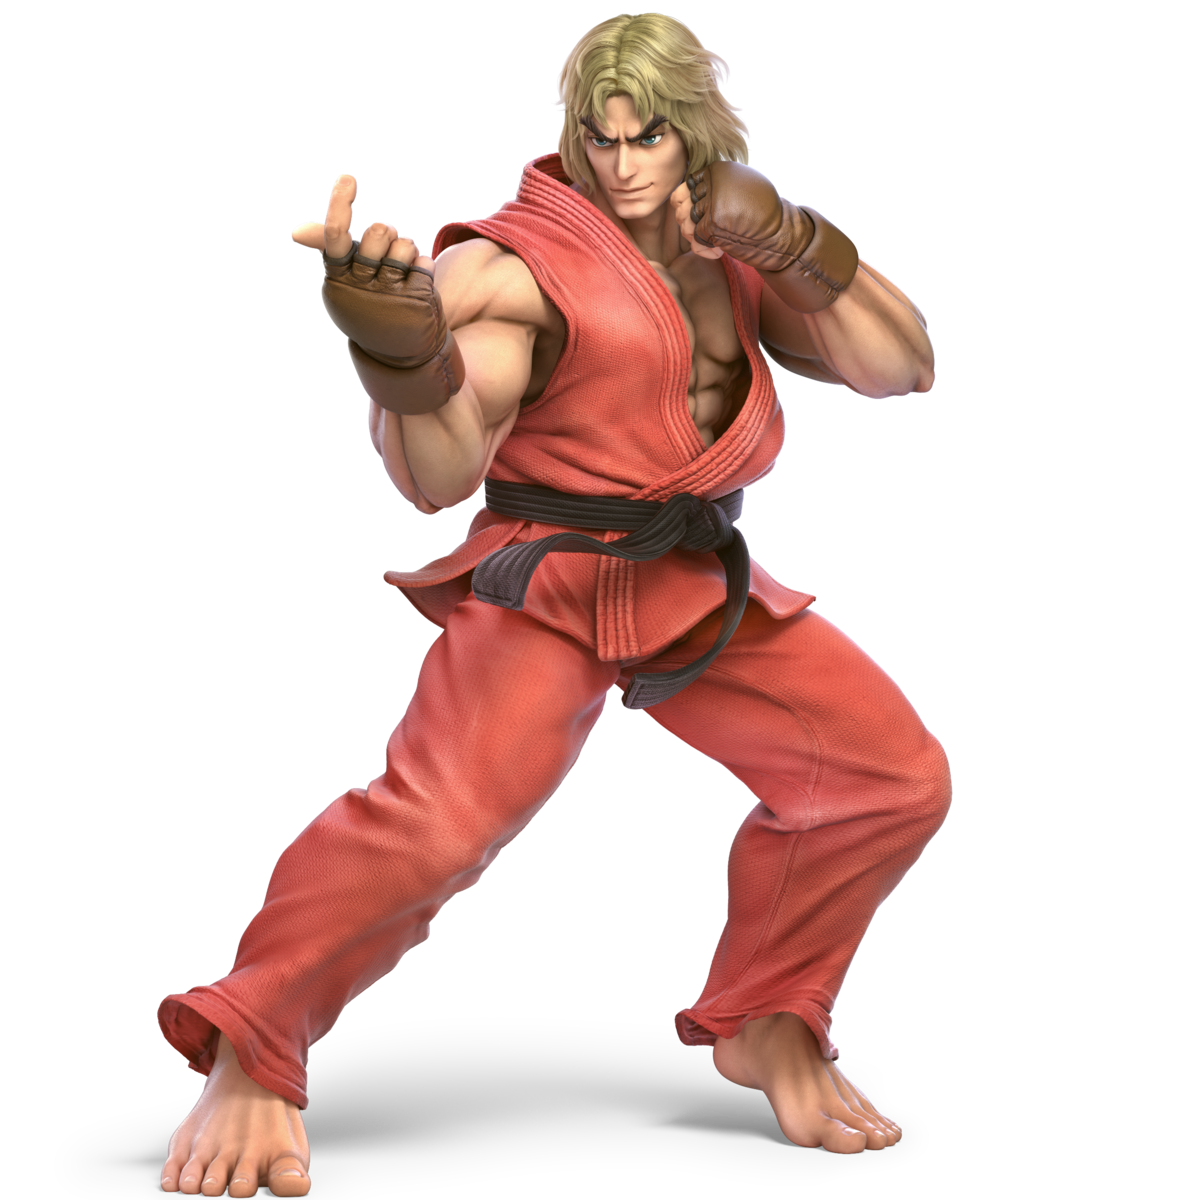
Echo | Ken is an echo fighter of Ryu, which makes him the same as Ryu, but Ken so far has the most amount of differences to go over when it comes to all the echoes covered here. Ken’s ground speed is faster, he doesn’t have a collarbone breaker, and he does a kick upwards for his Up Air. Ken’s Forward Smash is his heavy kick. Ken’s command inputs can make him do various series of kicks. Ken’s Shoryuken is more fiery than Ryu’s and does more hits, same deal with Ken’s Tatsumaki with it having multiple hits. Ken’s back throw is the hell wheel, where he throws his opponent after rolling around with them. Ken also has two Final Smashes. The first being his Shinryuken, where he does a fiery Shoryuken up into the air that delivers multiple hits of damage. Ken’s second Final Smash is him doing his Shippu Jinraikyaku, doing a series of kicks like his Tatsumaki, until Ken goes into the air and finishes his opponent off with one last kick. |
Cloud

Jab | Two kicks followed by a horizontal Buster Sword slash. |
Side Tilt | A quick sword slash. |
Up Tilt | An upwards sword attack in an arc. |
Down Tilt | Cloud slides forward across the ground hitting anyone he passes. |
Dash Attack | Cloud thrusts himself and the side of the Buster Sword forward. |
Neutral Air | A close range, 360 degree sword spin. |
Forward Air | Cloud swings his sword from high to low with the ability to spike. |
Back Air | A low to high backwards swing. |
Up Air | Cloud pushes the edge of the Buster Sword upwards. |
Down Air | Cloud thrusts his sword downwards to deal damage and even spike enemies. |
Get Up Attack | Swings his sword around him 180 degrees. |
Side Smash | Three full power forward sword swings to send opponents flying. |
Up Smash | Cloud does a back to front sword slash that starts by going below him then above him in a rainbow shape. |
Down Smash | Cloud hooks the opponent with the bottom of his sword handle before stabbing them with the Buster Sword. |
Neutral Special | Cloud fires out an energy wave from his sword that travels across the stage to hit enemies (going slightly further on the ground). With Limit Break the wave is faster, moves further and causes an AoE multi-hit damage field around whoever gets hit by the move. |
Side Special | Cloud performs 5 sword strikes trapping anyone hit by the Buster Sword in the combo. With Limit Break the move is quicker and stronger. |
Up Special | Cloud does a rising sword slash taking him high into the sky, hurting anyone hit by him. Cloud can then quickly drop downward with the Buster Sword spiking anyone hit by the move who is airborne. With Limit Break Cloud flies up higher at faster speeds. |
Down Special | Cloud charges up his Limit meter at a fast pace. With Limit Break the move turns into a low damage spin that has strong upwards launch power. |
Forward Throw | A drop kick that knocks away the grabbed enemy. |
Back Throw | Cloud pulls the enemy behind him before kicking them away. |
Up Throw | Cloud kicks the enemy twice, pushing them into the sky. |
Down Throw | A chokeslam dowards that bounces the foe up and to the opposite direction of the one Cloud is facing. |
Final Smash | Cloud hits the target with Omnislash, knocking the enemy into the air. He follows this up with a flurry of slashes slamming the foe back down to the ground. If Cloud is in his Advent Children costume, his final smash becomes Omnislash Ver. 5, where his fusion sword splits into multiple swords that he uses to slash the opponents in the air and back down to the ground. |
Miscellaneous | Cloud has a meter called “Limit”. This meter is charged by using down special or through damaging/receiving damage. When Limit is fully charged Cloud will reach a state called “Limit Break” which makes Cloud move faster and enhances his special moves. Limit is reset after Cloud dies or uses a special move. |
Corrin
Jab | Corrin does a fang stab and then two sword swipes into a flurry of dragon mouth bites. |
Side Tilt | Corrin does a sword swipe. |
Up Tilt | Corrin twirls and spins their sword upwards. |
Down Tilt | Corrin sweeps the ground with their sword. |
Dash Attack | Corrin spins their whole body towards their opponent, hitting them multiple times with her sword. |
Neutral Air | Corrin slightly transforms into a dragon and swings both a fang and her sword at once in the air. |
Forward Air | Corrin does a forward sword swipe in the air. |
Back Air | Corrin slightly transforms into a dragon to use their wings to propel themselves forward, as well as hit any enemies behind them. |
Up Air | Corrin swings their sword 180 degrees upwards. |
Down Air | Corrin slightly transforms into a dragon to descend to the ground, stomping it with their feet as dragon fangs. |
Get Up Attack | As Corrin gets up, she swings her sword from left to right. |
Side Smash | Corrin charges up, using the buzzsaw on her sword to harm her opponents that get close to it, and then unleashes a fang that travels a long distance. |
Up Smash | Corrin slightly transforms into a dragon to stab two fangs on her arms upwards. |
Down Smash | Corrin slightly transforms into a dragon to stab both her sword and a foot as a fang from left to right. |
Neutral Special | Corrin transforms her arm into a dragon mouth that charges up a ball of water that can be fired at the opponent. The ball of water stuns the opponent and if they are close to Corrin, her dragon arm can take a big bite out of her opponent. |
Side Special | Corrin hops a short distance and transforms her arm into a fang that stabs right through her opponent to the ground. It pins her opponent and herself there and she can choose to kick forwards or backwards from it, or cancel the attack. |
Up Special | Corrin slightly transforms into a dragon and flies on up with her wings. She can even do some damage to her opponent upon travelling upwards. |
Down Special | Corrin does a counter that when she gets hit, she fully transforms into a dragon and does a stomp that sends the opponent flying away. |
Forward Throw | Corrin slightly transforms into a dragon and stabs her opponent with a fang, making them fly forwards. |
Back Throw | Corrin slightly transforms into a dragon and stabs her opponent with a fang, making them fly in the opposite direction. |
Up Throw | Corrin fully transforms into a dragon and smacks her opponents into the air with her head. |
Down Throw | Corrin fully transforms into a dragon and stomps her opponent, making them bounce from the floor into the air. |
Final Smash | Corrin strikes the ground, then she fully transforms into a dragon and unleashes a torrential roar, which is a water tornado that her opponents get caught in and launches them away. |
Bayonetta
Jab | Bayonetta throws three punches and then does a flurry of punches on her opponent. An alternate version of this is her firing her guns in three different positions, which can really rack up the damage. |
Side Tilt | Bayonetta does a series of three kicks, all of which she can fire her guns with. |
Up Tilt | Bayonetta does an uppercut and can fire her guns while the opponent is in the air. |
Down Tilt | Bayonetta does a sweeping kick on the floor and can fire all four of her guns after the sweep. |
Dash Attack | Bayonetta does a dashing punch attack that she can follow up on with a gun attack. |
Neutral Air | Bayonetta does a spinning tornado kick, she can fire her guns while doing so. |
Forward Air | Bayonetta does a combo of two punches and a kick, all of which she can fire her guns while doing. |
Back Air | Bayonetta does a backwards kick, she can fire her guns while doing this. |
Up Air | Bayonetta spins upwards and can fire her guns while spinning around. |
Down Air | Bayonetta does a stomping leg kick as she descends, she can then fire her guns after the stomp. |
Get Up Attack | As Bayonetta gets up, she does two kicks from the left to the right. |
Side Smash | Bayonetta summons the fist of Madama Butterfly to punch her opponent, she can also fire her guns after the punch. |
Up Smash | Bayonetta summons the fist of Madama Butterfly to punch her opponent into the air, she can also fire her guns after the punch. |
Down Smash | Bayonetta summons the heel of Madama Butterfly to stomp her opponent. |
Neutral Special | Bayonetta fires rapid supercharged bullets from her hand guns or foot guns. |
Side Special | Bayonetta does a slide kick into an After Burner kick, where she sends her opponents upwards to do some air combos on them. |
Up Special | Bayonetta does a rising multi hit uppercut called a Witch Twist. |
Down Special | Bayonetta does a counterattack called Witch Time, where if the opponent hits her, time slows down for them, allowing Bayonetta to get multiple hits in. |
Forward Throw | Bayonetta psychically grabs her opponent, she then does a shoulder thrust to push her opponent forward. |
Back Throw | Bayonetta kicks her opponent to the opposite side. |
Up Throw | Bayonetta kicks her opponent into the air. |
Down Throw | Bayonetta lifts her foot over her head and smacks her opponent onto the floor for a bounce into the air. |
Final Smash | Bayonetta slows down time completely as she racks up enough damage on her opponents to fill up a gauge to summon Gomorrah. Who bites her opponents up and it will instantly kill them if they’re at 100%. |
Inkling
Jab | A punch and two kicks combo or a Splattershot rapid fire attack that covers the enemy in ink. |
Side Tilt | Inkling smacks the opponent with the Splattershot. |
Up Tilt | An upward front to back kick. |
Down Tilt | Two low to the ground kicks. |
Dash Attack | A forward charging shoulder check. |
Neutral Air | Inkling does a mid-air 360 spinning kick. |
Forward Air | An aerial dropkick. |
Back Air | A backwards smack with the Splattershot. |
Up Air | Two upward kicks in an arc. |
Down Air | A strong downwards spike with the Splattershot. |
Get Up Attack | Shooting an ink blast from the Splattershot on both sides of Inkling. |
Side Smash | A large slash with the Splat Brush, covering the opponent ink. |
Up Smash | An upward shot from a Blaster that applies ink to the enemy. |
Down Smash | Inkling pulls out a Slosher covering enemies to the left and right of them in ink. |
Neutral Special | Inkling begins to fire a long range stream of ink with the Splattershot. This does light damage and knockback but more importantly douses the target in ink. |
Side Special | Inkling runs forward while holding out a Roller. This Roller splashes ink on the foe and can bury them in the ground leaving them vulnerable to more damage. |
Up Special | The Inkling enters their squid form and performs a super jump, sending them into the sky. Enemies close by the start up of the move take light damage and knockback while being splashed with ink. |
Down Special | Throws a Splat Bomb which either detonates on contact with an enemy or after a short time. This bomb can be thrown at various angles and speeds. |
Forward Throw | Inkling shoots their opponent forward. |
Back Throw | Inkling turns into a squid and throws their opponent in the opposite direction. |
Up Throw | Inkling turns into a squid and headbutts their opponent into the air. |
Down Throw | Inkling throws their opponent to the ground. |
Final Smash | Places down a Killer Wail, a high-damage machine that fires sound waves that cover those in ink. |
Miscellaneous | The Inkling runs on their supply of ink. This ink is capable of being splashed onto opponents with certain moves. Foes covered in Ink will take more damage during the duration they are covered in ink. The Inkling will run out of ink eventually by using moves that require ink. Running out of ink makes these moves much weaker or even unusable so the Inkling will need to go under and refill ink often. Whenever the Inkling dashes they turn into their squid form making them much smaller and harder to hit. |
Ridley
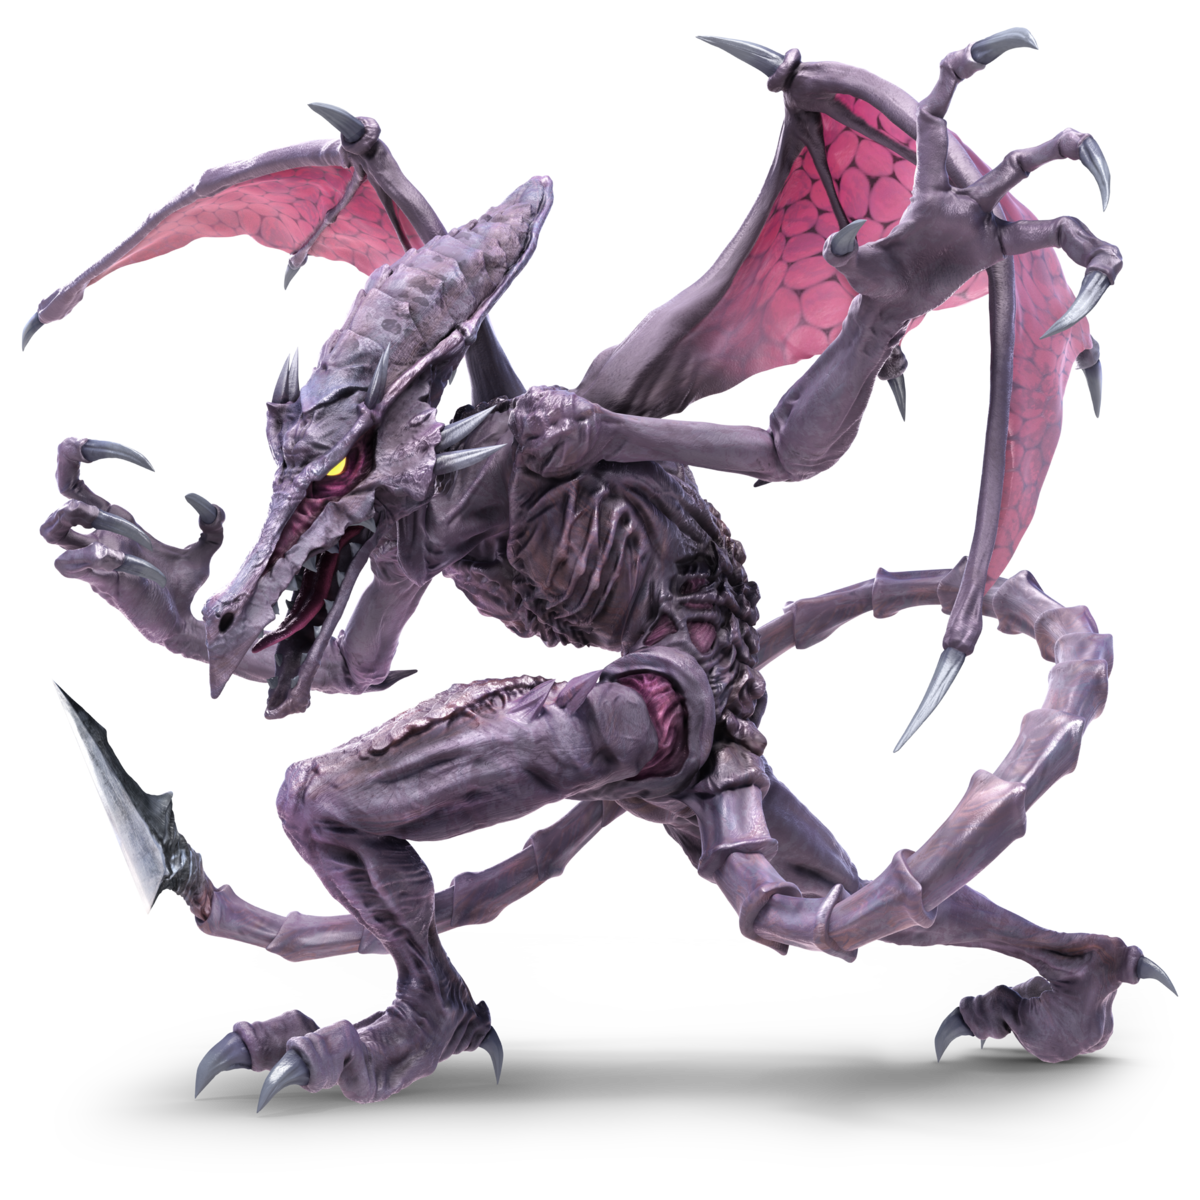
Jab | Two claw slashes followed by rapid tail pokes or a bite. |
Side Tilt | A forward tail thrust. |
Up Tilt | A large upwards claw swipe. |
Down Tilt | A low tail attack. |
Dash Attack | A lunging forward bite. |
Neutral Air | Ridley swings his tail around his body for ApE damage. |
Forward Air | A few tail stabs in mid-air. |
Back Air | A backwards kick in the air. |
Up Air | Ridley claps his wings above him to damage aerial foes. |
Down Air | Ridley drops downwards, first hitting anyone below. |
Get Up Attack |
|
Side Smash | Ridley creates a powerful close range explosion of fire from his mouth. |
Up Smash | Ridley does a front flip while kicking his leg in an arc above himself. |
Down Smash | Two wing slams on both sides that knock enemies into the sky. |
Neutral Special | Ridley charges up a stream of plasma balls. The longer the attack charges the more plasma balls are fired with a maximum of 4. |
Side Special | Ridley lunges in the chosen direction, grabbing his prey before dragging them across the stage. |
Up Special | Ridley does a slight charge up before flying in any of the four cardinal directions. |
Down Special | Ridley pulls his tail back before quickly thrusting it outwards. If an enemy is hit by the tip of the tail they will fall to the ground. If at a high enough damage percentage, it instantly kills them. |
Forward Throw | A simple chucking of the enemy forward. |
Back Throw | Ridley drags the enemy across the ground before throwing them behind himself. |
Up Throw | Ridley tosses the opponent up before stabbing them with his tail. |
Down Throw | Ridley slams the foe into the ground. |
Final Smash | Ridley charges forward, knocking his enemies into space and on top of Samus’ ship. He then fires a massive laser hurting the opponents and taking the ship down. If the opponent is over 100%, it instantly kills them. |
Miscellaneous | Ridley has 3 jumps instead of two due to his wings. |
Simon

Jab | Simon whips his opponent twice and then does a flurry of whips. Holding down the button can make Simon dangle his whip in any direction controlled, which is handy at keeping foes away or blocking projectiles. |
Side Tilt | Simon just throws one whip like the good old days. |
Up Tilt | Simon spins his whip upwards. |
Down Tilt | Simon does a slide kick that he can follow up on with a leaping kick. |
Dash Attack | Simon twirls his whip while dashing. |
Neutral Air | Simon spins his whip around in a circular motion in the air, landing multiple hits on his opponent. |
Forward Air | Simon does a simple forward whip in the air. |
Back Air | Simon turns backwards to whip whatever foe is behind him in the air. |
Up Air | Simon whips upwards. |
Down Air | Simon does a dive kick that makes him descend at a diagonal angle, if he hits his opponent, he bounces off of them. |
Get Up Attack | As Simon gets up, he does two sweep kicks from left to right. |
Side Smash | Simon charges up his whip as he whips it from a large distance away from his foe. |
Up Smash | Simon charges up his whip as he whips it a large distance upwards. |
Down Smash | Simon charges up his whip as he sweep whips the ground from left to right. |
Neutral Special | Simon throws an axe in an arc. |
Side Special | Simon throws a cross that comes back to him like a boomerang. |
Up Special | Simon performs an uppercut with a sword, delivering multiple hits of damage to his opponent. |
Down Special | Simon throws holy water, which can ignite a flame on the ground that lasts for a couple seconds. |
Forward Throw | Simon grabs the opponent and spins around with them before throwing them forward. |
Back Throw | Simon throws his opponent in the opposite direction. |
Up Throw | Simon throws his opponent upward and whips them to make them go even higher. |
Down Throw | Simon slams his opponent to the ground. |
Final Smash | Simon traps their opponent in a coffin, catches it with his whip and throws it in the air. Simon then does his super move, Grand Cross, where he blasts the coffin with magical crosses surrounding him. |
Richter
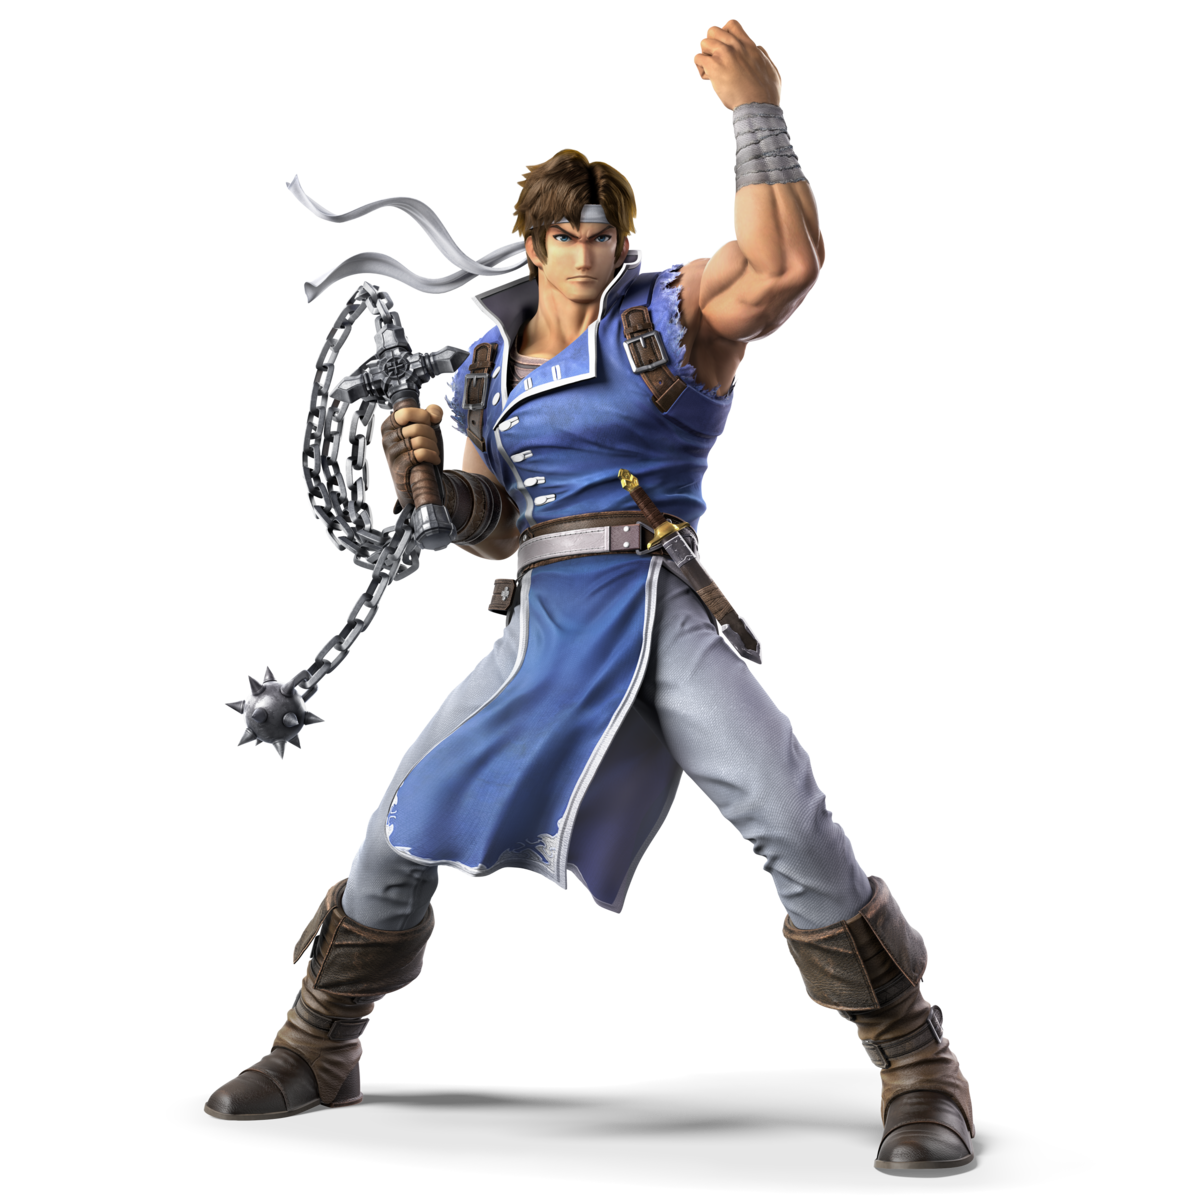
Echo | Being an echo of Simon, Richter’s moveset is the exact same as Simon’s. There’s not really any differences between the two, but Simon does derive some moves from Richter in their home series. |
King K. Rool
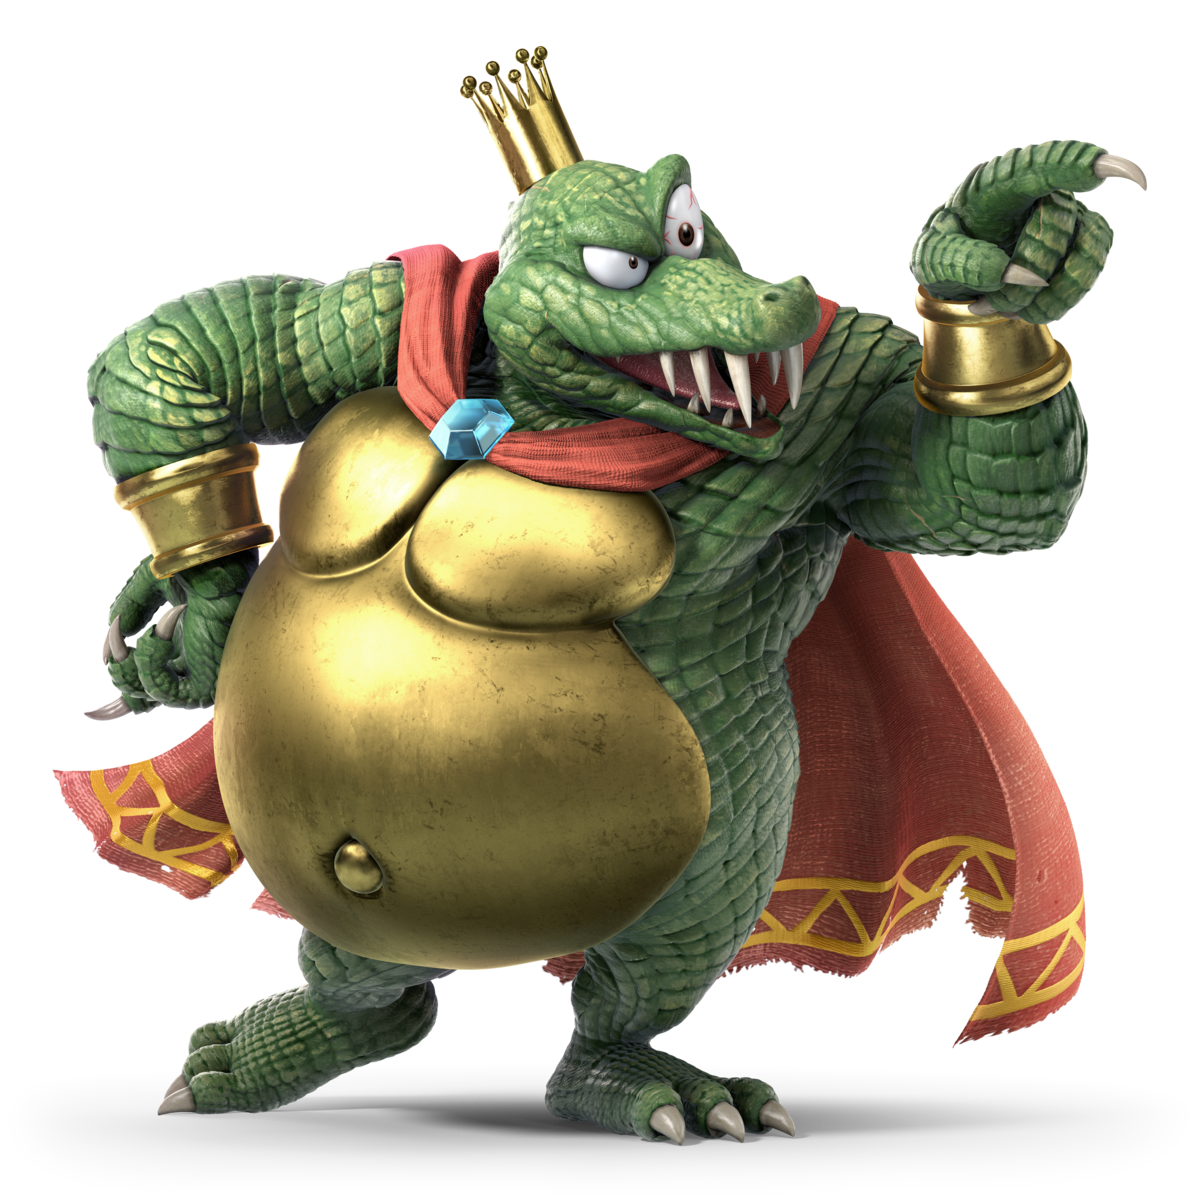
Jab | A left and right hand swipe followed up by a forward kick |
Side Tilt | A quick swipe forwards |
Up Tilt | A swift uppercut |
Down Tilt | A stomp that buries opponents |
Dash Attack | A running jump and stomach bump |
Neutral Air | Stomach protrusion |
Forward Air | Dropkick |
Back Air | Downward Punch |
Up Air | An upward headbutt |
Down Air | Downward two foot kick |
Get Up Attack | A pair of swipes to the sides as K. Rool gets back up |
Side Smash | A straightforward jab with a boxing glove |
Up Smash | An upward headbutt and stomach drop |
Down Smash | A jumping splash |
Neutral Special | A giant, one pellet blunderbuss shot |
Side Special | A crown throw that alters direction like a boomerang |
Up Special | A propeller jetpack that lifts K. Rool to the sky |
Down Special | A counter and reflector that covers K. Rool’s stomach metal |
Forward Throw | K. Rool throws their opponent to the floor, which makes them fly forward. |
Back Throw | K. Rool drags their opponent across the ground and throws them into the opposite direction. |
Up Throw | K. Rool jumps into the air and does a back breaker. |
Down Throw | K. Rool throws their opponent to the ground so hard, it buries them. |
Final Smash | K. Rool lunges forward, launching anyone he hits to DK Island, which he sequentially blows up from his own island with his giant laser. |
Miscellaneous | K. Rool’s belly armor serves as a guard, allowing him to take excess hits to the stomach. If this armor cracks, he will be left vulnerable. |
Isabelle

Jab | A toy hammer strike that can be repeated indefinitely. |
Side Tilt | Isabelle strikes her opponent with an umbrella. |
Up Tilt | Isabelle swings a broom upwards. |
Down Tilt | Isabelle plucks a plant out of the ground. |
Dash Attack | Isabelle trips and drops a potted plant that hits her opponent. |
Neutral Air | Isabelle spins around in the air with a pair of palm-palms. |
Forward Air | Isabelle fires a slingshot pellet in the air. |
Back Air | Isabelle fires a slingshot pellet behind her in the air. |
Up Air | Isabelle swings a turnip upwards. |
Down Air | Isabelle swings a turnip downwards. |
Get Up Attack | As Isabelle gets up, she swings a broom from left to right. |
Side Smash | Isabelle charges up a party popper that damages her opponent upon explosion. |
Up Smash | Isabelle blows a whistle and summons a do-not-enter sign that sends her opponents into the air. |
Down Smash | Isabelle uses a bucket of water and splashes it left and right to damage her opponent. |
Neutral Special | Isabelle pockets a projectile that she can throw right back at her opponent. |
Side Special | Isabelle pulls out a fishing rod and casts a line that can catch her opponent and she can throw them after it catches them. |
Up Special | Isabelle sits on a swing with two balloons carrying her upwards. |
Down Special | Isabelle plants a Lloid Rocket that if the opponent steps on it or Isabelle commands it to, it flies upwards and explodes, damaging the opponent in the air. |
Forward Throw | Isabelle pulls out a butterfly net to catch her opponent, she then throws them forward. |
Back Throw | Isabelle uses her butterfly net to throw the opponent to the opposite side. |
Up Throw | Isabelle uses her butterfly net to throw the opponent upwards. |
Down Throw | Isabelle uses her butterfly net to throw the opponent to the ground, making them bounce off it and into the air. |
Final Smash | Isabelle summons Tom Nook and the gang to build a town hall around their opponent. Upon completion they celebrate, but the Town Hall explodes and launches Isabelle’s opponent away. |
Incineroar
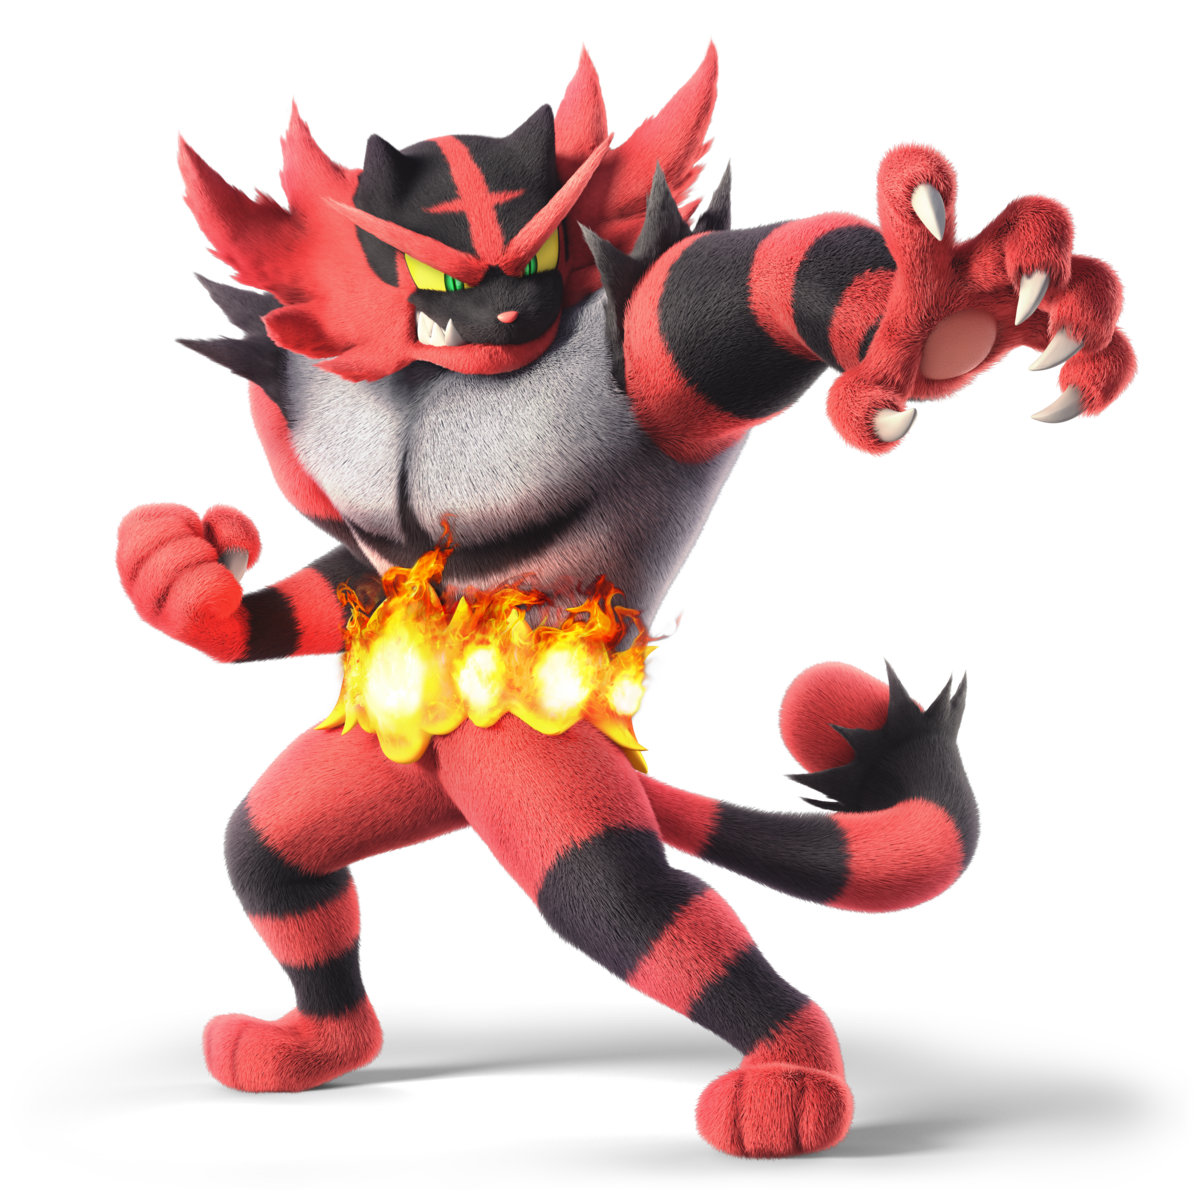
Jab | A chop, knee strike and elbow attack combo. |
Side Tilt | The infamous “Cheeto Fingers” poke. |
Up Tilt | An upwards headbutt in an arc |
Down Tilt | a on the ground leg sweep. |
Dash Attack | A lunging knee forward. |
Neutral Air | Incineroar faces the ground, bumping out his chest while extending his limbs to make his full body a dangerous hitbox. |
Forward Air | An aerial dropkick. |
Back Air | An aerial backwards kick. |
Up Air | A right to left kick above Incineroar. |
Down Air | A two legged stomp dowards capable of spiking opponents. |
Get Up Attack | A claw swipes on each side of Incineroar. |
Side Smash | An incredibly powerful frontal kick. |
Up Smash | Incineroar clasps his fists together before swinging them upwards to cover the area in front of him and above him with one strong swing. |
Down Smash | Incineroar leaps off the ground and belly slams back down. |
Neutral Special | Incineroar starts to wildly spin around in a lariat. This move does more damage if Incineroar hits the opponent as he extends his arms out. Incineroar can move side to side very slightly. |
Side Special | Incineroar charges forward, extending his hand out to grab the first person it makes contact with. The ropes of a ring will spawn behind Incineroar which it will toss the caught foe into. The opponent will then ricochet back to Incineroar, who will then hit the enemy into the sky or with a clothesline that carries the opponent past Incineroar. |
Up Special | In a blazing ball of glory Incineroar will rise up, knocking any foes nearby up with him. Incineroar will then diagonally dive towards the ground, spiking any opponents caught in his way until it either reaches the stage in a fiery explosion or dies trying. |
Down Special | Incineroar puffs out his chest, countering any knockback he would take if it is hit. If the attack is a melee move Incineroar will be knocked away in flames. More importantly, Incineroar gains a stack of “Revenge”. Revenge can be stacked 3 times and is a 1 time use power boost to any of Incineroar’s moves. Revenge is used up if Incineroar takes too much damage or lands an attack. |
Forward Throw | Incineroar spins around before chucking the foe forward and up. |
Back Throw | A suplex that knocks the opponent away |
Up Throw | A backbreaker that hits the enemy upwards. |
Down Throw | A chokeslam into the ground. |
Final Smash | Incineroar performs Max Malicious Moonsault, he starts with rushing forward and grabbing an enemy. He will then take them to a ring and bounce them off the ropes sending them into the sky where Incineroar performs a combo. The Final Smash ends with Incineroar charging into the enemy one last time while engulfing the arena in flames. |
Piranha Plant

Jab | A three hit combo with two leaf attacks followed by a headbutt or a rapid barrage of bites. |
Side Tilt | Two forward bites. |
Up Tilt | Plant violently shakes its head around. |
Down Tilt | A sweep with one of its leaves. |
Dash Attack | Plant flings its pot forward to hit enemies. |
Neutral Air | Plant spins its leaves like a buzzsaw to cut enemies that get too close. |
Forward Air | Plant swings its pot to smack foes in front of it. |
Back Air | Plant spits a close range explosion behind itself. |
Up Air | A back to front upwards headbutt. |
Down Air | Plant swings its pot downward which can spike enemies. |
Get Up Attack | Spins itself around on the ground hitting enemies in the area. |
Side Smash | Plant turns its head into a Prickly Piranha Plant and swings itself forward dealing powerful damage and knockback. |
Up Smash | A chomp towards the sky. |
Down Smash | Plant swings its pot across the floor on both sides of itself. |
Neutral Special | Plant will spit up a spike ball that it will continuously blow in the air. Piranha Plant can choose to fling the ball to the left/right or it can drop the ball. |
Side Special | Plant will begin charging up a poisonous gas that becomes bigger and stronger the longer it’s held. |
Up Special | Plant will spin its leaves like a helicopter to fly in the air and chop up foes in its path. |
Down Special | Plant retreats down into its pot and starts charging up. Plant will then quickly extend its stem and bite the opponent. The longer the attack is charged the further Plant extends its stem. |
Forward Throw | Headbutts the enemy away. |
Back Throw | Bites the opponent and flings them behind itself. |
Up Throw | Throws the enemy up and bites the enemy, forcing them upwards. |
Down Throw | Throws the enemy down and bites them twice. |
Final Smash | Summons Petey Piranha who sticks adjacent enemies inside cages while he flings them around. |
Miscellaneous | If Plant is stepped on while crouching it will bite the enemy. |
Joker
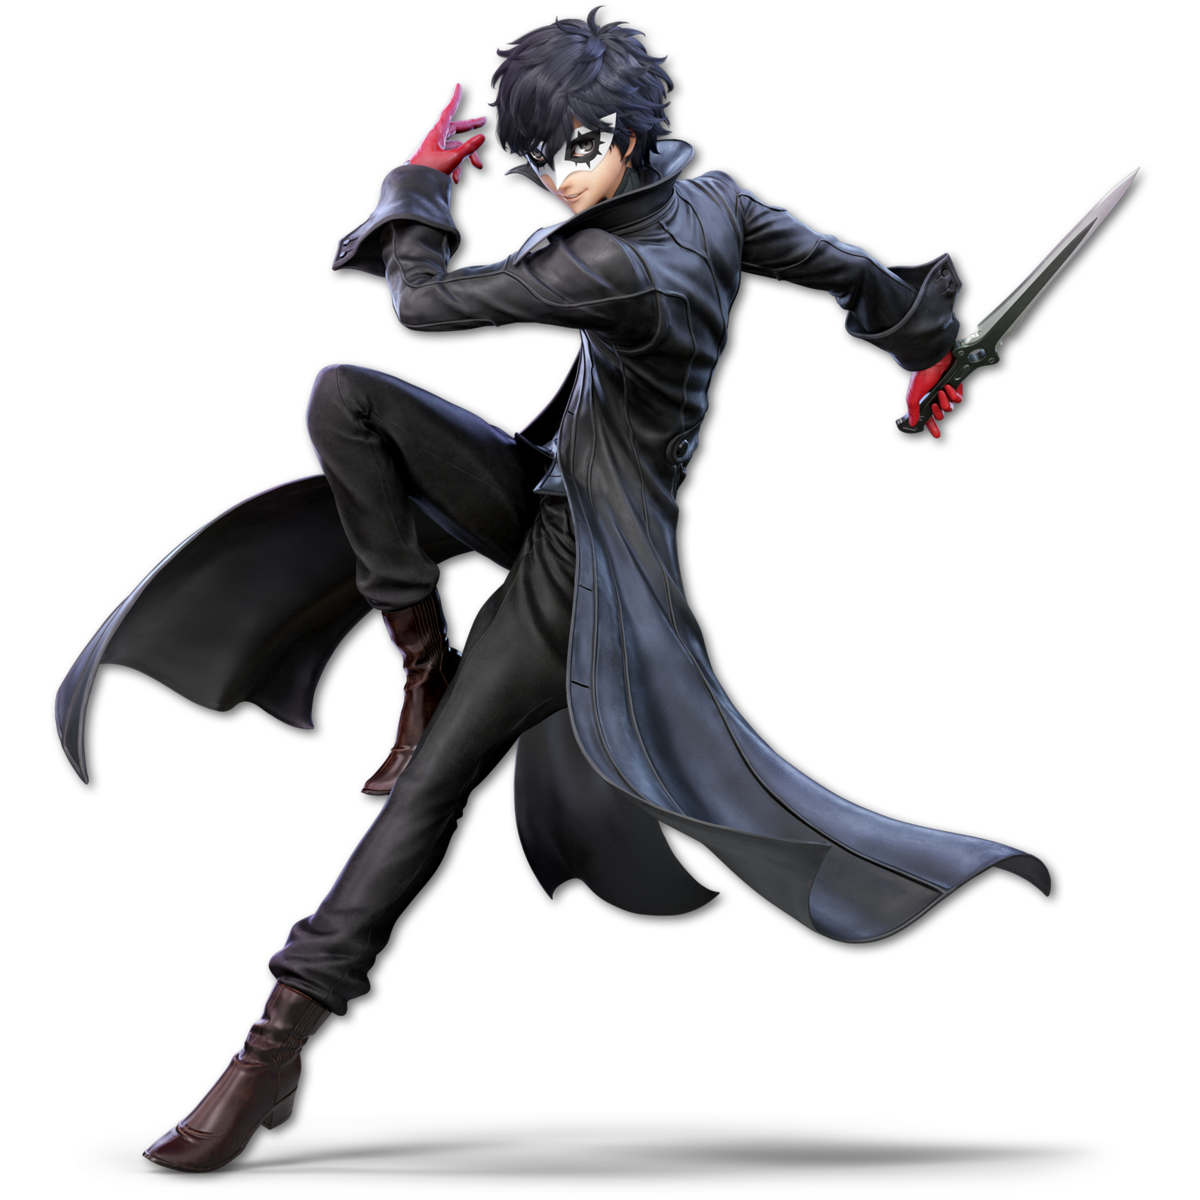
Jab | Three quick knife attacks. |
Side Tilt | Two stabs with his knife. |
Up Tilt | Joker throws his knife up |
Down Tilt | Joker slides forward. |
Dash Attack | Joker does two running kicks forward. |
Neutral Air | Joker spins around with his knife. |
Forward Air | Two aerial kicks forward. |
Back Air | A low to high knife slash. |
Up Air | A multi-hit drill kick facing upwards. |
Down Air | Joker slashes his knife in an arc below him. |
Get Up Attack | A knife strikes in both side directions. |
Side Smash | Joker does a large knife slash forward. |
Up Smash | A low to high Knife slash that hits in front of Joker and goes above him. |
Down Smash | Joker sweeps his knife low to the ground and on both sides of him. |
Neutral Special | He wields a gun. He can jump in the air while shooting it allowing him to fire straight down or in a wheel shape. With Arsene the gun becomes stronger and fires new bullets. |
Side Special | Joker fires an energy bolt that deals damage to an enemy overtime. With Arsene the move deals more damage, is faster and is multi-hit when it connects. |
Up Special | Throws a grappling hook diagonally upwards to grab enemies and ledges. With Arsene active Joker flies up using Arsene’s wings. |
Down Special | Joker grips his mask ignoring all knockback while gaining extra Rebellion Gauge charge. Once Arsene is out this acts as a melee counter move. |
Forward Throw | Chucks his enemy away with blue energy. |
Back Throw | Trips the enemy over his leg ending them behind him. |
Up Throw | Flings the enemy high into the sky. |
Down Throw | Throws the enemy down with devious amounts of aura. |
Final Smash | Joker dashes and slashes, sending anyone caught into his All-Out Attack, which summons random members of the Phantom Thieves to finish off their opponents in style. If the opponent is over 100%, it instantly kills them. |
Miscellaneous | When Joker takes damage he builds up his “Rebellion Gauge” which also builds up overtime. Once the bar is full Joker uses his Persona, Arsene, who buffs his regular moves with more damage, electrical properties or extra hits. This also alters his special moves and how they work. |
Hero
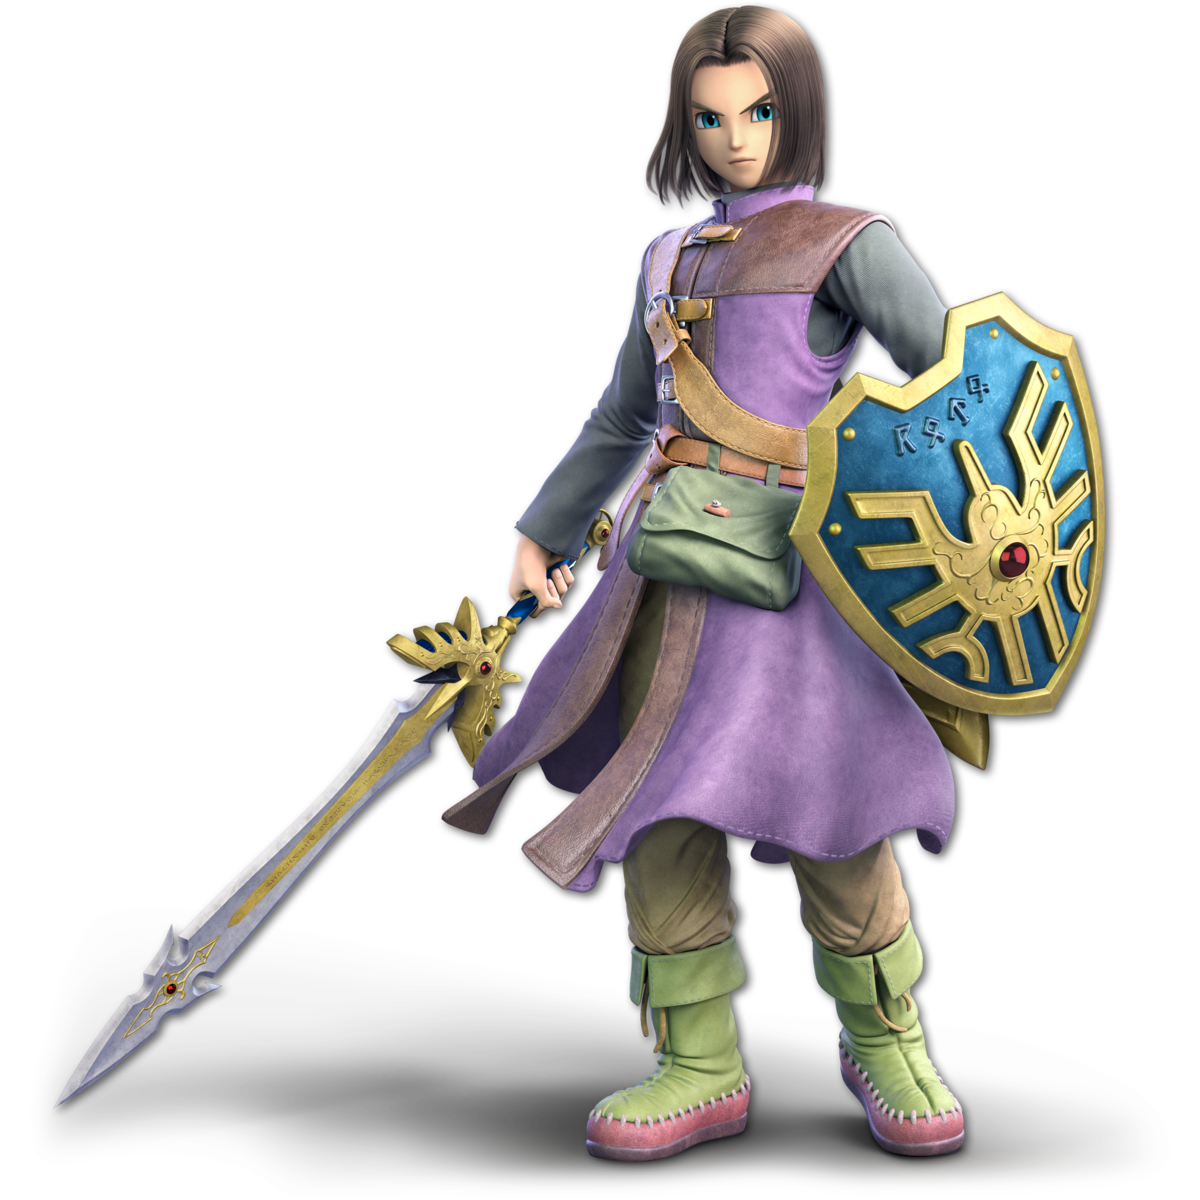
Jab | A series of vertical sword slashes. |
Side Tilt | A shield bash, followed by a quick horizontal sword slash. |
Up Tilt | A large upwards arc swing with the Hero’s sword. |
Down Tilt | A forwards aiming kick to hit those low to the ground. |
Dash Attack | Hero rushes forwards and leaps, blade drawn. This move has wide range and deals impressive damage, though it can be a bit on the slow side. |
Neutral Air | A quick spinning slash around Hero on all sides. |
Forward Air | A direct downwards slash forwards. |
Back Air | An upwards slash behind Hero, catching those behind him with ease. |
Up Air | An upwards kick to catch those above Hero, surprisingly quick. |
Down Air | A powerful downwards stab with the Hero’s sword to slash below him. Deals a Meteor Smash if landed successfully. |
Get Up Attack | A slash to both sides as the Hero gets up. |
Side Smash | A powerful downwards slash in front of the Hero. It can occasionally be a Critical Hit. |
Up Smash | A direct upwards stab to the air above, it can sometimes be a Critical Hit. |
Down Smash | A pair of slashes to the sides of Hero, both of them can sometimes be Critical Hits. |
Neutral Special | A fire attack known as Frizz, it is a relatively standard fire projectile. It can be charged up into the more powerful Frizzle or Kafrizz, drastically increasing its might. |
Side Special | A forwards aiming electric attack known as Zap. This can be given more range and power if charged slightly into Zapple, or it can be turned into an extremely powerful sword spin attack with Kazap, an immensely dangerous strike that can easily take stocks should it land. |
Up Special | Woosh summons a small gust below the Hero to launch him into the air, also damaging those hit by the winds. It can also be charged into Swoosh or Kaswoosh to power up this gale and summon two tornadoes below the Hero, as well as attaining more height from the launch. |
Down Special | Hero activates the Command Selection to utilize a number of spells.
Bang - A small explosion projectile that deals some damage. Kaboom - An extremely dangerous explosion projectile that sucks opponents in before dealing noteworthy damage and potentially KOing. Sizz - A quick fire projectile that rushes forwards. Sizzle - A faster, stronger fire projectile known for being extremely quick. Flame Slash - A powerful and quick slashing attack with the Hero’s sword, now with fire added to it. Kacrackle Slash - Another slashing attack, now with ice powers. Can freeze opponents, leaving them wide open to further damage. Hatchet Man - A move with an extremely lengthy start-up, but crushing and devastating damage should it hit. Easily capable of taking stocks and also breaking shields. Snooze - A projectile attack that will put victims to sleep should they be hit by it. Whack - An extremely dangerous projectile. While it deals little damage and knockback, it has the potential to immediately KO the victim, with the possibility of this increasing the more damage the target has. Thwack - A stronger and deadlier version of Whack. While it doesn’t move forwards, it has a wider area of effect and can hit a larger area, and the odds of it KOing immediately are better. Metal Slash - A quick and simple sword slash that does pretty much nothing normally. If the victim is metal, however, then they’re dead. Simple as that. Kaclang - The Hero turns metal for a while, no-selling all manner of attacks for the move’s duration. Has horrible ending vulnerability though and if there’s another Hero on the field then you better hope they don’t get Metal Slash on their selection. Kamikazee - Hero explodes and dies. No, really. The Hero immediately self-destructs and loses a stock, but deals extremely potent damage to those caught in the blast, potentially taking everyone out with him. Magic Burst - The Hero unleashes a massive explosion all around him using all of his magic points. The more MP Hero has, the bigger and stronger the blast, though this leaves Hero without any magic. Oomph - Buffs Hero’s power for about 12 seconds, dealing more damage and knockback. Psyche Up - Buffs Hero’s power for a single hit, making said attack stronger when it connects. Accelerate - Buffs Hero’s speed massively for 10 seconds, making it easy to get around the battlefield. Bounce - Passively reflects any and all projectiles that hit Hero for about 12 seconds. This can be used in tandem with other attacks, making it a great way to ruin any zoner’s day. Heal - Does exactly what you would think it does. Zoom - Hero whooshes away to a random spot on the map. Great for recoveries or for getting out of a jam in general. Hocus Pocus - Causes a random effect. It may do something good, like make Hero invincible, huge, or restore his MP. But it will more often do something bad, like shrink him, slow him down, put him to sleep, or place a very lovely flower on his head that deals passive damage. Or it might just use a random spell for 4 MP. |
Forward Throw | Hero throws their opponent forwards. |
Back Throw | Hero throws their opponent to the opposite side, Judo Style. |
Up Throw | Hero throws their opponent upwards. |
Back Throw | Hero jumps down and bashes their opponent to the ground on the way down. |
Final Smash | With one swing of their sword, Hero summons multiple Dragon Quest characters to deliver a powerful blow known as Gigaslash. |
Miscellaneous | The Hero has a unique Magic Points system for his special moves. These can be used to fire off attacks or power them up, with each move having a set cost. Additionally, the meter passively refills or can be filled up faster by landing attacks. |
Banjo & Kazooie
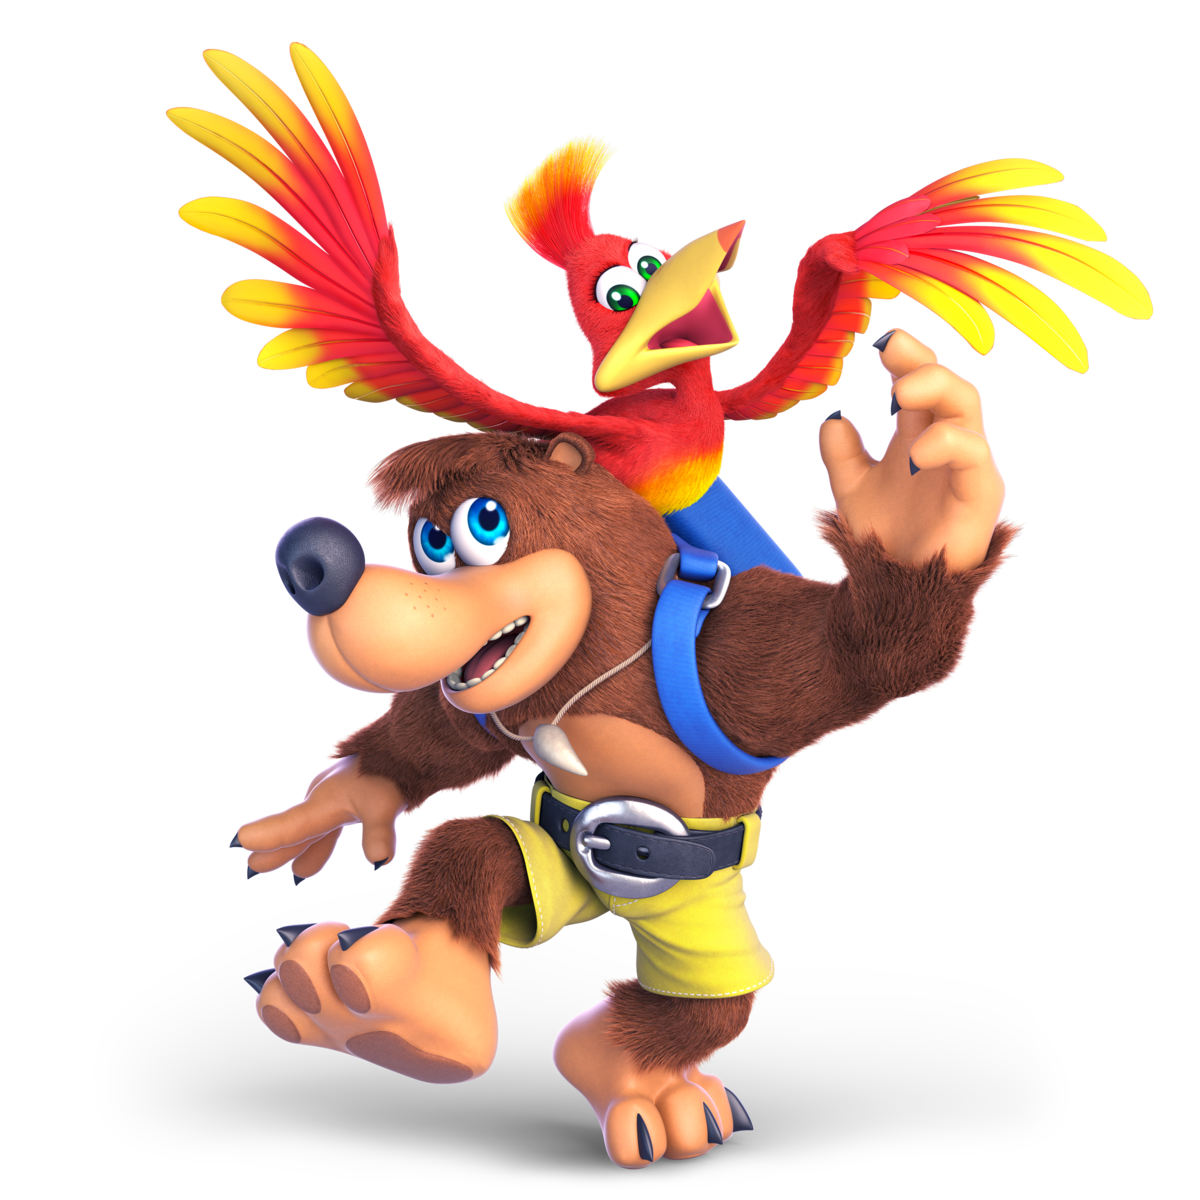
Jab | A three hit punch combo that can include a rapid peck attack from Kazooie in the middle. |
Side Tilt | Banjo uses Kazooie’s beak to stab enemies. |
Up Tilt | Kazooie puts her feet on the ground so Banjo can do an upwards kick. |
Down Tilt | Kazooie does a low to the ground peck that moves her and Banjo forward slightly. |
Dash Attack | A roll forward. |
Neutral Air | Kazooie spins her wings around like a helicopter which hits all enemies around her and Banjo. |
Forward Air | Banjo does an overhead punch that hits enemies in front of him. |
Back Air | Kazooie does a few pecks behind Banjo. |
Up Air | Kazooie claps her wings together to hit foes above the duo. |
Down Air | Banjo and Kazooie start a rapid descent from the sky with Kazooie falling beak first to poke anyone in their drop path. This move is capable of spiking people if landed properly. |
Get Up Attack | Banjo performs a kick on both sides of him. |
Side Smash | Banjo slams Kazooie down like a hammer in front of himself. |
Up Smash | Kazooie begins spinning upwards dealing multiple hits of damage with strong knockback. |
Down Smash | Kazooie slams both of her wings down to the left and right of Banjo. |
Neutral Special | Kazooie shoots an egg from her mouth. Banjo can then take Kazooie out of the backpack and have her rapidly fire eggs from her mouth while moving. |
Side Special | Kazooie uses her wings to shield Banjo as they charge forward dealing massive damage and knockback. This move can only be used 5 times per stock. |
Up Special | A Shock Spring Pad platform materializes beneath Banjo who jumps on it to propel himself into the air. The move can be charged to increase the height Banjo goes up. |
Down Special | Kazooie fires out a grenade egg behind Banjo. Banjo can quickly pick this egg up and throw it at the opponent or he can simply face away as the egg goes towards the enemy. |
Forward Throw | Banjo holds the enemy as Kazooie kicks them away. |
Back Throw | Banjo spins around a few times before throwing the opponent behind him and Kazooie. |
Up Throw | Banjo tosses the enemy up leading to Kazooie pecking the foe into the air. |
Down Throw | Banjo picks the enemy up before slamming them into the ground hard enough to bury them in the floor. |
Final Smash | This dynamic duo summons The Mighty Jinjonator, a statue that charges and slams into the opponent. |
Miscellaneous | Kazooie can use her wings to give Banjo an extra third jump. |
Terry
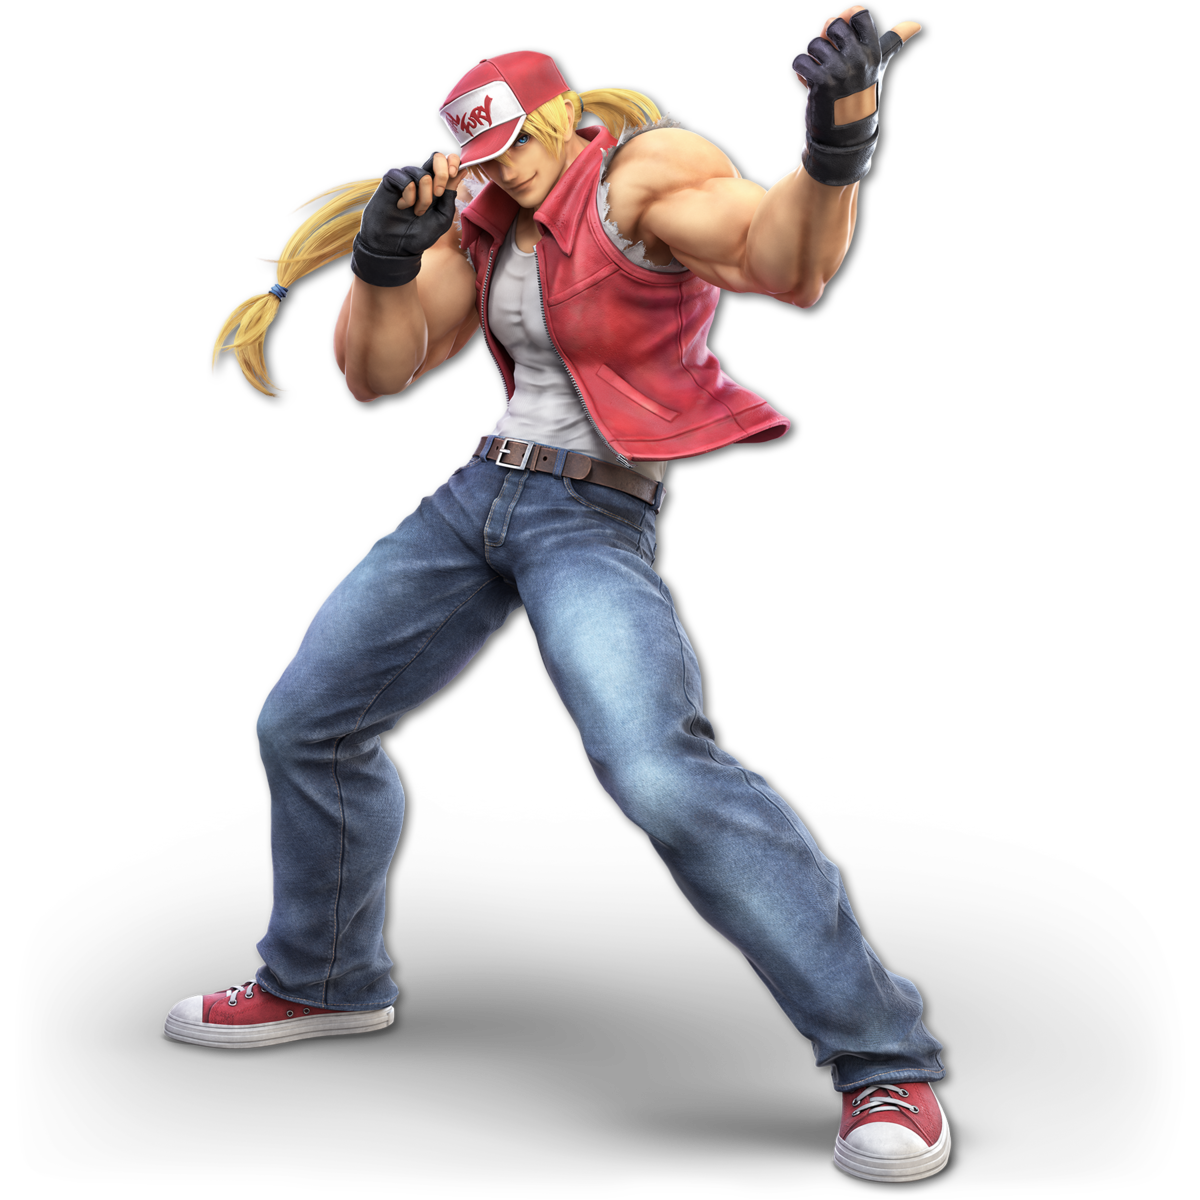
Jab | Terry does two punches and then a kick. |
Side Tilt | Terry does a quick little kick. |
Up Tilt | Terry does a slight uppercut. |
Down Tilt | Terry jabs his foot forward on the ground. |
Dash Attack | Terry does his shoulder block, hitting his opponent with an attack with his shoulder as he charges at them. |
Neutral Air | Terry chops downward in the air. |
Forward Air | Terry does a jump kick. |
Back Air | Terry does a kick that goes backwards. |
Up Air | Terry does a backflip style kick. |
Down Air | Terry punches downward, which can potentially spike his opponent. |
Get Up Attack | As Terry gets up, he does two kicks from left to right. |
Side Smash | Terry charges up a roundhouse kick. |
Up Smash | Terry charges up an uppercut. |
Down Smash | Terry charges up a kick that goes slightly upward on the ground. |
Neutral Special | Terry uses Power Wave, where he punches the ground to fire a wave of energy that travels across the ground. |
Side Special | Terry performs Burn Knuckle, where he charges forward with a punch that can launch his opponent. Using a quarter forward command input, Burn Knuckle becomes stronger and goes farther. |
Back Side Special | Terry performs Crack Shoot, where he spins his whole body in a front flip to do a kick. Using a quarter back command input, Crack Shoot becomes even stronger. |
Up Special | Terry performs Rising Tackle, where he spins his whole body upward with a kick. Using the command input, down charge then up, Rising Tackle becomes even stronger. |
Down Special | Terry performs Power Dunk, where he jumps up and comes back down with a punch that can cause a light explosion onto the ground. |
Forward Throw | Terry picks up the opponent and slams them onto the ground as they fly forwards. |
Back Throw | Terry picks up the opponent and slams them onto the ground as they fly backwards. |
Up Throw | Terry does an uppercut that launches the opponent upwards. |
Down Throw | Terry does a suplex that makes the opponent fly once they hit the ground. |
Final Smash | Terry starts his final smash using Power Geyser a total of three times. Once his opponent is caught in it, Terry follows it up with Power Dunk and finishes it off with Buster Wolf. |
Miscellaneous | Once at 100% damage, Terry’s GO Meter activates, gaining access to two super special moves. The first one Terry gets access to is Power Geyser, using the quarter back to half circle motion, Terry punches the ground, causing a massive explosion. Terry’s second super special move is Buster Wolf, using the double quarter forward motion, Terry charges forward and hits his opponent with Buster Wolf, which when caught in it, launches them far back. |
Byleth
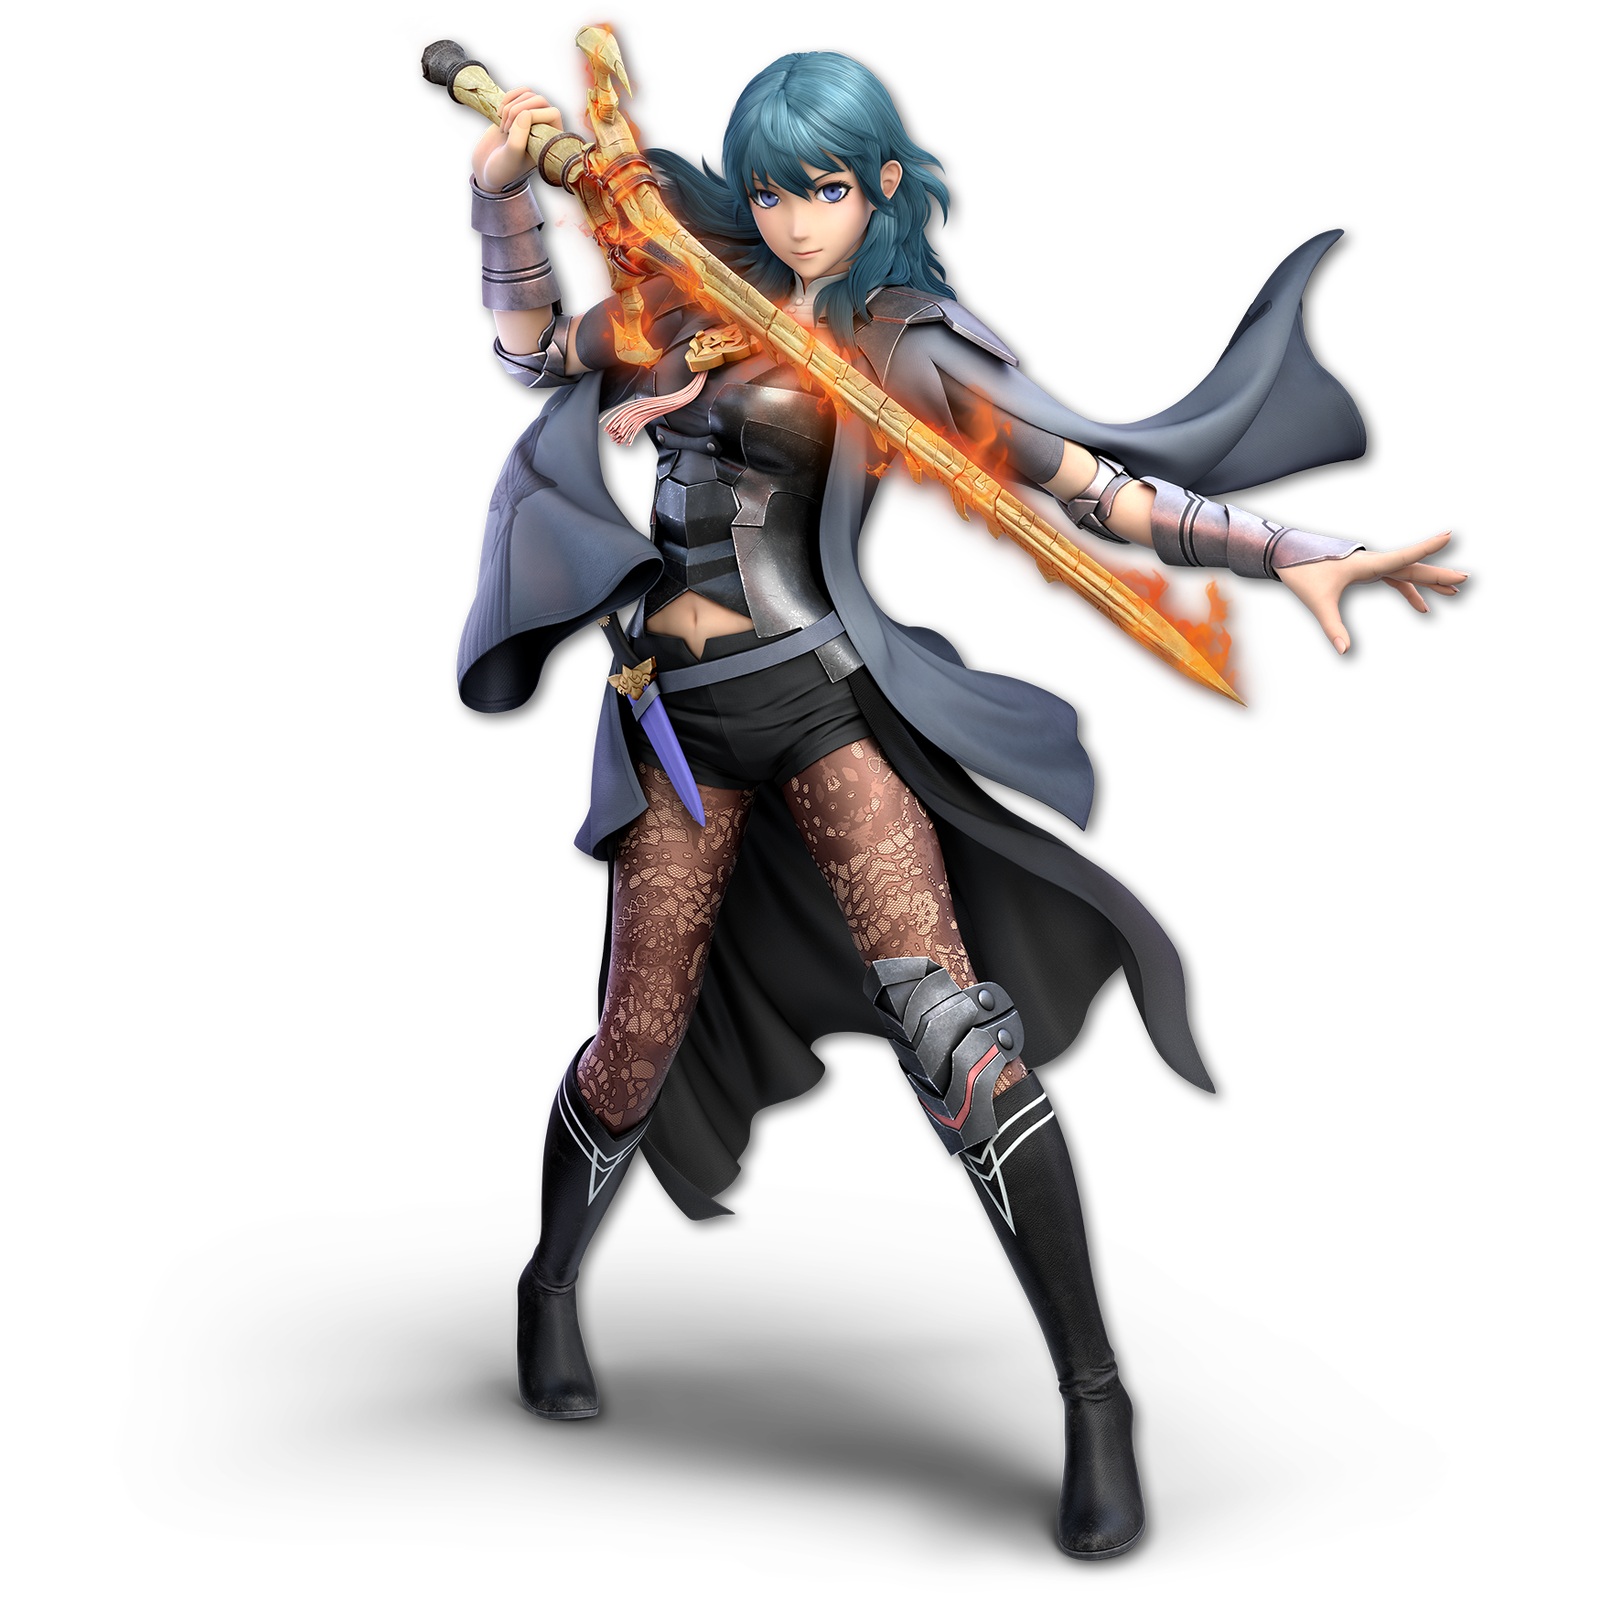
Jab | A chop followed by two kicks or rapid sword swings. |
Side Tilt | A simple sword slash. |
Up Tilt | An upwards front to back sword attack. |
Down Tilt | A low angled whip attack. |
Dash Attack | A lunging sword swing. |
Neutral Air | Byleth spins Failnaught around for multiple hits of damage that surround them. |
Forward Air | A frontal smack with Areadbhar. |
Back Air | A backwards stab using Areadbhar. |
Up Air | A whip cyclone above Byleth. |
Down Air | A strong but slow swing from Aymr capable of spiking enemies towards the ground. |
Get Up Attack | A sword slash that is swept across both sides of Byleth. |
Side Smash | A powerful thrust with Areadbhar. |
Up Smash | A multi-hit whip cyclone from the Sword of the Creator. |
Down Smash | Two Aymr strikes left and right of Byleth. |
Neutral Special | Byleth charges up an arrow from Failnaught. The longer it’s charged the faster the arrow flies and the stronger it is. |
Side Special | A low to high sweep of Areadbhar that covers a large area in front of Byleth. |
Up Special | Byleth extends the Sword of the Creator out diagonally like a grappling hook. This tethers Buleth to a ledge in range or an enemy hit by the tip of the sword. If an enemy is hit Byleth will jump off of them while spiking the target downwards. |
Down Special | Byleth readies Aumr for a powerful strike before slamming the axe down. Byleth is unable to be flinched by most regular attacks while reading Aymr. |
Forward Throw | Byleth slashes the enemy away with their sword. |
Back Throw | Byleth spins the foe around before tossing them backwards. |
Up Throw | Byleth pushes the enemy into the sky using the Sword of the Creator. |
Down Throw | Byleth whips the enemy using their sword hitting them a short distance away. |
Final Smash | Byleth hits their opponents with their whip, delivering a powerful attack empowered by Solthis. |
Min Min
Jab | Min Min throws a punch from her left arm that extends across the stage. |
Side Tilt | Min Min throws a punch from her left arm that extends across the stage, only this time she walks forward slightly. |
Up Tilt | Min Min does a flip kick. |
Down Tilt | Min Min does a slide kick. |
Dash Attack | Min Min does a running jump kick. |
Neutral Air | Min Min swings her whole left arm in a 180 degree arc. |
Forward Air | Min Min throws a punch from her left arm that extends across the stage in the air and a laser beam fires out from the dragon on that arm. |
Back Air | Min Min throws a punch from her left arm that extends across the stage in the air from behind her and a laser beam fires out from the dragon on that arm. |
Up Air | Min Min does a flip kick in the air. |
Down Air | Min Min does a descending stomp attack. |
Get Up Attack | As Min Min gets back up, she sweeps her left arm from left to right. |
Side Smash | Min Min charges up her left arm and it extends across the stage to do a lot of damage. |
Up Smash | Min Min charges up a flip kick that sends her opponents up into the air. |
Down Smash | Min Min charges up and does a split kick that hits both left and right. |
Neutral Special | Min Min does a punch between one of her three right arm modes. |
Side Special | Min Min essentially does a Smash attack with one of her three right arms, delivering even greater damage with them. |
Up Special | Min Min uses both of her arms to bounce extremely high. The direction can be angled. |
Down Special | Min Min can swap her right arm into three different modes, Ramram, Megawatt, and Dragon Ramram: it’s fast and easy to bend, almost like a boomerang, but it doesn’t do a whole lot of damage. Megawatt: while it may be slow, it packs a massive electrical punch. Dragon: the same mode her left arm has, essentially Min Min gets to have dual dragon arms. It has the longest range out of Min Min’s three arms since it can shoot a laser. |
Forward Throw | Min Min reaches out both of her arms to grab the opponent. She then push kicks her opponent forward. |
Back Throw | Min Min does a backwards suplex, sending her opponents into the opposite direction. |
Up Throw | Min Min uses both of her feet to kick the opponent into the air. |
Down Throw | Min Min puts the opponent onto the ground and brings a kick down that makes them bounce into the air. |
Final Smash | Min Min starts her final smash by punching her opponent, she then summons all the Arms fighters to punch their opponent as Min Min finishes it off by charging up a laser from her left arm that delivers a devastating final blow. |
Steve
Jab | A slash from a sword that can be continuously done over and over. |
Side Tilt | Same as his jab. |
Up Tilt | A series of continuous overhead axe chops. |
Down Tilt | Steve uses a FLINT AND STEEL to create a small fire that lingers for a short period of time. Being hit with this fire traps you in multiple hits of damage and if the fire is lit off an edge it will fall down while burning. |
Dash Attack | Steve lunges forward while swinging his pickaxe forward. |
Neutral Air | An aerial sword slash. |
Forward Air | A frontal pickaxe attack that can spike opponents. |
Back Air | A backwards facing pickaxe swing. |
Up Air | Steve swings his axe upwards but in the air. |
Down Air | Steve uses iron to create an anvil which he cartoonishly drops on his enemies for high damage. |
Get Up Attack | A quick sword slash done forwards and backwards. |
Side Smash | A powerful sword swing. |
Up Smash | Steve places a magma block above his head. Any foes caught in this block will be hit for multiple chunks of damage before being launched away when Steve mines the block. |
Down Smash | Steve drops LAVA in front of him before picking it up and dropping it behind himself for strong damage. |
Neutral Special | Steve pulls out a pickaxe, axe or shovel to mine the ground or the wall next to him. Doing this grants Steve different materials such as dirt, wool, ice, wood, stone, iron, gold, diamond and redstone. This special changes if Steve is mid-air while performing the move. In the air Steve will place a block out of his materials starting from the lower levels and ending with higher level materials. The level of material will determine how durable the block is. Blocks can break due to physical damage and will wither down overtime. Blocks can be chained together into other blocks to create platforms and vertical walls. |
Side Special | Steve uses iron to create a minecart, propelling himself across the stage. To continue moving the cart on the ground Steve will use his weaker materials to create rails to guide the minecart. Running into an enemy with the minecart does decent damage and knockback. Steve can also hop out of the minecart which will trap someone in the minecart if they are hit by it. Steve can also hop back in the minecart himself if he wishes to continue using it. The final thing Steve can do is use gold and restore to create redstone rails, which cause the Minecraft to move much faster and hit much harder. |
Up Special | Steve uses an ELYTRA and a firework to rocket himself in a given direction. If someone is close to Steve during the rocketing off they will be hit for a small amount of damage. After rocketing off Steve can float around and swoop in the skies until he touches solid ground or a wall. |
Down Special | Steve uses materials to plant a block of TNT down. He can then place down a trail of redstone and a pressure plate connected to the TNT. Hitting the pressure plate or TNT enough will cause it to explode dealing massive damage to its surroundings. Both Steve’s lava, FLINT AND STEEL or any fire attack will activate the TNT automatically as well. |
Forward Throw | Steve uses a fishing rod to extend his grab range. Once grabbed the opponent is trapped in a fence. Steve’s forward throw summons in a piston block that pushes the enemy away. |
Back Throw | Steve flings the opponent away behind him with the fishing rod. |
Up Throw | Steve creates a piston under the foe that pushes them up. |
Down Throw | Steve uses iron to create an anvil above the person he has grabbed, crushing them. |
Final Smash | By placing down a piston, Steve launches his opponent through a metal door and into a room. It’s revealed to be filled with TNT, Zombies, and Creepers, causing one large explosion as Steve eats his meat. |
Miscellaneous | On stage Steve will spawn a CRAFTING TABLE wherever he is that he can use to upgrade his tools. He will need to do this throughout the match as each of his tools have durability that must be kept up and upgrading his tools with different ores will increase their power and other attributes like speed with gold. Steve also has a bar of resources that obtains randomly generated resources based on what he is mining. The odds of getting certain materials can vary based on the surface Steve is mining. As the saying goes, First we mine… Then we craft. |
Sephiroth
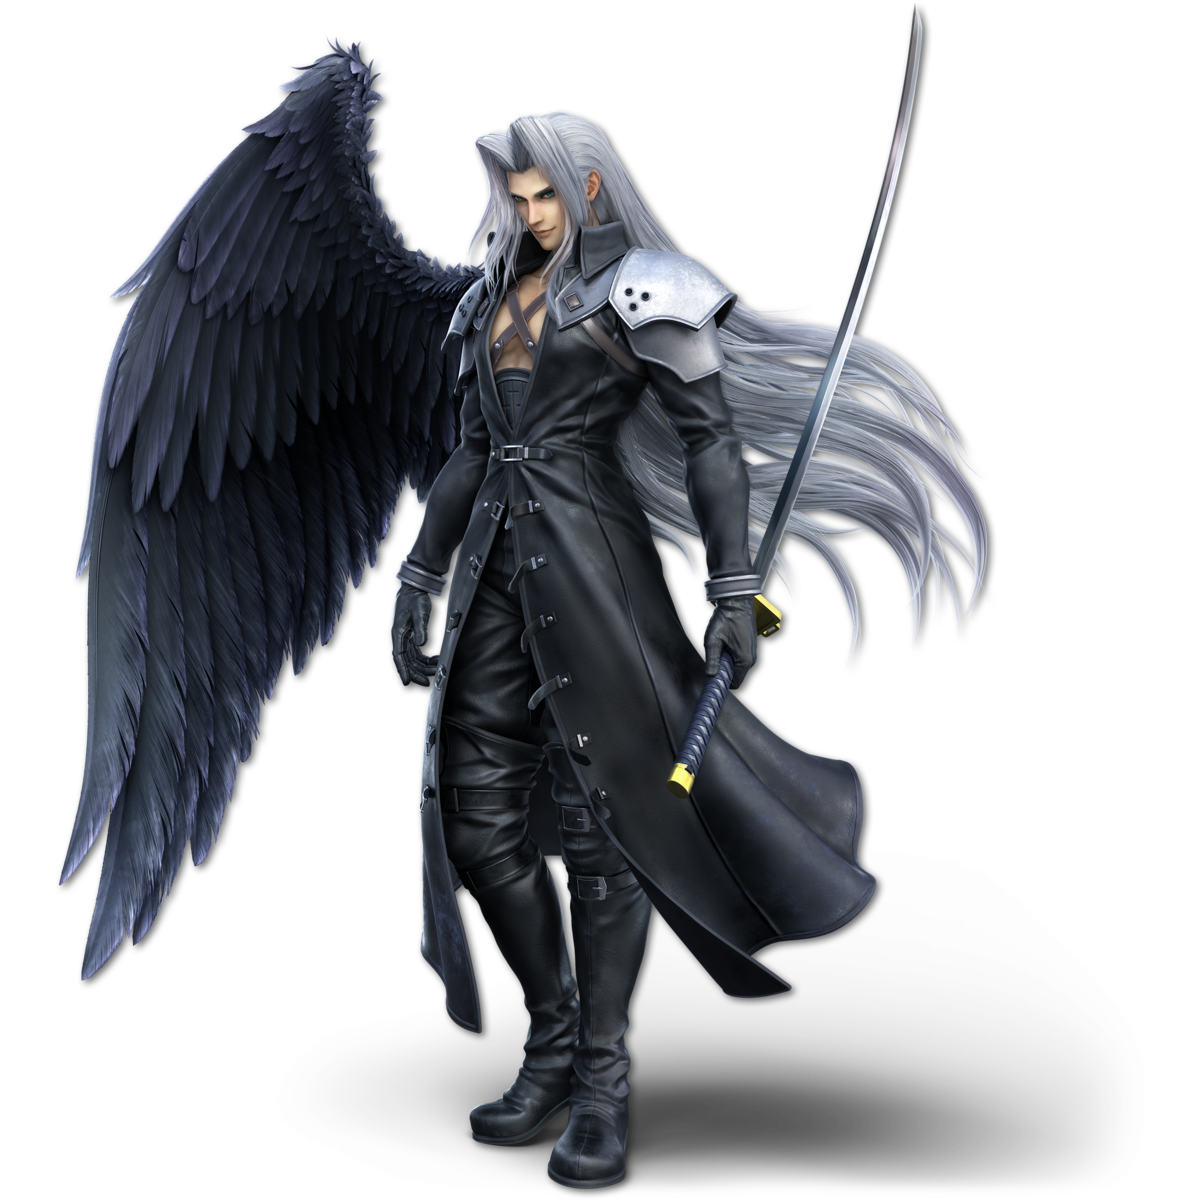
Jab | A three hit combo with two kicks an attack using the hilt of Sephiroth’s sword. |
Side Tilt | A frontal sword slash. |
Up Tilt | Sephiroth does a small slash that goes vertically up, stabbing enemies close by and above. |
Down Tilt | Sephiroth slides forwards with a kick. |
Dash Attack | A forward dash where Sephiroth fuels his hand with magic to hit his foes. |
Neutral Air | Sephiroth creates a burst of magic around himself to damage all those around him. |
Forward Air | A front facing sword stab that can pierce into walls to help propel Sephiroth upwards. |
Back Air | A backwards sword slash in mid-air. |
Up Air | An upwards sword slash done in an arc. |
Down Air | Sephiroth plunges downward sword-first to stab and spike the opponent. |
Get Up Attack | Two low kicks on both sides of Sephiroth. |
Side Smash | A wide sword swing to slash down even the strongest of foes. |
Up Smash | A wide, overhead sword slash. |
Down Smash | Sephiroth plunges his sword into the ground doing high damage to shields. |
Neutral Special | Sephiroth charges up a fireball in his hand before releasing it. The fireball has 3 forms. Flare which is a medium slap and damage projectile. Megaflare is faster and does more damage. Gigaflare is the final form of the attack which moves slow but has massive area damage. |
Side Special | Sephiroth fires a small projectile that can be held to charge up. Holding the attack down for long will increase the amount of Shadowflares surrounding an opponent on contact. The max amount of Shadowflares someone can have orbiting them is 5 and after a set period of time all the Shadowflares the target currently has on them will detonate for powerful damage. |
Up Special | Sephiroth does a quick sword slash in any direction. He also can do a slower move that slashes 8 times called Octaslash. |
Down Specialist | Sephiroth puts up a barrier capable of countering attacks. Hit will immediately activate against any attack for strong damage but will also attack on its own for much less damage. However, the barrier can be broken through with high damages or grabbed out of. |
Forward Throw | After grabbing a foe with telekinesis, Sephiroth creates a magical explosion that sends the opponent forward. |
Back Throw | Sephiroth teleports the opponent behind him before crushing them with his telekinesis. |
Up Throw | An upwards toss followed by a sword slash. |
Down Throw | Sephiroth pushes the enemy into the floor before bouncing them away. |
Final Smash | With one slash of his blade, Sephiroth transfers any hit opponents into an illusion where he becomes Safer Sephiroth. Sephiroth then uses Supernova, a blast that destroys the sun and cracks the planet open. This can inflict different status effects on you. |
Miscellaneous | When put at a big enough disadvantage Sephiroth will unleash his Winged form. In this form Sephiroth is stronger, faster, has super armor on the start of his Smash Attacks and can do an extra jump in the air. |
Pyra & Mythra
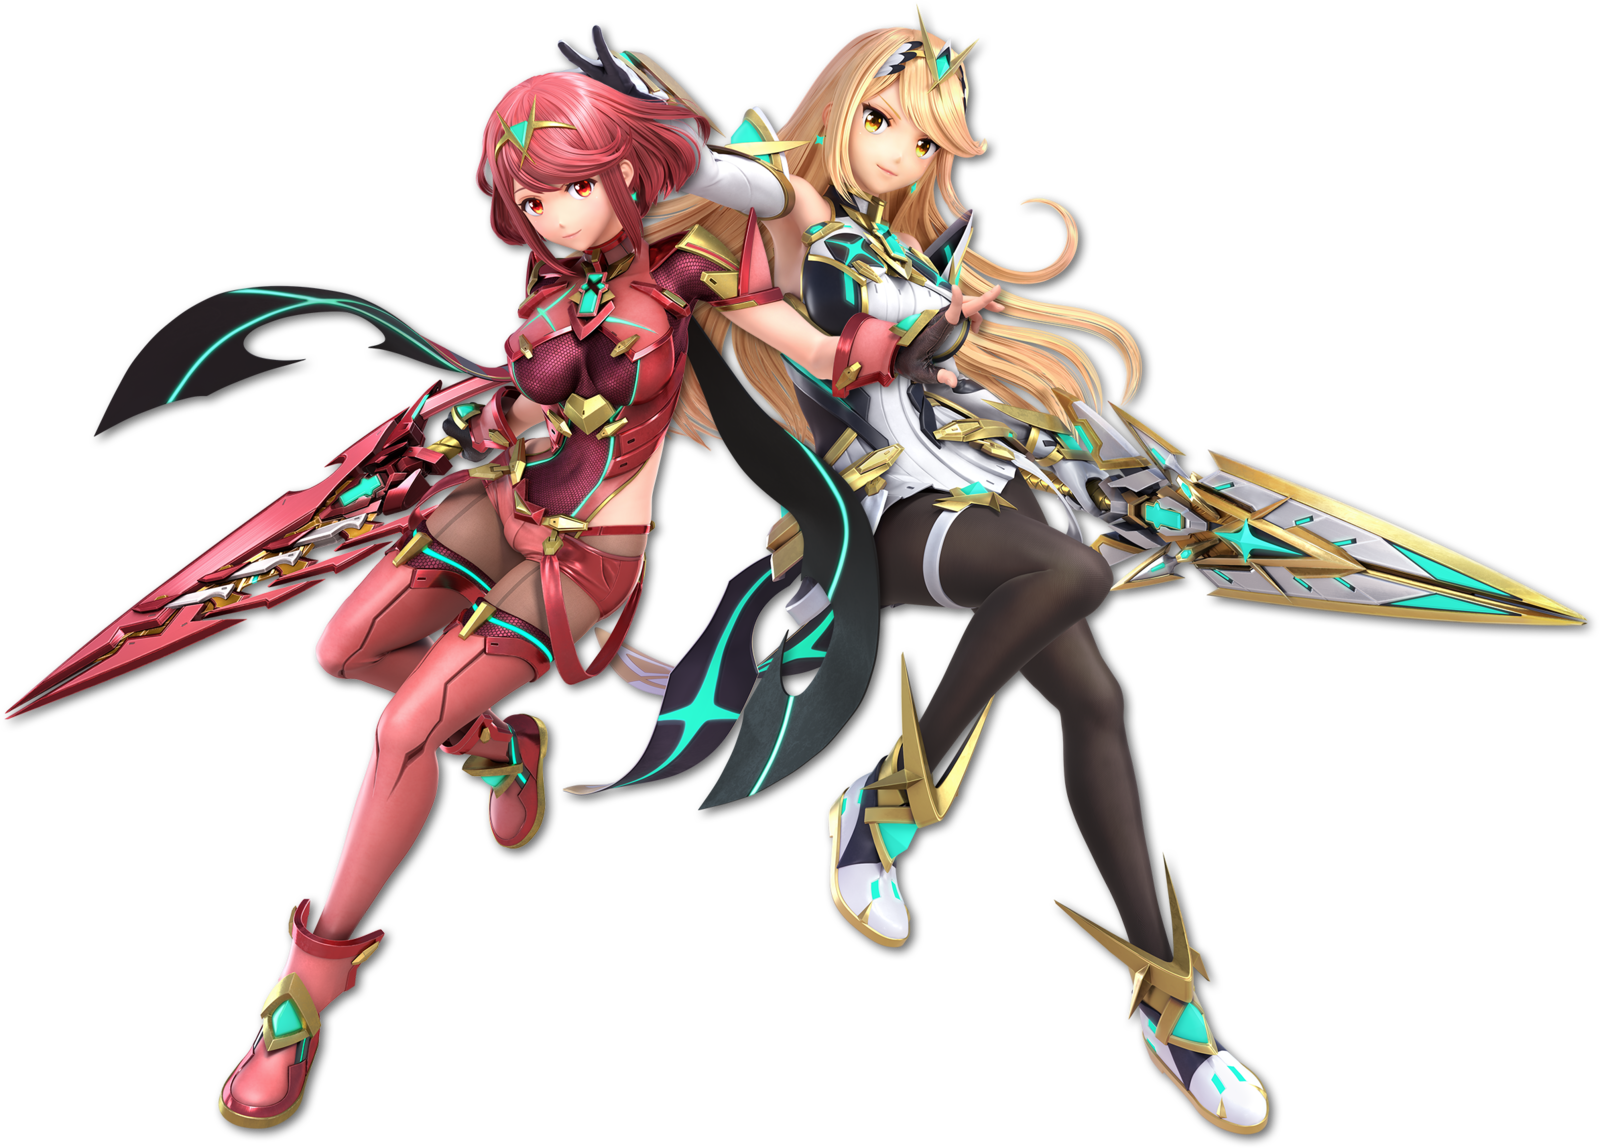
Jab | Pyra does a punch, then two sword swipes with the Aegis, Pyra also can use fire to hit the opponents multiple times. Mythra has the same attack, only instead of fire, it’s light. |
Side Tilt | Pyra and Mythra do a downward swipe of the Aegis. |
Up Tilt | Pyra and Mythra do an overhead horizontal swipe of the Aegis. |
Down Tilt | Pyra and Mythra do a ground sweep with the Aegis. |
Dash Attack | Pyra and Mythra do a dashing swipe with the Aegis. |
Neutral Air | Pyra and Mythra spin the sword in the air multiple times, delivering multiple hits. |
Forward Air | Pyra and Mythra do a forward vertical slice in the air. |
Back Air | Pyra and Mythra do a backward vertical slice in the air. |
Up Air | Pyra and Mythra do an upward overhead slice. |
Down Air | Pyra and Mythra do a full slice downwards. |
Get Up Attack | As Pyra and Mythra get up, they do two slices with the Aegis from left to right |
Side Smash | Pyra does a smash flare as she slams the Aegis onto the ground in a fiery explosion. Mythra does something similar, only it’s a more basic downward slash. |
Up Smash | Pyra and Mythra spin the Aegis in a circle holding it up to the air. |
Down Smash | Pyra and Mythra spin onto the ground, doing slashes with the Aegis in a circular motion. |
Neutral Special | Pyra performs Flame Nova, spinning the Aegis around in a fiery whirlwind. Mythra performs Lightning Buster, charging up the Aegis and swiping it a number of times. |
Side Special | Pyra performs Blazing End, throwing the Aegis forward as it spins in a circular motion for a couple seconds and comes back to Pyra like a boomerang. Mythra performs Photon Edge, slicing the Aegis a few times as she dashes forward at an extremely fast pace. |
Up Special | Pyra performs Prominence Revolt as she jumps upwards and quickly goes back down to the ground, resulting in a fiery explosion from the Aegis. Mythra performs Chromadust, as she jumps upwards with a slice and fires three lasers from the Aegis in the air. |
Down Special | Pyra swaps with Mythra and vice versa. |
Forward Throw | Pyra and Mythra throw their opponent forward with their unique element |
Back Throw | Pyra and Mythra kick their opponents backwards. |
Up Throw | Pyra and Mythra just throw their opponents upwards with their own visual flare involving their elements. |
Down Throw | Pyra and Mythra both place their opponent on the ground and stab them with the Aegis. |
Final Smash | Both Pyra and Mythra will summon Rex to their side, channeling their respective attack with him. Pyra and Rex use Burning Sword, jumping up and slicing their opponents upward with an attack that summons a giant fire from the Aegis. Mythra and Rex use Sacred Arrow, raining down multiple beams of light to hit their opponents. |
Miscellaneous | Pyra and Mythra have the ability to swap back and forth on the fly. Mythra’s dodge is foresight, where she dodges at the last second and takes 50% less damage with no knockback. Pyra does more damage. Mythra is more faster. |
Kazuya

(Moves are named because bro has 41 moves)
Flash Punch Combo | Kazuya does two quick jabs from his left hand then followed by a stronger punch from his right. |
10 Hit Combo | By mashing the attack button, Kazuya does a 10 Hit Combo string. |
Oni Front Kick | Kazuya does a quick front kick. |
Flash Tornado | Kazuya does an upwards roundhouse kick. |
Twin Pistons | Kazuya does two uppercuts. |
Nejiri Uraken | Kazuya does a sweeping downwards punch that trips up his opponents. |
Roundhouse to Triple Spin Kicks | Kazuya does a short hop and does three spin kicks on the ground. |
Tsunami Kick | Kazuya does an axe kick that hits the opponent twice. |
Stature Smash | A standing trip kick Kazuya does. |
Jump Side Kick | Kazuya does a short hop backwards and kicks while doing it. |
Crouch Jab | Kazuya does a quick jab while crouching. |
Tombstone Crusher | Kazuya does a ducking kick that sweeps his opponent. |
Crouch Spin Kick | Kazuya does a sweeping roundhouse kick. |
Demon God Fist | As Kazuya gets back up from ducking, he does a devastating electrical punch that makes his opponent go into a crumple state. |
Leaping Side Kick | Kazuya’s dash attack, where he dashes towards his opponent and does a forward hop kick. |
Left Splits Kick | Kazuya does a dashing axe kick. |
Get Up Attack | As Kazuya gets up, he does two kicks from left to right. |
Glorious Demon God FIst | Kazuya’s Side Smash, where he briefly goes into Devil Form to land a devastating punch onto his opponent. |
Devil Twister | Kazuya’s Up Smash, where he briefly goes into Devil Form to punch his opponent into the air. |
Lion Slayer | Kazuya’s Down Smash, where he briefly goes into Devil Form and swings his fist downwards like a hammer to smash his opponent to the ground. |
Jumping Knuckle | Kazuya’s neutral air attack, where he punches downwards, this can even spike his opponents. |
Searing Edge | Kazuya’s forward air attack, which has him do a jump kick. |
Jumping Sobat | Kazuya’s back air, where he kicks in the direction opposite of him. |
Rising Toe Kick | Kazuya’s up air, where he kicks upwards with his toe. |
Demon Scissors | Kazuya’s down air, where he descends downwards, hitting his opponent with a leg kick. |
Crouch Dash | Kazuya ducks and dashes forward at a fast speed, he can do this multiple times and it can lead into other moves. |
Spinning Demon to Left Hook | After Kazuya crouch dashes, he does two spin kicks on the ground into a punch. |
Electric Wind God Fist | After Kazuya crouch dashes, he can do an electrical uppercut that does minor damage. |
Dragon Uppercut | After Kazuya crouch dashes, he can do a devastating electrical uppercut. |
Devil Blaster | Kazuya briefly transforms into Devil Form to fire a laser from his third eye on his forehead that has a lot of distance. |
Devil Fist | Kazuya briefly transforms into Devil Form and dashes forward with a punch that goes through his opponents and puts them in a crumple state. |
Devil Wings | Kazuya briefly transforms into Devil Form and uses his wings to fly upwards. |
Heaven’s Door | Kazuya briefly transforms into Devil Form and grabs his opponent by the face and flies upwards, then comes right back down, slamming his opponent to the ground. |
Sternum Smash | Kazuya’s pummel where he punches his opponent while grabbing them. |
Double Face Kick | Kazuya’s forward throw, where he kicks his opponent twice, sending them forwards. |
Steel Pedal Drop | Kazuya’s back throw, where he throws his opponent by the leg in the opposite direction. |
Air Inferno | Kazuya’s up throw, where he throws his opponent upwards, and briefly goes into Devil Form to fire a laser upwards. |
Stonehead | Kazuya’s down throw, where he headbutts his opponent and makes them bounce off the ground. |
Gates Of Hell | A devastating command grab that Kazuya can do where he hits his opponent and kicks them away a far distance. |
Demon’s Wrath | Kazuya’s side taunt where he does the Demon’s Wrath combo that can actually do some damage. |
Final Blaster | Kazuya transforms into Devil Kazuya to unleash a long ranged laser. If Kazuya hits his opponent with it, he transforms into Devil Kazuya-X, where he releases a barrage of lasers from his chest and wings that go into various angles to deliver devastating damage to his opponent. |
Rage Drive | At 100% damage, Kazuya goes into Rage mode, which gives him access to his Rage Drive. By performing the Gates of Hell command or Heaven’s Door command, Kazuya does an even stronger version of Heaven’s Door that does a devastating amount of damage to his opponent. |
Sora
Jab | A three hit combo with his keyblade. |
Side Tilt | A three hit combo again that begins with an upwards strike. |
Up Tilt | Sora raises his keyblade into the air and begins to spin it. |
Down Tilt | A downward sweep that catches people off guard. |
Dash Attack | A powerful slide. |
Neutral Air | Sora spins his keyblade around that, if he catches anyone, initiates a three hit combo. |
Forward Air | Another strike that initiates a three hit combo. |
Back Air | Turns around to do a powerful strike. |
Up Air | Backflips and performs a powerful strike. |
Hurricane Blast | Sora performs a powerful spin that sends him downwards. |
Get Up Attack | Hits both behind and infront with his keyblade. |
Side Smash | Sora performs a powerful swing. |
Up Smash | Sora lifts his keyblade into the air with a small blast at the end. |
Down Smash | Sora jumps into the air before slamming down. |
Neutral Special | Sora switches between three different magics with every use. Firaga, Thundaga, and Blizzaga. Firaga is a fireball that knocks people back, Thundaga is three lightning bolts that strike, and Blizzaga is a projectile that freezes people. |
Side Special | A high-speed thrust, Sonic Blade that locks on to a target, allowing Sora to do three dashes. |
Up Special | Sora spins upwards and catches people nearby. |
Down Special | Sora performs a block with his Keyblade that stuns enemies who attack during the counter pose. Sora will then attack the foe who struck his counter with his Keyblade, knocking them away. This move also avoids projectiles during its runtime. |
Forward Throw | He sure swings his keyblade. |
Back Throw | He sure does another swing. |
Down Throw | He sure slams you down. |
Up Throw | He sure throws you up. |
Final Smash | Sora fires a keyhole that sucks people in. Those caught are sucked into a door that seals shut, Sora using the same keyhole blast to explode the door. Instantly Kills at 100%. |
Miscellaneous | Sora is extra floaty and his second jump goes higher than his first. |
Mii Brawler
Jab | Hits enemies with a basic punch. |
Side Tilt | Swings his leg forward to deliver a powerful kick. |
Up Tilt | Jumps into the air to deliver an uppercut. |
Down Tilt | Performs a leg sweep Mortal Kombat style. |
Dash Attack | Swings forward with a mighty kick to the face or just body in general, I suppose. |
Neutral Air | Does a kick while in the air. |
Forward Air | Twists, their body forward and backward while kicking in the air. |
Back Air | While in the air hits the opponent behind them with a kick. |
Up Air | Throws their leg up into the air, hitting any airborne opponents. |
Down Air | While in the air the brawler puts their fists together Captain Kirk style and then hits the opponent below them. |
Get Up Attack | Performs a leg sweep while getting up. |
Side Smash | Sends a punch forward and can angle it upwards, straightforward, or downwards |
Up Smash | Does a kickflip that launches foes upward |
Down Smash | Simultaneously stretches their arm and leg, sending a punch forward and kick behind them |
Neutral Special | Shot Put: The Mii throws a heavy metal ball at their opponent Flashing Mach Punch: The Mii sends a flurry of punches forward before uppercutting their foe into the air Exploding Side Kick: The Mii charges up and releases a powerful flaming kick forward, sending foes flying
|
Side Special | Onslaught: The Mii charges forwards and unleashes a flurry of punches and kick before launching the target upwards with a kick Burning Dropkick: The Mii dropkicks forwards and hurts enemies with fire Suplex: A lunge forward that results in grabbing the foe and slamming them to the ground
|
Up Special | Soaring Axe Kick: Sends a flipkick upward that can be followed by a axe kick downwards Helicopter Kick: The Mii releases a flurry of kicks that sends the Mii Brawler into the air, hitting foes caught in it Thrust Uppercut: A powerful uppercut that sends the Mii into the air
|
Down Special | Head-On Assault: The Mii dives down head-first into the ground. Has a chance to bury opponents Feint Jump: Mii jumps in an arc in order to catch foes off-guard. Can be followed up by a downward kick Counter: Opponent hits the Mii and is judo thrown on contact.
|
Forward Throw | Mii Brawler throws their opponent forward. |
Back Throw | Mii Brawler kicks their opponent to the opposite side. |
Up Throw | Mii Brawler uppercuts their opponent into the air. |
Down Throw | Mii Brawler places their opponent onto the ground and chops them. |
Final Smash | The Miis sends you up into the air, hitting you with a barrage of punches before finally hitting you back down to ground level with a powerful punch. |
Mii Swordfighter
Jab | Mii Swordfighter does three sword swipes. |
Side Tilt | Mii Swordfighter swings their sword forward. |
Up Tilt | Mii Swordfighter swings their sword overhead. |
Down Tilt | Mii Swordfighter stabs their sword forward while ducking. |
Dash Attack | Mii Swordfighter runs and swings their sword forward. |
Neutral Air | Mii Swordfighter swings their sword downwards in the air. |
Forward Air | Mii Swordfighter does three stabs forward. |
Back Air | Mii Swordfighter swipes their sword to the opposite direction in the air. |
Up Air | Mii Swordfighter spins their whole body with the sword raised in the air. |
Down Air | Mii Swordfighter spins their whole body downward with their sword aiming towards the ground. |
Get Up Attack | As they get up, Mii Swordfighter swings their sword from left to right on the ground. |
Side Smash | Mii Swordfighter charges up and swings their sword forward for a devastating attack. |
Up Smash | Mii Swordfighter swings their sword overhead twice. |
Down Smash | Mii Swordfighter swings their sword from left to right towards the ground. |
Neutral Special | Gale Strike: Mii summons a small tornado that launches opponents upwards Shuriken of Light: a projectile that does small damage Blurring Blade: A chargeable series of sword slashes that burns foes on contact
|
Side Special | Airborne Assault: The Mii does a rolling flip forward followed by a strike Gale Stab: A chargeable forward lunge that stabs whoever gets in the way Chakram: A sharp disk projectile
|
Up Special | Stone Scabbard: A straight upward slash followed by a straight downward stab Skyward Slash Dash: A series of diagonal slashes for good recovery Hero’s Spin: On the ground this move is a chargeable sword spin that knocks foes away. In the air it's an upwards twirl that hits enemies in its path multiple times.
|
Down Special | Blade Counter: Counter melee attacks with a slash Reversal Slash: The Miis can turn opponents around and reflect projectiles Power Thrust: A strong thrust attack that can also be used diagonally in the air
|
Forward Throw | Mii Swordfighter kicks their opponent forward. |
Back Throw | Mii Swordfighter kicks their opponent to the other side. |
Up Throw | Mii Swordfighter does an overhead swipe that sends their opponent into the air. |
Down Throw | Mii Swordfighter slams their opponent into the ground. |
Final Smash | The Miis sends out a barrage of energy waves from its sword to harm enemies. |
Mii Gunner
Jab | Mii Gunner does a punch, a kick, then an explosive blast from their cannon. |
Side Tilt | Mii Gunner fires a short reaching laser. |
Up Tilt | Mii Gunner does an explosive uppercut with their cannon. |
Down Tilt | Mii Gunner shoots an explosion downwards. |
Dash Attack | Mii Gunner runs towards their opponent and fires an explosion at them. |
Neutral Air | Mii Gunner swings their whole cannon around them. |
Forward Air | Mii Gunner fires a laser forwards. |
Back Air | Mii Gunner fires an explosion to their opposite side. |
Up Air | Mii Gunner shoots a few blasts upwards. |
Down Air | Mii Gunner fires an explosion downwards. |
Get Up Attack | As they get up, Mii Gunner shoots two explosions from left to right. |
Side Smash | Mii Gunner charges up their cannon to fire a few shots forward. |
Up Smash | Mii Gunner fires some explosions upwards. |
Down Smash | Mii Gunner shoots two explosions from left to right towards the ground. |
Neutral Special | Charge Blast: Similar to Samus’ charge shot, the Mii charges up an energy ball and blasts it at the enemy Laser Blast: a semi-spammable laser projectile Grenade Launch: Shoots a grenade that will explode upon contact
|
Side Special | Flame Pillar: Shoots out a plume of fire that hurts enemies Stealth Burst: A projectile that continues to travel forward until the Mii detonates it Gunner Missile: The Miis will fire either a homing missile or a slowing non-homing missile
|
Up Special | Lunar Launch: The Mii fires their cannon towards the ground to propel them into the air Cannon Jump Kick: Similar to the Lunar Launch but the Mii will also kick straight up into the air damaging foes Arm Cannon: The Mii shoots towards the ground to propel them high into the air
|
Down Special | Echo Reflector: The Mii uses a device to reflect projectiles Bomb Drop: The Miis lays a small bomb on the ground that explodes after a short time Absorbing Vortex: An ability that allows the Mii to absorb energy-based projectiles and regain health
|
Forward Throw | Mii Gunner slams their opponent with their cannon to make them go forward. |
Back Throw | Mii Gunner throws their opponent to the opposite direction and fires a laser. |
Up Throw | Mii Gunner throws their opponent into the air and fires a laser. |
Down Throw | Mii Gunner slams their opponent to the ground. |
Final Smash | The Mii summons two drones to help release a large laser blast with its arm cannon. |
Miscellaneous | Is Sans Undertale |
Fighting Polygons
(Polygon bros???)
Outside of being really funny for this particular match up, the fighting Polygon’s are just reskins of the 64 cast. Since Master Hand created the Classic Mode of Smash 64 they join his roster of fighters.
Master Fortress Minions
When the phase of Master Fortress is reached Master Hand will summon versions of Stalfos, Geemers, Plasma Wisps and Lethiniums made out of swarm. For explanations on their powers see the Master Fortress section of the blog.
Polygon Man
Polygonal All-Stars
One of the most notable things about Polygon Man is his summoning of polygonal, evil cast-members from the game. These ”All-Stars” each pull from a unique energy source called All-Star Power (AP). AP allows the All-Stars to use powerful super moves capable of KOing strong opponents. All-Stars are also all capable double jumping.
Cole MacGrath
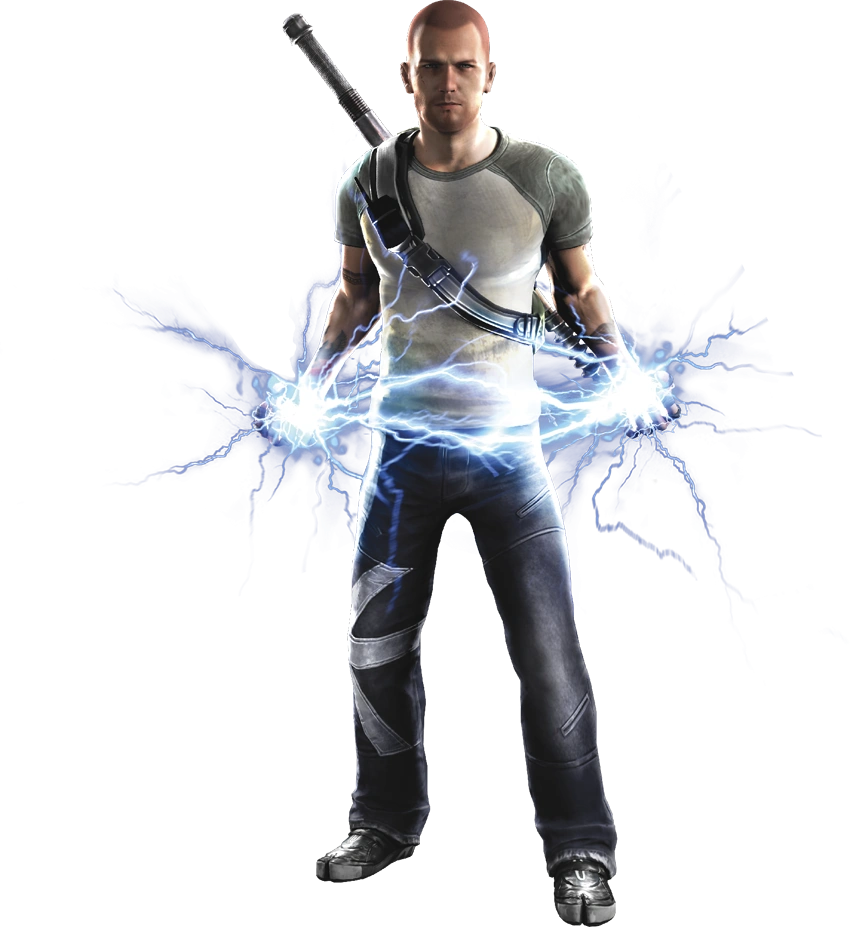
Light Attack | Cole does a series of three whacks with his amp. He also has an alternate one where he does two, but then the last hit crumples the opponent with his electricity. |
Light Forward | Cole uses electricity to grind forwards (like Shadow the Hedgehog) and can follow up using his own gigawatt blades to slice at his opponent twice or a leaping shoulder tackle. |
Light Up | Cole aims his amp upwards and uses some electricity to hit his opponent. |
Light Down | Cole slams his amp to the ground. |
Aerial Light Attack | Cole does a two hit combo with his amp in the air. |
Aerial Light Forward | Cole uses his lightning tether to grapple towards his opponent or any nearby object to close the gap towards them. |
Aerial Light Up | Cole aims his amp upwards and uses some electricity to hit his opponent while in the air. |
Aerial Light Down | As he quickly descends, Cole slams his amp to the ground. |
Heavy Attack | Cole fires a small projectile of electricity at his opponent and can do it multiple times in rapid succession, which can electrocute his opponent. |
Heavy Forward | Cole throws a sticky lightning grenade, which can stick to any surface or opponent and then explodes. |
Heavy Up | Cole throws a ball of electricity that can explode upon contact. |
Heavy Down | Cole uses an alpha blast, which is an energy force field (also like Shadow the Hedgehog) that can hit his opponent. |
Aerial Heavy Attack | Same thing only in the air. |
Aerial Heavy Forward | Same thing only in the air. |
Aerial Heavy Up | Same thing only in the air. |
Aerial Heavy Down | Same thing only in the air and Cole aims it downwards. |
Special Attack | Cole uses frost shield, which generates a barrier that can block projectiles. |
Special Forward | Cole uses a freeze rocket that can freeze his opponent solid. |
Special Up | Cole uses ice launch, where he uses a pillar of ice that launches him upwards. |
Special Down | Cole summons an ice barrier that can knock his opponent upwards, |
Aerial Special Attack | Same thing only in the air and Cole hovers for a bit. |
Aerial Special Forward | Same thing only in the air. |
Aerial Special Up | Same thing only in the air and the ice pillar can hit opponents as it falls. |
Aerial Special Down | Same thing only in the air. |
Forward Throw | Cole grapples his opponent with his amp and swings around them as he tosses them, launching them in the opposite direction. |
Up Throw | Cole slides underneath his opponent and whacks them upwards with his amp. |
Down Throw | Cole jumps off his opponent and slams his amp down. |
Super 1 - Human Bullet | Cole catches his opponent with electromagnetism and throws them across the stage, making them explode. |
Super 2 - Ionic Freeze | Cole summons a wave of ice spikes that go across the stage and one shot any opponent. |
Super 3 - Electric Tornado | Cole summons an electric tornado that he can control while he’s off the stage. Any opponent caught in it will be killed instantly. Cole then finishes it by casting an ionic storm. |
Evil Cole
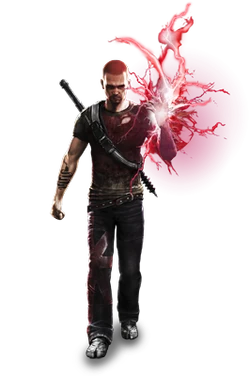
Light Attack | Evil Cole does a series of three whacks with his amp. |
Light Forward | Evil Cole uses electricity to grind forwards (like Shadow the Hedgehog) and can follow up using his own gigawatt blades to slice at his opponent twice or a leaping shoulder tackle. |
Light Up | Evil Cole smacks his amp upwards and uses some electricity to hit his opponent. |
Light Down | Evil Cole slams his amp to the ground. |
Aerial Light Attack | Evil Cole does a two hit combo with his amp in the air. |
Aerial Light Forward | Evil Cole uses his lightning tether to grapple towards his opponent or any nearby object to close the gap towards them. |
Aerial Light Up | Evil Cole smacks his amp upwards and uses some electricity to hit his opponent while in the air. |
Aerial Light Down | Evil Cole descends onto the ground and slams onto it, unleashing a shockwave of electricity. |
Heavy Attack | Evil Cole fires a small projectile of electricity at his opponent and can do it multiple times in rapid succession, which can electrocute his opponent. |
Heavy Forward | Evil Cole throws a lightning grenade, followed by a second grenade that detonates after the first. |
Heavy Up | Evil Cole fires a ball of electricity upwards which then splits into two that explode upon contact. |
Heavy Down | Evil Cole uses a nightmare blast, which is an energy force field (also like Shadow the Hedgehog) that can hit his opponent. |
Aerial Heavy Attack | Same thing only in the air. |
Aerial Heavy Forward | Same thing only in the air. |
Aerial Heavy Up | Same thing only in the air. |
Aerial Heavy Down | Same thing only in the air and Evil Cole aims it downwards. |
Special Attack | Evil Cole uses Giga Punch. Where he charges up a fiery punch that once unleashed can render the opponent in a crumple state. |
Special Forward | Evil Cole uses Firebird Strike, where he ignites his body with fire and quickly charges towards the opponent. |
Special Up | Evil Cole uses Hellfire Rockets, where he fires three bursts of flames upwards. |
Special Down | Evil Cole uses Oil Spike, where he throws a spot of oil onto the ground that can trap the opponent if they touch it. |
Aerial Special Attack | Same thing only in the air. |
Aerial Special Forward | Same thing only in the air. |
Aerial Special Up | Same thing only in the air. |
Aerial Special Down | Same thing only in the air. |
Forward Throw | Evil Cole grapples his opponent with his amp and swings around them as he tosses them, launching them in the opposite direction. |
Up Throw | Evil Cole slides underneath his opponent and whacks them upwards with his amp. |
Down Throw | Evil Cole grabs the opponent by the face and slams them to the ground, making them bounce upwards. |
Super 1 - Human Bullet | Evil Cole catches his opponent with electromagnetism and throws them across the stage, making them explode. |
Super 2 - Ionic Drain | Evil Cole drains the life of his opponents around him and follows it up with a blast. |
Super 3 - The Beast Awakens! | Evil Cole uses the power of The Beast as he gains a large boost in power and it grants him the ability to fly. Any attack Evil Cole uses will kill the opponent instantly. |
Kratos
Light Attack | A three hit combo forward utilising Kratos’ iconic Blades of Athena |
Light Forward | Kratos flings the Blades of Athena forward, attaching himself to an opponent and proceeds to shoulder charge |
Light Up | An upward slash with the blades that launches opponents up. Kratos can follow the enemy into the air by holding down the light attack button. |
Light Down | A sweeping slash with the blades at the opponents feet that trips |
Aerial Light Attack | An aerial version of his basic hit combo |
Aerial Light Forward | A quick fling-slash forward with the blades |
Aerial Light Up | Kratos spins around in a cyclone with the blades, hitting opponents around him multiple times |
Aerial Light Down | A quick downward slash with both blades |
Heavy Attack | Kratos swings the blades overhead and slams the ground with force causing a small shockwave that launches enemies up |
Heavy Forward | Kratos charges forward with a spartan spear and shield combo, if he successfully hits an opponent they will be knocked away with the spear |
Heavy Up | Kratos pulls out the heads of Nemean Cestus and attacks upwards at an angle |
Heavy Down | Kratos hops forward a small distance before slamming the Barbarian Hammer into the ground creating a fire shockwave |
Aerial Heavy Attack | Kratos flings the Blades of Athena around him in a circular motion |
Aerial Heavy Forward | Kratos pulls out the spartan spear and shield and quickly jabs forward with the former |
Aerial Heavy Up | Kratos spins the heads of Nemean Cestus around him |
Aerial Heavy Down | Similar to his heavy down, Kratos slams the Barbarian Hammer into the ground causing a fire shockwave |
Special Attack | Kratos whips out the legendary Golden Fleece to defend himself, if an opponent hits Kratos during this he will respond with a quick ground slash that will send them flying |
Special Forward | Kratos pulls out Apollo’s Bow and fires a shot from it. Can be charged to deal more damage |
Special Up | Kratos equips the Wings of Icarus and rises upwards at a diagonal angle |
Special Down | Kratos holds up the decapitated head of Helios and fires forward a blast of light that knocks opponents to the ground |
Aerial Special Attack | Same as the grounded version |
Aerial Special Forward | Same as the grounded version |
Aerial Special Up | Same as the grounded version |
Aerial Special Down | Same as the grounded version |
Forward Throw | Kratos grabs the opponent and rushes forward with them a short distance before tossing them away |
Up Throw | Kratos grabs and tosses the opponent into the air before using one of his Blades of Athena to slam them back down to the ground |
Down Throw | Kratos grabs and slams the opponent to the ground with a blow from the Nemean Cestus |
Super 1 - Divine Absolution | Kratos equips the Blade of Olympus and performs a devastating swiping slash forward |
Super 2 - Divine Reckoning | Kratos stabs the Blade of Olympus into the ground causing a giant black vortex around him |
Super 3 - Rage of the Gods | Kratos grows to a giant size and dons the Armor of Ares and Blade of Olympus. For the next 10 seconds Kratos is completely invincible and can perform a series of attacks such as a three hit combo with the Blade of Olympus, a diving stab followed by an upwards slash and a blast of energy from the Blade of Olympus. |
Zeus
Light Attack | Zeus charges up a punch imbued with lightning or can do two punches. |
Light Forward | Zeus does a dashing punch imbued with lightning. |
Light Up | Zeus does a lightning uppercut. |
Light Down | Zeus does a hammer style punch with his lightning. |
Aerial Light Attack | Same thing only in the air. |
Aerial Light Forward | Same thing only in the air. |
Aerial Light Up | Same thing only in the air. |
Aerial Light Down | As he descends from the air, Zeus does a lightning charged punch to the ground. |
Heavy Attack | Zeus throws up to 3 bolts of lighting at his opponent. The lightning can be charged. |
Heavy Forward | Zeus fires chain lightning at his opponent, this can do multiple hits on them. |
Heavy Up | Zeus fires chain lightning to his opponents in the air, this can do multiple hits on them. |
Heavy Down | Zeus rains down lightning that strikes down onto himself. |
Aerial Heavy Attack | Same thing only in the air. |
Aerial Heavy Forward | Same thing only in the air. |
Aerial Heavy Up | Same thing only in the air. |
Aerial Heavy Down | Zeus fires chain lightning to his opponents that are on the ground, this can do multiple hits on them. |
Special Attack | Zeus spawns a copy of himself that can electrocute the opponent upon contact. |
Special Forward | Zeus absorbs projectiles and converts it into AP. |
Special Up | Zeus teleports with his lightning in any direction, any area he spawns in with opponents in the vicinity will electrocute them. |
Special Down | Zeus calls down a Lightning Strike that also helps bring opponents down from the air. |
Aerial Special Attack | Same thing only in the air. |
Aerial Special Forward | Same thing only in the air. |
Aerial Special Up | Same thing only in the air. |
Aerial Special Down | Same thing only in the air. |
Forward Throw | Zeus grabs his opponent and charges up a punch that launches his opponent across the stage. |
Up Throw | Zeus throws his opponent in the air and brings them back down with a lightning strike. |
Down Throw | Zeus electrocutes his opponent and throws them down to the ground. |
Super 1 - Lightning Clap | Zeus claps his hands together and a burst of lightning gets released out of them. |
Super 2 - Ultimate Storm | Zeus flies around the stage and unleashes a burst of lightning onto himself. |
Super 3 - Wrath Of Zeus | Zeus teleports himself and his opponents to the Summit of Sacrifice and becomes a giant. In this state, Zeus slams his fists down and summons bolts of lightning on his opponents. |
Miscellaneous | Zeus is capable of turning into a bird for quickly flying from place to place. Kinda like a Hawk (Tuah) |
Ratchet and Clank
Light Attack | Ratchet does a three hit combo with his Omniwrench. |
Light Forward | Ratchet throws his Omniwrench and it comes back to him like a boomerang. |
Light Up | Ratchet swings his Lightning Ravager upwards, it can also reflect projectiles. |
Light Down | Ratchet jumps up and slams his omniwrench downwards. |
Aerial Light Attack | Ratchet does a three hit combo with his Omniwrench and also hovers in the air with his rocket shoes. |
Aerial Light Forward | Same thing only in the air. |
Aerial Light Up | Same thing only in the air and his rocket boots propel him up a bit. |
Aerial Light Down | Same thing only in the air. |
Heavy Attack | Ratchet pulls out the Sonic Erupter that he can charge up and it fires a sonic frequency blast. |
Heavy Forward | Ratchet fires shots from his Constructo Pistol. |
Heavy Up | Ratchet fires a missile from the Warmonger upwards. |
Heavy Down | Ratchet pulls out his Buzz Blades and fires multiple shots that ricochet off the ground. |
Aerial Heavy Attack | Same thing only in the air. |
Aerial Heavy Forward | Same thing only in the air. |
Aerial Heavy Up | Same thing only in the air. |
Aerial Heavy Down | Same thing only in the air. |
Special Attack | Ratchet aims his Plasma Striker with a laser pointer and fires a laser blast. It can be aimed in any direction. |
Special Forward | Ratchet pulls out a small capsule that contains three little robots that track the opponent and explode upon contact. |
Special Up | Ratchet summons Mr. Zurkon and for a short period of time, Mr. Zurkon will follow Ratchet around and attack any opponent who is close to him. |
Special Down | Ratchet plants a Tesla Spike, if he plants another near each other, it creates a laser field that the opponent will get zapped with. |
Aerial Special Attack | Same thing only in the air and Ratchet’s rocket boots propel him while he’s aiming. |
Aerial Special Forward | Same thing only in the air. |
Aerial Special Up | Same thing only in the air. |
Aerial Special Down | Same thing only in the air. |
Forward Throw | Ratchet pulls out his Suck Cannon and once the opponent is inside, they remain in there until Ratchet fires them out. |
Up Throw | Ratchet fires them out of the Suck Cannon upwards. |
Down Throw | Ratchet fires them out of the Suck Cannon downwards. |
Super 1 - RYNO V | Ratchet pulls out the RYNO V and fires bullets and missiles from it at a short range that wipe out any opponent caught in it. All set to Tchaikovsky’s 1812 overture. |
Super 2 - Clank Goes Commando | Ratchet takes a backseat as Clank comes out to play. Clank uses Chronobombs to slow down opponents and the Chronoscepter to instantly wipe opponents out. |
Super 3 - Flight Of The Aphelion | Ratchet and Clank call in the Aphelion and get in it. They proceed to shoot their opponents with lasers and missiles with a first-person viewpoint from the cockpit. |
Jak and Daxter
Light Attack | Jak spins around as Daxter kicks the opponent multiple times. |
Light Forward | Jak dashes forward with a punch. |
Light Up | Jak does an uppercut that can get him very high. |
Light Down | Jak and Daxter dive down onto the ground, causing a mini shockwave. |
Aerial Light Attack | Same thing only in the air. |
Aerial Light Forward | Same thing only in the air and Jak and Daxter get on their hoverboard to do it. |
Aerial Light Up | Same thing only in the air. |
Aerial Light Down | Same thing only in the air and it can be done repeatedly. |
Heavy Attack | Jak uses the Arc Wielder and fires a beam of electricity. |
Heavy Forward | Jak fires three shots from his rifle. |
Heavy Up | Jak fires a shot from his plasma rifle upwards. |
Heavy Down | Jak uses his rifle to fire bullets that ricochets off the ground, this can be done up to three times. |
Aerial Heavy Attack | Same thing only in the air. |
Aerial Heavy Forward | Same thing only in the air. |
Aerial Heavy Up | Same thing only in the air. |
Aerial Heavy Down | Same thing only in the air. |
Special Attack | Jak fires a drone called the Gyro Burster, which fires shots at the enemies for a short period of time. |
Special Forward | Jak uses the Needle Lazer to fire three beams that track the opponent. |
Special Up | Jak uses the Mass Inverter to fire a blast of anti-gravity at the opponent, leaving them helpless as they float for a short period of time. |
Special Down | Jak uses the Wave Concussor that can be charged up and fires a massive blast of red energy. |
Aerial Special Attack | Same thing only in the air. |
Aerial Special Forward | Same thing only in the air. |
Aerial Special Up | Same thing only in the air. |
Aerial Special Down | Same thing only in the air. |
Forward Throw | Daxter pummels the opponent as Jak punches them while they’re distracted. |
Up Throw | Jak uses his hoverboard to knock his opponents into the air. |
Down Throw | Jak gets on his hoverboard and spins around, holding the opponent and letting go, making them fly away. |
Super 1 - Precursor Legacy | Jak and Daxter leap into the air and summon a blue Eco vent that fires a vertical blast of energy that one shots any opponent caught in it. |
Super 2 - Dark Jak’s Dark Bomb | Jak transforms into Dark Jak and leaps into the air and comes back down with a punch that emits a shockwave, instantly taking out the opponent. |
Super 3 - Light Jak | Jak transforms into Light Jak and gains access to attacks like the Light Shield, Flash Freeze, and Light Blast, which can one shot any opponent. Jak also gains the ability to fly while in this form. |
Nathan Drake
Light Attack | A melee combat with three finishers. A right hook, an uppercut and a front kick. |
Light Forward | Drake jumps up into the air and delivers a punch to his opponent. |
Light Up | While in the air tosses a grenade that explodes after a few seconds. |
Light Down | Drake does a sliding attack that trips, the opponent knocking them to the ground for a second. |
Aerial Light Attack | Drake does a forward kick. |
Aerial Light Forward | Does a dropkick. |
Aerial Light Up | Drake throws a grenade that explodes after a few seconds. It's different because this time he throws it while he’s on the ground. |
Aerial Light Down | Starts hitting them with the one twos which is to say he hits his opponent twice. |
Heavy Attack | Pulls out an AK-47 to shoot at enemies with. |
Heavy Forward | Drake grabs his handy-dandy Wes-44 magnum revolver, which knocks away the opponent. |
Heavy Up | Grabs a rocket launcher, which launches rockets (duh) at enemies. |
Heavy Down | Fires a Gatling gun which shoots a large amount of bullets and knocks the player back. |
Aerial Heavy Attack | Swings on a rope, like a monkey whilst firing an AK-47. |
Aerial Heavy Forward | While in the air, Drake pulls out his magnum, which does the exact same thing as it does on the ground. |
Aerial Heavy Up | Take exactly what I said above, but replace magnum with rocket launcher. |
Aerial Heavy Down | Drake grabs an Uzi and starts spraying enemies at a downward angle while in the air. |
Special Attack | Kicks an oil drum over to the enemy, blowing them up. |
Special Forward | Shoots a tranquilizer dart at his target temporarily subduing them. |
Special Up | Drake uses a zip line to go down |
Special Down | Has a concrete wall that he uses to protect himself from incoming attacks. |
Aerial Special Attack | While in the air, Drake also can use his oil drum, which also explodes just like the ground version. |
Aerial Special Forward | Drake can use his tranquilizer dart in the air. |
Aerial Special Up | Drake has a zip line which is the same as the ground version. |
Aerial Special Down | A bunch of debris starts to appear underneath Drake and he falls with it. |
Forward Throw | Grabs the opponent and then kicks them away. |
Up Throw | Grabs underneath the opponents feet and then flips them up into the air. |
Down Throw | Drake punches the opponent, putting them on their knees and then punches them again. |
Super 1 - Propane Tank | Drake throws a propane tank at the opponent, and then pulls out a gun which he fires, blowing up the tank and killing any adjacent persons. |
Super 2 - Stone Pillar | Drake pushes over a large stone pillar, crushing his opponent to death. |
Super 3 - El Dorado Sarcophagus | Drake obtains the El Dorado Sarcophagus which turns enemies into Descendants which are creatures from Drake‘s fortune. Drake also obtains Eddy's Golden Gun which I’m sure you can guess what it does and what it looks like. |
Sly Cooper
Light Attack | A quick two hit swipe with his cane |
Light Forward | Sly leaps forward in a small hop while spinning his cane |
Light Up | Sly rises upwards while swinging his cane up |
Light Down | A circular swing that trips opponents |
Aerial Light Attack | Sly quickly swings his cane downwards |
Aerial Light Forward | Same as the grounded version |
Aerial Light Up | Same as the grounded version |
Aerial Light Down | Sly quickly descends and slams the ground with his cane |
Heavy Attack | Sly throws an alarm clock forward that stuns enemies who come into contact with ir |
Heavy Forward | Sly rolls forward while engulfed in electricity, knocking enemies away |
Heavy Up | Sly uses a smoke bomb to teleport a short distance either forward or behind an enemy |
Heavy Down | Sly tosses a rage bomb that confuses enemies it hits |
Aerial Heavy Attack | A slow horizontal swing with the cane that stuns enemies |
Aerial Heavy Forward | A thrusting strike with the electrified cane |
Aerial Heavy Up | Same as the grounded version |
Aerial Heavy Down | A diagonal downward swipe that confuses enemies it hits |
Special Attack | Sly flinches back, pretending to be hit. If an opponent hits him during this, Sly will teleport behind them and counters with a quick thrusting strike |
Special Forward | Sly slides across the ground, leaving behind a trail of electricity that stuns opponents that touch it |
Special Up | Sly hops into an explosive barrel that can be detonated with any button |
Special Down | Sly plants an explosive variant of his cap on the ground |
Aerial Special Attack | Same as the grounded version |
Aerial Special Forward | Same as the grounded version |
Aerial Special Up | Same as the grounded version |
Aerial Special Down | Same as the grounded version |
Forward Throw | Sly latches onto an opponent and kicks them away |
Up Throw | Sly grabs the enemy and knees them, before swinging his cane like a golf club and slamming them upwards. |
Down Throw | Sly grabs and tosses the opponent up, hooks them onto his cane, and then slams them to the ground. |
Super 1 - Unstoppable Ally | Sly’s good friend, Murray, briefly shows up to charge forward and kill opponents |
Super 2 - Flying Raccoon | Sly equips Carmelita’s jetpack and flies around, dropping bombs on his opponent |
Super 3 - Recon Sly and His Targets | Sly leaps into the foreground before calling up his other good friend, Bentley, over his Binocucom. Sly can then instantly kill his opponents by snapping pics of them with his aforementioned Binocucom. |
Sweet Tooth
Light Attack | A two hit machete swing combo |
Light Forward | Sweet Tooth charges forward with a shoulder tackle |
Light Up | Sweet Tooth throws an uppercut |
Light Down | Sweet Tooth performs a downward kick |
Aerial Light Attack | Sweet Tooth swings underneath him with his machete |
Aerial Light Forward | Same as the grounded version |
Aerial Light Up | Same as the grounded version |
Aerial Light Down | Sweet Tooth strikes the ground with a double stomp that causes a shock wave |
Heavy Attack | Sweet Tooth pulls out his chainsaw and swings it all around himself |
Heavy Forward | Sweet Tooth pulls out his shotgun and fires a blast forward |
Heavy Up | Sweet Tooth throws his machete in an overhead arc |
Heavy Down | Sweet Tooth fires his shotgun at a downward angle |
Aerial Heavy Attack | Same as the grounded version |
Aerial Heavy Forward | Same as the grounded version |
Aerial Heavy Up | Same as the grounded version |
Aerial Heavy Down | Same as the grounded version |
Special Attack | Sweet Tooth unleashes a stream of fire from his mouth |
Special Forward | Sweet Tooth throws a flaming molotov that burns the ground on impact |
Special Up | Sweet Tooth claps his hands over his head, creating a large fire blast |
Special Down | Sweet Tooth places a landmine on the ground that explodes when opponents walk over it |
Aerial Special Attack | Same as the grounded version |
Aerial Special Forward | Same as the grounded version |
Aerial Special Up | Same as the grounded version |
Aerial Special Down | Same as the grounded version |
Forward Throw | Sweet Tooth grabs and punches the opponent away |
Up Throw | Sweet Tooth grabs his opponent and lifts them over his head before blasting them away with a fire blast from his head |
Down Throw | Sweet Tooth grabs an opponent and slams them onto the ground behind him |
Super 1 - TNT Tag | Sweet Tooth pulls out a stick of dynamite, charges forward and attaches the dynamite to an opponent before kicking them away to explode |
Super 2 - Death By Missile | Sweet Tooth fires a remote controlled missile which he can direct into opponents |
Super 3 - Rise of Mecha Tooth | Sweet Tooth summons his deadly Sweet-Bot and becomes unkillable for a certain amount of time. The Sweet-Bot is equipped with a giant minigun, missiles and a giant slam attack. |
Colonel Radec
Light Attack | Radec hits the enemy over the head with the stock of his rifle and follows up with a kick |
Light Forward | Radec stabs forward with a combat knife and then blasts the enemy away with a shotgun blast |
Light Up | Radec does a diagonally upwards slice with his knife |
Light Down | Radec drops a grenade to the ground to explode while cloaking away |
Aerial Light Attack | Radec throws two aerial front kicks |
Aerial Light Forward | Radec fires a single shot from his shotgun pistol forward |
Aerial Light Up | Same as the grounded version |
Aerial Light Down | Same as the grounded version |
Heavy Attack | Radec fires a burst of rounds from his LMG before reloading |
Heavy Forward | Radec crouches down and fire his sniper rifle |
Heavy Up | Radec aims his shotgun upwards at an angle and fires |
Heavy Down | Radec aims his Grenade Launcher at the ground and fires a round that shortly explodes |
Aerial Heavy Attack | Same as the grounded version |
Aerial Heavy Forward | Same as the grounded version |
Aerial Heavy Up | Same as the grounded version |
Aerial Heavy Down | Same as the grounded version |
Special Attack | Radec fires an explosive bolt forward from his Bolt Gun that sticks to opponents and shortly explodes |
Special Forward | Radec tosses an electric grenade that explodes mid-air, stunning opponents it hits |
Special Up | Radec aims and fires a blast of purple electricity from his Arc Rifle into the air |
Special Down | Radec fires a blast of fire from his flamethrower that can be held down to increase the duration |
Aerial Special Attack | Same as the grounded version |
Aerial Special Forward | Same as the grounded version |
Aerial Special Up | Same as the grounded version |
Aerial Special Down | Same as the grounded version |
Forward Throw | Radec stabs the opponent in their chest, cloaks and reappears behind them, and shoots them. |
Up Throw | Radec places his rifle to his enemy's head and fires repeatedly while holding them from their neck. |
Down Throw | Radec throws his enemy down, then stomps on them. |
Super 1 - StA-X3 W.A.S.P. Launcher | Radec arms his W.A.S.P. Launcher with a controllable reticle that locks onto and homes in on opponents |
Super 2 - StA5X Arc Cannon | Radec fires a shot from his Arc Cannon that travels across the whole screen horizontally |
Super 3 - StA-X6 Jetpack | Radec equips a jetpack and flies into the foreground. From there, Radec can aim and shoot at opponents from a first person perspective, instantly killing them. |
PaRappa the Rapper
Light Attack | A quick punch attack that can be mashed to turn into a flurry of kicks |
Light Forward | A quick shoulder check |
Light Up | An uppercut that launches opponents |
Light Down | A sliding kick that trips opponents |
Aerial Light Attack | A quick kick that leads into an axe kick |
Aerial Light Forward | A fast dashing kick |
Aerial Light Up | Same as the grounded version |
Aerial Light Down | A quick diving kick that, when hit, can be mashed into a flurry of kicks |
Heavy Attack | A quick skateboard swing that reflects projectiles |
Heavy Forward | An overhead slamming attack that causes knockdown |
Heavy Up | A spinning kick with his skateboard |
Heavy Down | A quick low pushing kick with the skateboard |
Aerial Heavy Attack | Same as the grounded version |
Aerial Heavy Forward | A quick dash at a downward angle |
Aerial Heavy Up | Same as the grounded version |
Aerial Heavy Down | A quick downward swing with the skateboard |
Special Attack | Pulls opponents in with a microphone |
Special Forward | A dash attack with the microphone |
Special Up | Parappa summons his friend, Boxy Box, to unleash a soundwave |
Special Down | Parappa places Boxy Box on the ground while he plays some tunes that spawn AP orbs |
Aerial Special Attack | Same as the grounded version |
Aerial Special Forward | Same as the grounded version |
Aerial Special Up | Same as the grounded version |
Aerial Special Down | Same as the grounded version |
Forward Throw | Grabs an opponent and kicks them away |
Up Throw | Grabs an opponent, performs a handstand and then kicks upwards |
Down Throw | Grabs an opponent, lifts them above his head, and kicks them down |
Super 1 - Romantic Karate | Parappa does a jumping 90-degree kick that causes a small orange flash of energy that kills opponents. |
Super 2 - Skater Boy | Parappa jumps on his skateboard and rides around the stage, knocking out anyone he hits. |
Super 3 - Doom Box ft. PaRappa!!! | PaRappa raps along with the iconic hit “I Gotta Believe!” This move will kill opponents no matter where they are on screen. |
Heihachi Mishima

Light Attack | Heihachi does his Flash Punch combo, where he throws three punches. |
Light Forward | Heihachi does Iron Hand, where he does a palm strike. |
Light Up | Heihachi does a Demon Uppercut and Dragon Uppercut, where he does a double uppercut combo. |
Light Down | Heihachi does Demon’s Wings, where he strikes with both fists on either side of him. |
Aerial Light Attack | Heihachi does Double Palms, where he does two palm strikes in the air. |
Aerial Light Forward | Same thing only in the air. |
Aerial Light Up | Same thing only in the air. |
Aerial Light Down | Heihachi does an aerial Hammer Punch, where he chops downwards. |
Heavy Attack | Heihachi does a Spinning Roundhouse kick. |
Heavy Forward | Heihachi does Hell Axle, where he leaps forward with two kicks back to back. |
Heavy Up | Heihachi does a Rising Toe Kick, which is a jumping high kick. |
Heavy Down | Heihachi does a Jichinsai, which is a stomp attack. |
Aerial Heavy Attack | Same thing only in the air. |
Aerial Heavy Forward | Same thing only in the air. |
Aerial Heavy Up | Same thing only in the air. |
Aerial Heavy Down | Heihachi does a Demon Scissors attack, where he flips while airborne and comes back down to the ground with a kick. |
Special Attack | Heihachi does Heaven’s Wrath, which is a counterattack. Heihachi can follow this up with Demon Breath, where he strikes his opponent back with a heavy blow engulfed in lightning. |
Special Forward | Heihachi does a Wave Dash, he can follow this up with a Wind God Fist, or a Spinning Demon, which can also be followed up with a Spinning Demon Uppercut or a Tsunami Kick. |
Special Up | Heihachi throws either a trophy or beach ball forward. |
Special Down | Heihachi goes into a Raijin Stance, where he charges up electricity into his hands. When Heihachi’s hands turn red, he gains triple the AP on every attack. Heihachi can also do a Pulverizer attack, while he charges up, Heihachi quickly dashes forward with a lightning punch that can render the opponent in a crumple state. |
Aerial Special Attack | Same thing only in the air. |
Aerial Special Forward | Same thing only in the air. |
Aerial Special Up | Same thing only in the air. |
Aerial Special Down | Same thing only in the air. |
Forward Throw | Heihachi does a Stonehead attack, where he grabs the opponent and headbutts them. |
Up Throw | Heihachi does a Jumping Powerbomb, where grabs the opponent and suplexes them, Powerbomb style. |
Down Throw | Heihachi does a Slamdown, where he grabs the opponent, throws them overhead onto the ground and stomps them. |
Super 1 - Lighting Hammer | Heihachi does a Lightning Hammer, where he smashes his forearm down like a hammer, instantly knocking out his opponent. |
Super 2 - Kuma Tag Team! | Heihachi summons Kuma, who can instantly take out the opponent while Heihachi focuses on other parts of the battle. |
Super 3 - Rockets Away! | Heihachi straps all the opponents onto a rocketship that launches them into space, instantly killing them all. |
Dante (DmC)
Light Attack | Dante swings Rebellion rapidly in a four-hit combo |
Light Forward | Dante swings Osiris in front of him in a multi-hit combo |
Light Up | Dante does a single-handed upward slash with Rebellion, launching the opponent into the air. |
Light Down | Dante slams the Arbiter into the ground, causing a small shockwave that launches the opponent upwards. |
Aerial Light Attack | Dante swings Rebellion thrice in the air |
Aerial Light Forward | Dante swings Osiris in front of him in a multi-hit combo |
Aerial Light Up | Dante swings Rebellion in a 2-hit attack |
Aerial Light Down | Dante descends and slams the ground with Rebellion, creating a small wave of impact that knocks the opponent down. |
Heavy Attack | Dante stands in place as he fires his pistols, Ebony and Ivory, finishing with a second round of quadruple shots. |
Heavy Forward | Dante spins forward while firing Ebony and Ivory, finishing with another round of shots. |
Heavy Up | Dante leaps into the air while firing Ebony and Ivory. |
Heavy Down | Dante quickly fires Ebony and Ivory on either side of him, before turning slightly to fire, then turning again to fire a final round of shots. |
Aerial Heavy Attack | Same as the ground version. |
Aerial Heavy Forward | Dante flips forward in mid-air and fires Ebony and Ivory |
Aerial Heavy Up | Dante spirals into the air while firing Ebony and Ivory. |
Aerial Heavy Down | Dante falls down while firing Ebony and Ivory |
Special Attack | Dante blocks with Rebellion. If an opponent strikes him, he counters with a quick upward slash with Rebellion. |
Special Forward | Dante does a dash forward, passing through any opponents |
Special Up | Dante rapidly spins Osiris in front of him, hitting the opponent multiple times and launching them into the air |
Special Down | Dante throws the Arbiter, launching opponents into the air |
Aerial Special Attack | Same as the grounded version |
Aerial Special Forward | Same as the grounded version |
Aerial Special Up | Same as the grounded version |
Aerial Special Down | Same as the grounded version |
Forward Throw | Dante does a roundhouse kick forwards, sending the enemy away |
Up Throw | Dante grabs the opponent and does a gut punch, knocking the opponent up into the air |
Down Throw | Dante jumps off the opponent's back, and comes down with a punch that knocks them down. |
Super 1 - Overdrive | Dante swings his sword, Rebellion, while holding it in reverse grip three times, unleashing a fire shock wave on the last swing that moves forward |
Super 2 - Stinger | Dante rushes forward with Rebellion covered in energy, stabbing through anyone in his path |
Super 3 - Devil Trigger Unleashed | Dante transforms into his Devil Trigger form, slowing all enemies and instant killing with his attacks |
Nariko

Light Attack | Nariko does a quick multi-hit combo with her blades |
Light Forward | Nariko does a slow, but powerful slash forward |
Light Up | Nariko does a quick two-hit combo with her chain blades by flipping forward |
Light Down | Nariko does an overhead axe kick, bouncing the opponent up |
Aerial Light Attack | Nariko does an aerial three-hit combo with her blades |
Aerial Light Forward | Nariko does a heavy horizontal slash. |
Aerial Light Up | Nariko gracefully flips her body while slashing with her twin blades in a rapid circular motion. |
Aerial Light Down | Nariko descends to the ground and does a powerful overhead sword slam, causing a wave of impact that bounces the opponent up. |
Heavy Attack | Nariko brings her blades out in front of her to block attacks. If an opponent strikes her, she counters with a double horizontal slash. This move can also reflect projectiles. |
Heavy Forward | Nariko swings her blades upwards twice, causing debris that pushes the opponent back. |
Heavy Up | Nariko does an upward swing with her blades, launching the opponent into the air. |
Heavy Down | Nariko throws her blades forward to pull enemies closer |
Aerial Heavy Attack | Same as the ground version. |
Aerial Heavy Forward | Same as the ground version. |
Aerial Heavy Up | Nariko holds one blade in place in mid-air before moving to slash with the other blade |
Aerial Heavy Down | Nariko throws her blades at a 45 degree angle, pulling any opponent closer in her grasp. Once the opponent is pulled in, she kicks them back to the ground |
Special Attack | Nariko does a four hit combo consisting of palm strikes that stuns the enemy with the final hit |
Special Forward | Nariko fires a bullet from a rocket launcher, which causes a small explosion when hit. |
Special Up | Nariko tosses a shield forward. Any opponent hit by the shield will be knocked down. |
Special Down | Nariko slams her sword into the ground, causing four giant sword stones to rise around her; crumples the opponent. |
Aerial Special Attack | Nariko does a midair four-hit combo that starts with her wrapping her legs around her opponent and ends with a stunning palm strike |
Aerial Special Forward | Same as the ground version. |
Aerial Special Up | Same as the ground version. |
Aerial Special Down | Same as the ground version. |
Forward Throw | Nariko flips over her opponent and throws them away |
Up Throw | Nariko knocks the opponent up with a quick swing of her blades, leaps after them and kicks them away |
Down Throw | Nariko stabs her blade into the ground, flips over it and kicks the opponent, knocking them down |
Super 1 - Twing Twang | Nariko summons her adoptive sister, Kai, who shoots in one direction with her crossbow at an explosive barrel |
Super 2 - Dawn Siege | Nariko mounts a siege cannon for a few seconds that can be aimed and fired to kill enemies |
Super 3 - The Goddess | Nariko gains the full power of the Goddess and replaces her blades with The Heavenly Blades. In this form, Nariko can perform various moves that kill enemies instantly |
Sackboy
Light Attack | A quick two hit combo with slaps |
Light Forward | Pulls the opponent in with a grab before throwing them over his back |
Light Up | Sackboy uses his grappling hook to latch onto an opponent before slamming himself into them |
Light Down | Sackboy pulls out a bounce pad to protect himself which will launch nearby opponents and reflect projectiles |
Aerial Light Attack | An aerial circular slap attack |
Aerial Light Forward | Same as the grounded attack |
Aerial Light Up | Same as the grounded attack |
Aerial Light Down | Same as the grounded attack |
Heavy Attack | Sackboy creates a ball made out of jam that he proceeds to smack away |
Heavy Forward | Sackboy equips his jetpack and flies forward, knocking enemies down. Can be charged, |
Heavy Up | Sackboy flies into the air with his jetpack knocking enemies up with him |
Heavy Down | Using his Popit menu, Sackboy creates a checkpoint that he can teleport back to by pressing the button again. The checkpoint can be destroyed however. |
Aerial Heavy Attack | Same as the grounded version |
Aerial Heavy Forward | Same as the grounded version |
Aerial Heavy Up | Same as the grounded version |
Aerial Heavy Down | Same as the grounded version |
Special Attack | Using the Cakeinator, Sackboy shoots a giant piece of cake forward that knocks opponents down. The cake will stay on the ground and damage opponents who touch it. |
Special Forward | Using his Popit menu, Sackboy creates a giant fan that blows opponents away. |
Special Up | Sackboy creates a bounce pad that causes any opponent to touch it to jump in the air. |
Special Down | Using his Popit menu, Sackboy places an electrical pad on the ground that electrifies opponents who touch it |
Aerial Special Attack | Same as the grounded version |
Aerial Special Forward | Same as the grounded version |
Aerial Special Up | Same as the grounded version |
Aerial Special Down | Same as the grounded version |
Forward Throw | Sackboy grabs the opponent and prepares to punch them, but his Popit menu appears and creates a boxing glove sticker, which Sackboy leaps over as it punches the opponent. |
Up Throw | Sackboy grabs the opponent and tosses them up into the air before his Popit menu creates a spiderweb sticker that temporarily traps them. |
Down Throw | Sackboy grabs the opponent and his Popit menu creates an anvil sticker, to which Sackboy moves to the side as it crashes on the opponent. |
Super 1 - Costume Clash | Sackboy quickly changes into one of three costumes and rushes forward |
Super 2 - Coal Catastrophe | Sackboy uses his Popit to drop flaming hot coal on the stage |
Super 3 - Prize Bubble Bonus | Sackboy traps all opponents in bonus bubbles that can be collected; AP and items can also be dropped from bubbles |
Raiden
Light Attack | Raiden does four sword slices. |
Light Forward | Raiden does a dashing sword slice. |
Light Back | Raiden stabs his sword to the opponent behind him. |
Light Up | Raiden slices his sword upwards, sending the opponent into the air for some air combos. |
Light Down | Raiden does an overhead slice of his sword. |
Aerial Light Attack | Same thing only in the air. |
Aerial Light Forward | Raiden spins his whole body forward and slashes his sword downwards. |
Aerial Light Up | Same thing only in the air. |
Aerial Light Down | Raiden descends to the ground with a sword slice. |
Heavy Attack | Raiden does a High Kick Cut, where he can set up for a wide variety of combos that can be chained together with light and heavy attacks. |
Heavy Forward | Raiden does a Flurry Kick, where he does a flurry of kick stab attacks. |
Heavy Up | Raiden does a flip slash kick called Rolling Thunder. |
Heavy Down | Raiden does a Sweep Kick with his sword. |
Aerial Heavy Attack | Raiden does a Whirlwind Kick, which is a spin kick sword attack in the air. |
Aerial Heavy Forward | Raiden does a kick with his sword at a downward diagonal angle. |
Aerial Heavy Up | Same thing only in the air. |
Aerial Heavy Down | Raiden does a Slam Slice, which is a downward kick slash. |
Special Attack | Raiden parries his opponent's attack and follows up with a slash that leaves them in a crumple state. |
Special Forward | Raiden does a Lighting Strike attack, which is a dashing sword stab. |
Special Up | Raiden jumps up and does a stomp on the opponent's back. |
Special Down | Raiden teleports to a nearby opponent and sweeps his sword to trip them. |
Aerial Special Attack | Same thing only in the air. |
Aerial Special Forward | Same thing only in the air. |
Aerial Special Up | Raiden catches the opponent in the air and stomps on them multiple times and finishes it by kicking them to the ground. |
Aerial Special Down | Raiden descends and stabs the ground with his sword, causing a shockwave. |
Forward Throw | Raiden impales his opponent, leaving them in a crumpled state. |
Up Throw | Raiden impales his opponent and throws them in the opposite direction |
Down Throw | Raiden performs a Zan-Datsu, where he impales his opponent, slams them to the ground and steals AP from them. |
Super 1 - Stormbringer | Raiden does a spinning handstand with his sword on his feet, which instantly kills anyone caught in it. |
Super 2 - Blade Mode | Raiden goes into Blade Mode, where he unleashes a blast of energy that stuns his opponents and any attack Raiden does while in this mode instantly kills the opponent. |
Super 3 - The Box Revengeance! | Raiden’s foes get trapped in a box. He then proceeds to cut down every box in the area to find and instantly kill his opponents. |
Spike
Light Attack | Spike dual wields Stun Clubs as he does a four hit combo on his opponent with them. |
Light Forward | Spike charges up wielding both Stun Clubs and dash thrusts with them. |
Light Up | Spike spin jumps up, swinging both Stun Clubs and laying multiple hits on his opponent. |
Light Down | Spike takes out a blade and sweeps his opponent with it. |
Aerial Light Attack | Same thing only in the air. |
Aerial Light Forward | Same thing only in the air and Spike goes downwards at a diagonal angle. |
Aerial Light Up | Same thing only in the air. |
Aerial Light Down | Spike takes out his blade and stabs the ground with it, creating a small impact wave. |
Heavy Attack | Spike takes out a Remote Controlled Satellite laser that he can unleash a blast of with the push of a button, rendering their opponent in a crumple state. |
Heavy Forward | Spike throws a Bananarang and it comes back to him. |
Heavy Up | Spike fires a pellet from a Slingshot diagonally upwards. It can be charged as well. |
Heavy Down | Spike uses a Grenade Launcher to fire an Electric Grenade that electrocutes his opponent. |
Aerial Heavy Attack | Same thing only in the air. |
Aerial Heavy Forward | Same thing only in the air. |
Aerial Heavy Up | Same thing only in the air. |
Aerial Heavy Down | Same thing only in the air and fired at a downwards arc. |
Special Attack | Spike uses a Hoola-Hoop that can do damage to his opponent. He can even run and do a body slam with it. |
Special Forward | Spike uses his Boxing Glove gadget to punch his opponent. It can be charged for better distance and damage. |
Special Up | Spike can teleport left or right with his Teleport Boots. |
Special Down | Spike takes out his Monkey Radar that can summon any monkey to attack his opponent, depending on which color the radar is. Blue: a monkey rushes in with a shoulder charge. Green: a monkey will toss a banana peel out, tripping anyone who steps on it. Red: Pipotron G is summoned and does two powerful swinging punches. |
Aerial Special Attack | Same thing only in the air. |
Aerial Special Forward | Same thing only in the air. |
Aerial Special Up | Same thing only in the air. |
Aerial Special Down | Same thing only in the air. |
Forward Throw | Spike pushes his opponent as a monkey appears behind his opponent to trip them. |
Up Throw | Spike smacks his opponent upwards with a Golden Sword. |
Down Throw | Spike lifts his opponent into the air, jumps up and smacks them back down to the ground with two Stun Clubs. |
Super 1 - Monkey Net | Spike catches his opponent with his Monkey Net, instantly killing them. |
Super 2 - Sword Frenzy | Spike takes out his Golden Sword and swings it to create a blade beam that one shots anyone in its way. |
Super 3 - Super Laser Cannon | Spike calls in a satellite laser strike, which fires a large beam that reflects off of a satellite dish and comes back down to Earth, wiping out everyone on the stage. |
Sir Daniel Fortesque
Light Attack | Sir Dan does three sword swings. He can even charge it to increase its power. |
Light Forward | Sir Dan does a sword thrust that can be charged. |
Light Up | Sir Dan swipes his sword upwards. |
Light Down | Sir Dan spins his whole torso while ducking, landing a few hits with his sword from left to right. |
Aerial Light Attack | Sir Dan slams his sword downwards, slamming his opponent to the ground. |
Aerial Light Forward | Same thing only in the air. |
Aerial Light Up | Same thing only in the air. |
Aerial Light Down | Sir Dan does a downward slash in a moon-like arc that slams the opponent down to the ground. |
Heavy Attack | Sir Dan throws a battle axe like a boomerang. |
Heavy Forward | Sir Dan charges forward, shoulder first, ramming into anyone in his way. |
Heavy Up | Sir Dan pulls out a bow and fires an arrow into the air that electrocutes the enemy. |
Heavy Down | Sir Dan pulls out a hammer and smashes it onto the ground. |
Aerial Heavy Attack | Same thing only in the air. |
Aerial Heavy Forward | Same thing only in the air. |
Aerial Heavy Up | Same thing only in the air. |
Aerial Heavy Down | Same thing only in the air and Sir Dan descends to the ground as he smashes the hammer onto the ground. |
Special Attack | Sir Dan equips a shield that can absorb projectiles, but it does have a limited durability. |
Special Forward | Sir Dan puts his own head on the ground, which travels towards the opponent and explodes in a poisonous gas cloud that puts the opponent in a crumple state. |
Special Up | Sir Dan tosses a drumstick in an overhead arc. It’s slow, but it explodes upon contact. |
Special Down | Sir Dan drinks a dragon potion that he spits out onto the ground, creating a small pit of flames that remains there for four seconds. |
Aerial Special Attack | Same thing only in the air. |
Aerial Special Forward | Same thing only in the air. |
Aerial Special Up | Same thing only in the air. |
Aerial Special Down | Same thing only in the air. |
Forward Throw | Sir Dan bashes the opponent on the head with his sword, sticks it onto the ground and pulls back the hilt of it, smacking his opponent in the face. |
Up Throw | Sir Dan punts his opponent into the air. |
Down Throw | Sir Dan hits the opponent with the hilt of his sword. Then he jumps up and stomps them onto the ground. |
Super 1 - Lightning Bolt | Sir Dan fires a lightning blast into the air that instantly kills the opponent. |
Super 2 - Golden Chalice | Sir Dan pulls out a chalice that releases spirits that go after Sir Dan’s opponents and instantly one shots them. |
Super 3 - Anubis Stone | Sir Dan uses the Anubis Stone, which engulfs his enemies in dark energy if they stand near it, which instantly kills them in three seconds. |
Isaac Clarke
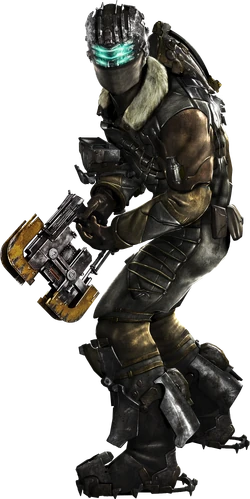
Light Attack | Isaac fires his Plasma Cutter. |
Light Forward | Isaac stomps down onto others (I wish that could be me). |
Light Up | Isaac swings his Plasma cutter skywards. |
Light Down | Isaac fires his Plasma Cutter down creating a yellow shockwave. |
Aerial Light Attack | Quite literally his Light Aerial |
Aerial Light Forward | He swings his Plasma Cutter forward. |
Aerial Light Up | He swings his Plasma Cutter upwards. |
Aerial Light Down | He swings his Plasma Cutter downwards. |
Heavy Attack | Isaac uses his iconic stasis to stun the opponent for a short while. |
Heavy Forward | He shoots you with his Plasma Cutter but harder. |
Heavy Up | He just guns you down but stronger, You thought I was gonna link something did you? But nah that wasn’t really funny fuck you. |
Heavy Down | He uses a flamethrower to burn you alive and purify you inside. |
Aerial Heavy Attack | Stuns you in the air for a bit. |
Aerial Heavy Forward | Yeah he shoots you. |
Aerial Heavy Up | More shooting. |
Aerial Heavy Down | More burning. |
Special Attack | I lowkey don’t know what was happening with Bouncing Bola. |
Special Forward | Throws a Suspended ripper. |
Special Up | Fires a stick of dynamite. |
Special Down | Set a motion sensor bomb up, if you walk over it won’t blow up but instead blow up. |
Aerial Special Attack | Same as Special Attack. |
Aerial Special Forward | Same as Special Forward. |
Aerial Special Up | Same as Special Up. |
Aerial Special Down | Same as Special down. |
Forward Throw | He fires up a Kinesis blast FORWARDS |
Up Throw | He fires up a Kinesis blast UP |
Down Throw | He fires up a Kinesis blast DOWN |
Super 1 - Strategic Shot | Use a Strategic Shot to freeze the foe in place for you to gun down. |
Super 2 - Kinesis Burst | Isaac overcharges his Kinesis Modulator and fires a large field burst of electricity creating a Kinesis burst. |
Super 3 - Dead Space | He fires a door which sends you out into the dead of space where rubble hits the opponents along with you shooting at the opponent. |
Miscellaneous | Issac Clarke has the ability of slight precognition, giving him visions of the future that flash by in his mind. |
Kat
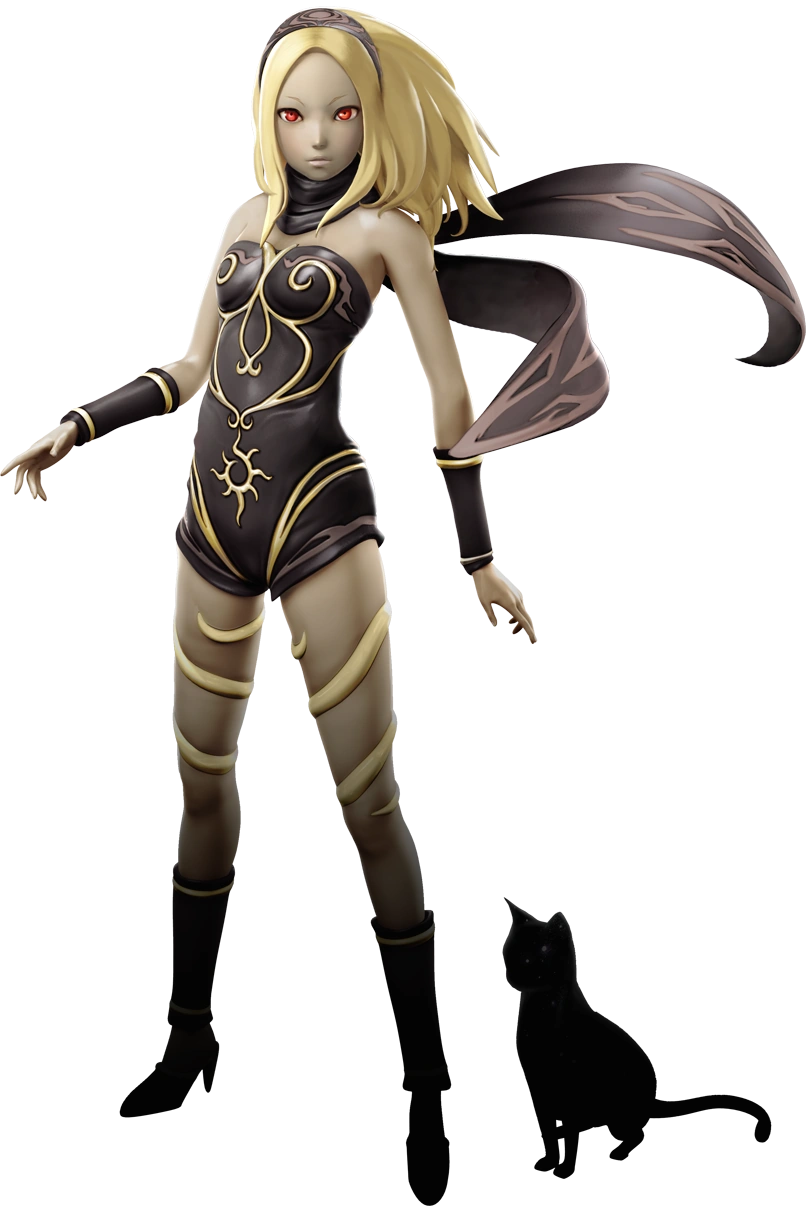
Light Attack | Kat does three quick kicks, knocking the enemy into the air |
Light Forward | Kat does a side kick with decent range, launching enemies away |
Light Up | Kat does a backflip kick, sending the enemy into the air. |
Light Down | Kat does a quick frontflip, slamming her leg into the ground after |
Aerial Light Attack | Kat knees the opponent in midair, then rushes forwards and does it again |
Aerial Light Forward | Kat does a diving kick going downwards slowly at a shallow angle |
Aerial Light Up | Same as ground version |
Aerial Light Down | Same as ground version |
Heavy Attack | Kat shoots up off the ground, taking opponents with her |
Heavy Forward | Kat does a flying forwards kick |
Heavy Up | Kat jumps high, catching an enemy in midair and slamming them down to the ground |
Heavy Down | Kat slides along the ground, ducking most projectiles |
Aerial Heavy Attack | Kat spins around with her foot held out, hitting everyone nearby |
Aerial Heavy Forward | Same as ground version |
Aerial Heavy Up | Same as ground version |
Aerial Heavy Down | Kat dives downwards with a kick similar to the gravity kick |
Special Attack | Kat summons three pieces of debris to float around her. Pressing Circle again will shoot one debris piece at a time until all three are gone |
Special Forward | Kat dashes forwards, quickly gaining speed and shredding anything in her way |
Special Up | Kat repels all nearby enemies |
Special Down | Kat attracts all nearby enemies |
Aerial Special Attack | Same as ground version |
Aerial Special Forward | Same as ground version |
Aerial Special Up | Same as ground version |
Aerial Special Down | Same as ground version |
Forward Throw | Kat launches an enemy away |
Up Throw | Kat sends an enemy into the air |
Down Throw | Kat slams an enemy into the ground, causing them to bounce back up |
Super 1 - Gravity Crush | Kat steals an orb of energy from an opponent and destroys it, killing the opponent and any other opponents in the vicinity |
Super 2 - Gravity Typhoon | Kat rises up in the air and fires two volleys of tracking, stalactite-like projectiles |
Super 3 - Gravity Panther | Kat merges herself with Dusty, and transforms into a panther-like creature. She attacks by slashing with claws and creates a gravitational vortex. She is also able to freely fly around the stage, even to the point of flying off-screen |
Emmett Graves
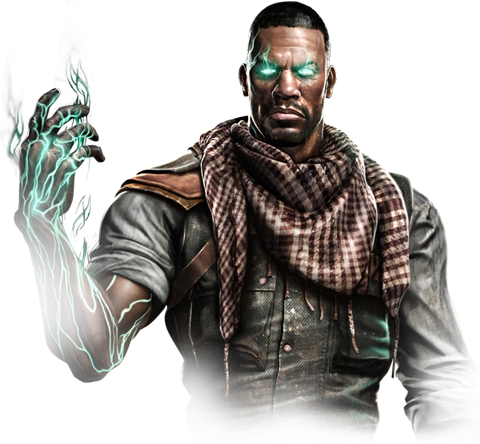
Light Attack | Emmett does two knife swipes. |
Light Forward | Emmett dashes forward with a rift enhanced punch. |
Light Up | Emmett does three knife swipes upwards. |
Light Down | Emmett slams the ground with his fist. |
Aerial Light Attack | Same thing only in the air. |
Aerial Light Forward | Same thing only in the air. |
Aerial Light Up | Same thing only in the air. |
Aerial Light Down | Same thing only in the air. |
Heavy Attack | Galloway Revolver: Emmett fires a shot from his Galloway Revolver. M.A.W. Launcher: Emmett throws a Tetranite Grenade, which bounces a bit and detonates after a short time. Union Shotgun: Emmett throws a R-Secs Proximity Mine, which sticks to his opponent or a surface and detonates after a short time. |
Heavy Forward | Galloway Revolver: Emmett fires three shots from his Kinetic Rifle. M.A.W. Launcher: Emmett aims his Launcher to fire a rocket forwards, the angle can be adjusted with the red laser pointer. Union Shotgun: Emmett fires his Union Shotgun forwards. |
Heavy Up | Galloway Revolver: Emmett fires a shot from his Galloway Revolver upwards. M.A.W. Launcher: Emmett aims his Launcher to fire a rocket upwards. Union Shotgun: Emmett fires his Union Shotgun upwards. |
Heavy Down | Galloway Revolver: Emmett fires a shot from his Galloway Revolver downwards. M.A.W. Launcher: Emmett aims his Launcher to fire a rocket downwards. Union Shotgun: Emmett fires his Union Shotgun downwards. |
Aerial Heavy Attack | Same thing only in the air. |
Aerial Heavy Forward | Same thing only in the air. |
Aerial Heavy Up | Same thing only in the air. |
Aerial Heavy Down | Same thing only in the air. |
Special Attack | Emmett calls in Rift Extractor, which gradually drops AP. |
Special Forward | Emmett calls in an Auto Turret, which periodically fires at Emmett’s opponents. |
Special Up | Emmett calls in an M.A.W. Launcher Supply Bunker, which contains his Rocket Launcher. |
Special Down | Emmett calls in an Union Shotgun Supply Bunker, which contains his Shotgun. |
Aerial Special Attack | Same thing only in the air. |
Aerial Special Forward | Same thing only in the air. |
Aerial Special Up | Same thing only in the air. |
Aerial Special Down | Same thing only in the air. |
Forward Throw | Emmett lifts his opponent up and punches them forward. |
Up Throw | Emmett lifts his opponent up and punches them upwards. |
Down Throw | Emmett kicks his opponent to their knees and knocks them down onto the ground. |
Super 1 - Rift Shot | Emmett fires a more powerful shot from any of his three weapons that kills his opponents instantly. |
Super 2 - Rift Bomb | Emmett calls down a Rift Bomb, which explodes upon contact with Rift Energy. |
Super 3 - The Hawk | Emmett calls in The Hawk, which Emmett gets in and pilots around the stage. In it, Emmett can fire its machine gun, deploy air mines, stomp his opponent, and have The Hawk fly and drop large energy blasts onto his opponent. |
Big Daddy
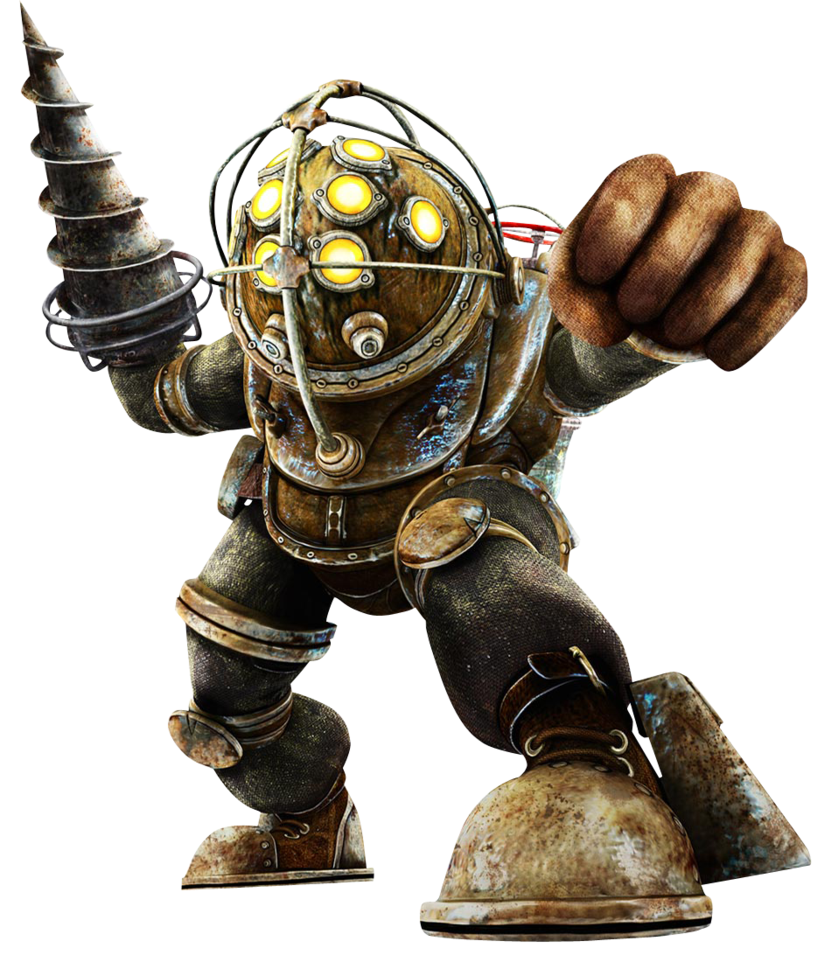
Light Attack | The Big Daddy throws a simple punch forward |
Light Forward | The Big Daddy throws a downward punch that knocks opponents to the ground |
Light Up | The Big Daddy throws a simple uppercut that launches opponents |
Light Down | The Big Daddy does a sweeping punch that trips opponents |
Aerial Light Attack | Same as the grounded version |
Aerial Light Forward | The Big Daddy throws a stronger punch that launches opponents farther |
Aerial Light Up | Same as the grounded version |
Aerial Light Down | The Big Daddy throws a downward punch |
Heavy Attack | The Big Daddy quickly thrusts his drill forward, knocking opponents down |
Heavy Forward | The Big Daddy dashes forward, stopping only when hitting an opponent. If the charge connects and the button is pressed again, The Big Daddy will slam the opponent down with an overhead drill attack |
Heavy Up | The Big Daddy throws an uppercut attack with his drill that hits multiple times |
Heavy Down | The Big Daddy slams his drill into the ground causing an explosion that can be mashed for consecutive explosions |
Aerial Heavy Attack | Same as the grounded version |
Aerial Heavy Forward | Same as the grounded version |
Aerial Heavy Up | Same as the grounded version |
Aerial Heavy Down | Same as the grounded version |
Special Attack | The Big Daddy utilises the Incinerate! Plasmid to fire a small explosion forward which can be charged for a bigger explosion |
Special Forward | The Big Daddy utilises the Electro Bolt Plasmid to fire a bolt of electricity forward that stuns the enemy on impact |
Special Up | The Big Daddy utilises the Cyclone Trap Plasmid to fire forward a small tornado that launch opponents into the air |
Special Down | The Big Daddy utilises the Winter Blast Plasmid to create a small patch of ice that freezes enemies on contact |
Aerial Special Attack | Same as the grounded version |
Aerial Special Forward | Same as the grounded version |
Aerial Special Up | Same as the grounded version |
Aerial Special Down | Same as the grounded version |
Forward Throw | The Big Daddy grabs the enemy and slams them away with his drill |
Up Throw | The Big Daddy grabs the enemy and knocks them in the air with his drill |
Down Throw | The Big Daddy grabs the opponent and slams the enemy to the ground |
Super 1 - Little Sister Gather | The Big Daddy roars, calling forth a Little Sister to jump on and stab an opponent, absorbing their ADAM in the process |
Super 2 - Frenzy | The Big Daddy enters an enraged state, increasing his speed, agility and power. In this state all of the aforementioned Plasmids are replaced with the Insect Swarm Plasmid. |
Super 3 - Flood | The Big Daddy floods the entire stage with water causing opponents to float around, unable to fight back |
Fat Princess

Light Attack | A quick two-hit attack with the scepter |
Light Forward | Steps forward and swings the scepter in the form of an uppercut |
Light Up | Hops a little and swings the scepter in an overhead arc |
Light Down | Gracefully twirls while swinging the scepter in a sweeping motion |
Aerial Light Attack | Swings the scepter downwards while in the air |
Aerial Light Forward | Same as the ground version. |
Aerial Light Up | Same as the ground version. |
Aerial Light Down | A quick scepter swing from underneath |
Heavy Attack | Twirls around gracefully, before finishing with a powerful butt drop that knocks the opponent away |
Heavy Forward | A quick sumo palm slap forward |
Heavy Up | Twirls around gracefully, before finishing with a powerful butt drop that knocks the opponent away |
Heavy Down | Hops into the air and does a powerful butt drop |
Aerial Heavy Attack | A quick kick flurry |
Aerial Heavy Forward | Lunges forward with a belly bump |
Aerial Heavy Up | Same as the ground version. |
Aerial Heavy Down | Same as the ground version. |
Special Attack | Summons a Mage who throws a fireball forward |
Special Forward | Summons a Warrior who does a lunging sword attack |
Special Up | Summons a Mage who throws a fireball upward |
Special Down | Summons a Worker who plants a bomb that explodes after a while |
Aerial Special Attack | Same as the ground version. |
Aerial Special Forward | Same as the ground version. |
Aerial Special Up | Same as the ground version. |
Aerial Special Down | Same as the ground version. |
Forward Throw | Grabs the opponent by the arm and spins them around a couple times before letting go |
Up Throw | Grabs the opponent and kicks them up into the air |
Down Throw | Grabs the opponent and does a belly bump, finishing with a butt drop |
Super 1 - Feed Me Cake! | A piece of cake will appear that Fat Princess will dash towards, killing enemies in her way |
Super 2 - Ride The Chicken! | Fat Princess rides on top of a giant chicken. During this time, the chicken is able to kill by charging forward into opponents |
Super 3 - Protect the Princess! | Fat Princess summons an entire legion of villagers that will attack and swarm opponents while she sits down and enjoys a nice slice of cake. |
Toro Inoue
Light Attack | Toro does a Toro Jab, where they move their hand up quickly. |
Light Forward | Toro does a Toro Swing, where they swing a ball of cloth forward. |
Light Up | Toro does a Toro Headbutt. |
Light Down | Toro does a Toro Sweep, where they bring out a broom and swing it from left to right. |
Aerial Light Attack | Toro does a Toro spin, where they spin their fists around in the air. |
Aerial Light Forward | Same thing only in the air. |
Aerial Light Up | Same thing only in the air. |
Aerial Light Down | Toro does a Toro Swipe, where they swing their broom downward. |
Heavy Attack | In Justice form, Toro thrusts his elbow forward. In Ninja form, Toro throws a spear with a scorpion at the end, and grapples towards them. In Oni form, Toro charges up a ball of mochi and fires it. |
Heavy Forward | In Justice form, Toro does a side kick. In Ninja form, Toro slides and leaves fish bones in his wake. In Oni form, Toro does a three hit hammer attack. |
Heavy Up | In Justice form, Toro does an uppercut. In Ninja form, Toro throws three ninja stars upwards. In Oni form, Toro rises into the air with mochi balls spinning around him. |
Heavy Down | In Justice form, Toro does a downwards chop. In Ninja form, Toro drops into a hole in the ground and appears from above to attack. In Oni form, Toro slams his hammer to the ground, which causes an explosion of mochi. |
Aerial Heavy Attack | In Justice form, Toro does a jumping spin kick. In Ninja form, it’s the same thing only in the air. In Oni form, it’s the same thing only in the air. |
Aerial Heavy Forward | In Justice form, it’s the same thing only in the air. In Ninja form, Toro does a bicycle kick. In Oni form, it’s the same thing only in the air. |
Aerial Heavy Up | In Justice form, Toro kicks in an upwards arc. In Ninja form, it’s the same thing only in the air. In Oni form, Toro does a flip upwards wrapped in mochi. |
Aerial Heavy Down | In Justice form, Toro kicks in a downward arc. In Ninja form, it’s the same thing only in the air. In Oni form, Toro does a Mochi style kick. |
Special Attack | Toro falls asleep, which generates AP. |
Special Forward | Toro does Henshin! I Am Torobi the Kat! Where he becomes a ninja and fires three ninja stars upon entry. |
Special Up | Toro does Henshin! I Am Justice Toro! Where they become a fighter for justice, performing a rising uppercut upon entry. |
Special Down | Toro does Henshin! I Am Oni Toro! Where they become an Oni, upon entry they do a headbutt. |
Aerial Special Attack | Same thing only in the air and Toro is on a parachute while sleeping. |
Aerial Special Forward | Same thing only in the air. |
Aerial Special Up | Same thing only in the air. |
Aerial Special Down | Same thing only in the air. |
Forward Throw | Toro does a sumo throw, where he grabs the opponent and pushes them away like a sumo wrestler does. |
Up Throw | Toro does a basketball throw, where they grab them and toss them straight into the air like a basketball. |
Down Throw | Toro does a tripping throw, where they yank out a blanket from underneath the opponent and trip them. |
Super 1 - Kuro Is So Mean >.< | Toro gets dropkicked by Kuro, which instantly kills any opponent in the way. |
Super 2 - Toro Makes a Wish o_0 | Toro summons a star that comes crashing down onto the stage, the shockwave from the crash instantly kills the opponent. |
Super 3 - Toro’s Dreams Come True ^o^ | Toro goes into Oni form and charges up their club as they dash towards his opponents, the screen goes dark with yellow slashes and when the screen comes back, the opponents are gone. |
Excalibur from Warframe!?!?
He was always in playstation all stars. OMM told me so
Stats
Master Hand
Feats
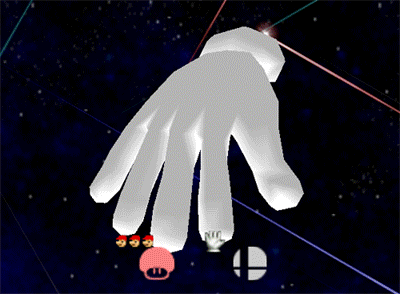
Brought the original Smash characters to life
Has fought many powerful warriors in his time
Defeated a small army of clone fighters, opening a path for the Smash fighters to beat Galeem
Attack Potency
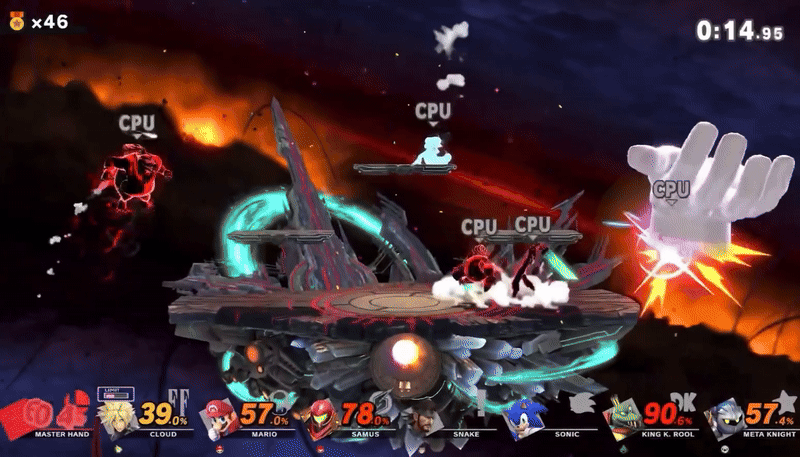
Durability

Speed
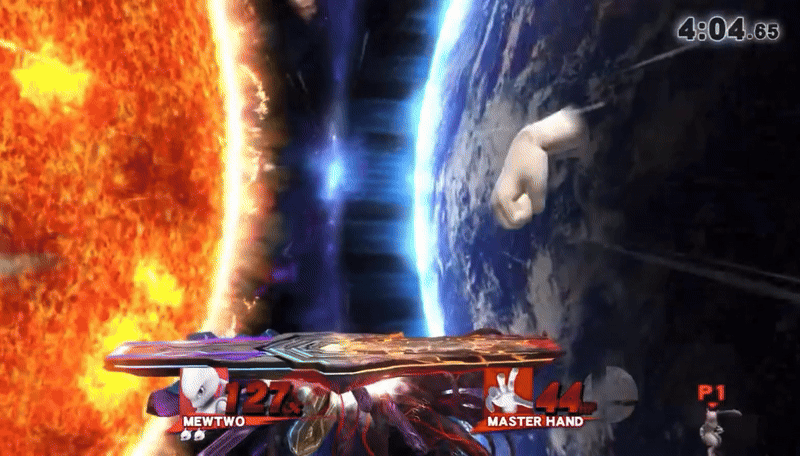
Polygon Man
Feats
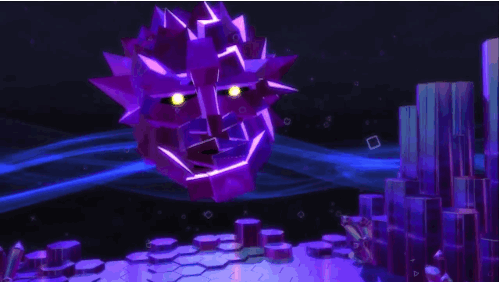
Attack Potency
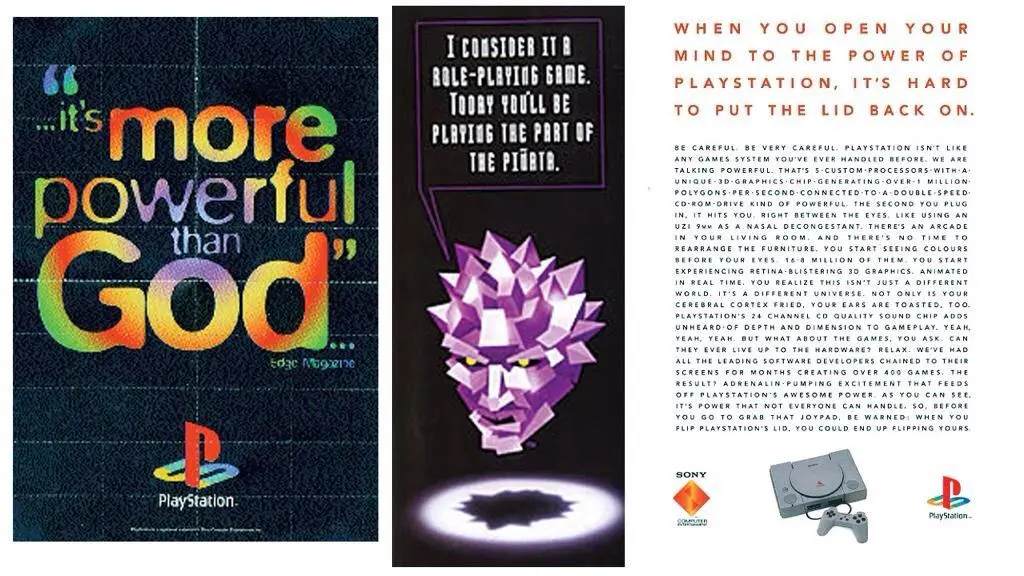
Durability
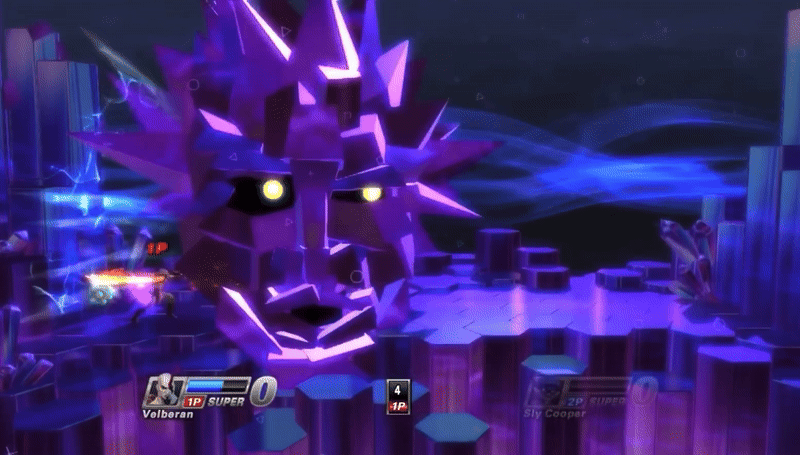
Speed
Scaling
Master Hand
Smash Fighters
In the beginning, the Smash Fighters used to be mere toys. This was until Master Hand gave them life and began challenging them for sport. Seeing as Master Hand can fight on par with the Smash Fighters and take their attacks he should scale to their feats.
Other Bosses
When it comes to bosses Smash is no stranger to powerful foes. Master Hand however, outranks almost all of them with his power and status. And while he may have been captured by Tabuu, we have no idea how close the original encounter was and when we see Master Hand fail to break his barrier, Hand is clearly weakened and damaged. Since all of the Smash Fighters can defeat these bosses and Master Hand is similar to them in power, boss scaling should come as no question.
Galeem and Dharkon

Galeem and Dharkon are the most powerful beings in the Smash Universe. However, Master Hand should at least downscale them by scaling the Smash Fighters, who were able to take both down at the same time
Polygon Man
The All Stars
After an All Star ran the gauntlet and reached their spikey adversary, Polygon Man would form, spawning duplicates of the fighters to challenge them. Seeing as he can tank multiple beatings from every All Star while staying in formation, he should scale to them.
Weaknesses
Master Hand
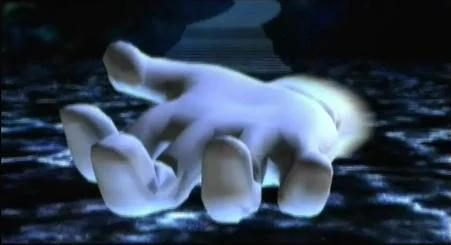
While Master Hand is astonishingly powerful, the creator of Smash is still with his weaknesses, some greater than others. For starters, Master Hand has a rather poor track record against mental attacks and control, being utilized as a puppet by both Tabuu and Galeem in Brawl and Ultimate. To be fair, Master Hand would always recover and even played a significant role in bringing down Galeem, but it is still an issue worth bringing up. Having such an ability is by no means a guaranteed win against Master Hand, but given his typical performance, it would likely be useful to have.
On top of that, perhaps the most obvious weakness Master Hand tends to run into is his tendency to hold back. Of course, most of Master Hand’s duels are just intended to be casual challenges and tests of one another’s ability, so it’s not like we’ve seen him throw a duel to the death or somesuch, and Master Hand has taken fights seriously when needed like when he crushed Galeem’s army. But it is still a habit of his to not bring his a-game out immediately unless he’s completely aware of extremely high stakes in a battle, which could cost him against sufficiently cunning or quick foes.
Polygon Man
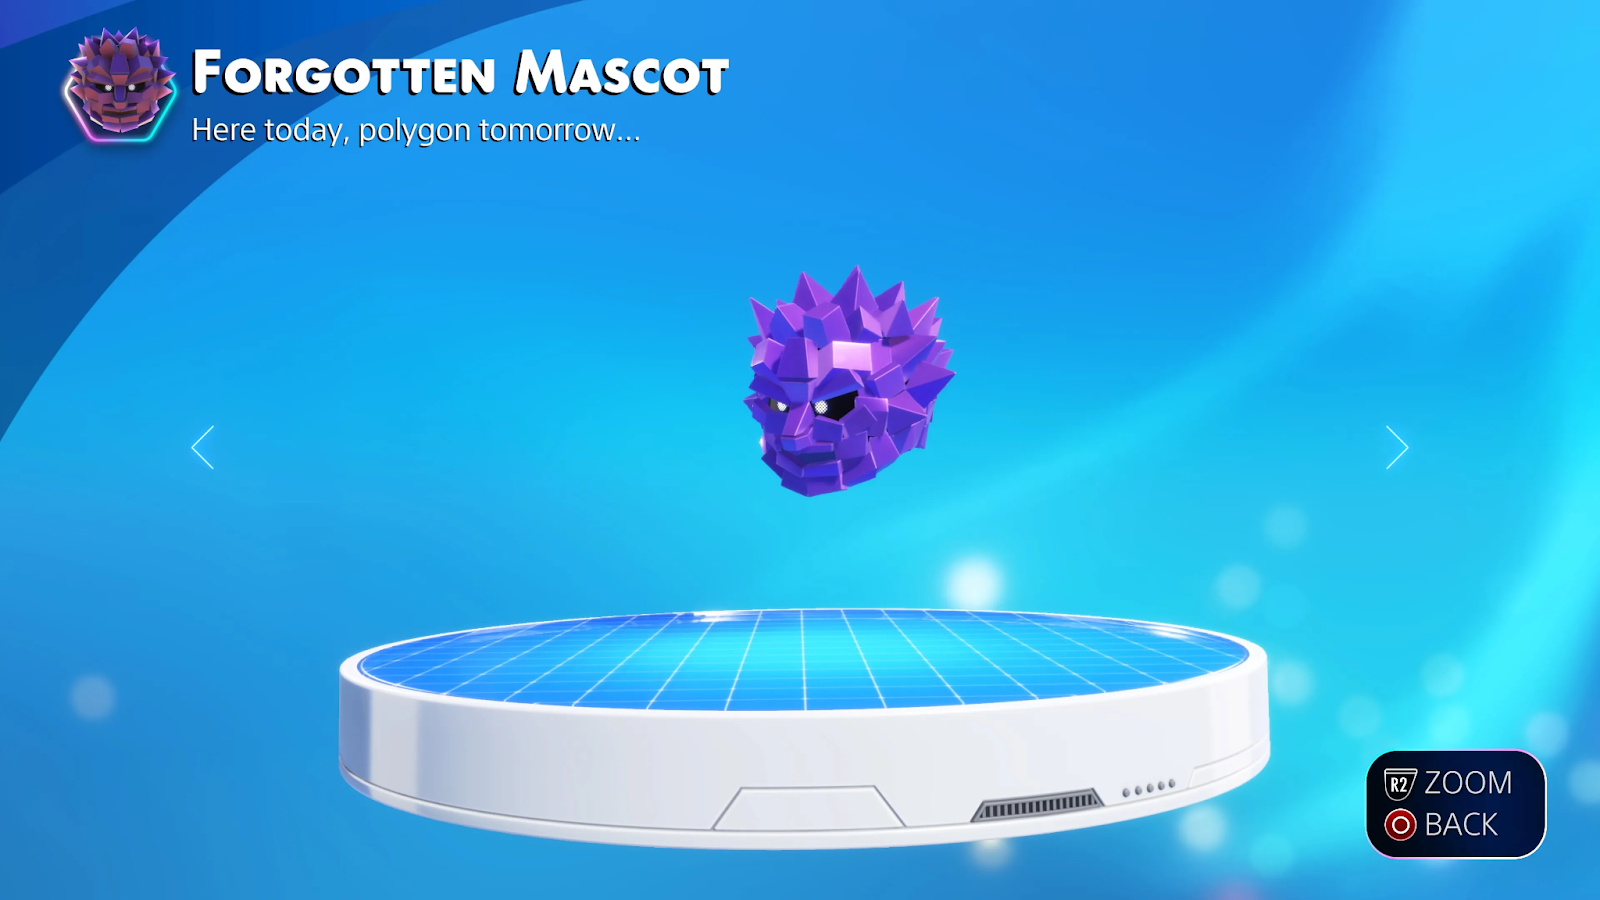
Outside of being an actual nobody, Polygon Man does have some fatal flaws in combat. His biggest being his arrogance. Polygon Man sees himself as a god and that no one can touch him until he loses at the hands of the All Stars. His arrogance leads to him underestimating his opponents and leaving himself vulnerable to enemy attacks.
Polygon Man’s other biggest issue is his lack of fighting ability. While he can transform to rectify this issue a little his movepool is very limited, with his only attack not tied to defeating an opponent being a head slam. Once he transforms he gains more attacks but still not enough to contend with more varied arsenals and movepools.
Before We Decide
Master Hand’s Snap / Galeem’s Light and Scaling
Smash is known for massive scope and size as a crossover. With over 200 unique franchises represented in the game clearly something big must be happening with the verse. In this section we will cover 2 main feats and clear up any misconceptions we can. First being Master Hands' potential creation of the Smash Universe and the second being Galeem’s crushing of the universe with light. This section will also attempt to add extra context to the actual scaling of characters to each other presented in the blog.
First up, did Master Hand create the Smash Bros. Universe? Well this is a debatable subject when you take into account the descriptions for Master Hand being VERY VAGUE. However we believe there is just enough in these descriptions to give the context required to add validity to him making the universe. In his description from Smash 4 Master Hand is stated to be the source of all creation in Smash 4 which would imply that he created the universe and everything in it. But we can get more specific. Master Hand’s Brawl description says he is the “link between this world and the one beyond”. This is elaborated on in Melee as Master Hand being the link between the imaginary world of Smash and the real world. There is only one real time this link is ever actually shown in game. Can you guess the scene?
If you said the opening to Smash 64 give yourself a pat on the back. The Smash 64 opening is the only time we ever see the real world in Smash. The rest of the time all of the in game events take place in Smash Bros. This would imply that in this moment, Master Hand created the Smash World and acts as the link between the world he comes from and the world he created. Now we aren’t going to argue R>F SSB that’s silly but based on multiple descriptions (such as the Smash 4 Master Hand description) we can safely assume Smash is at least a universe in size.
Another time where Smash is referred to as a Universe is when Galeem went ahead and “crushed the universe” in one big blast of light. Now there is no debate on if this is a universal feat in itself it’s stated to be such the question is the scaling around it. When Galeem first shows up he makes it clear he is stronger than Master Hand by having an entire army of controlled Master Hands at his disposal. This would imply he is on a level much higher than Master Hand himself. Further implied by Galeem bodying everyone in the opening of World of Light, with the exception of Kirby’s escape aboard the Warp Star.
However, based on how Galeem’s power works we can likely infer the Master Hand army is much weaker than Master Hand himself. What Galeem does to create armies of fighters is take the original fighter and copy them. He then has a Spirit (which is likely weaker than the original fighter) and then puppets the clone. This weird melding of spirits and fighter likely implies that the cloned fighters are not as powerful as the original. If you need more proof, clones directly puppeteered by Galeem and Dharkon’s power (which are much closer to the Master Hand ones) are easily swept away by Master Hand. Usually Master Hand is on even footing with the Smash fighters, so it would make no sense for him to suddenly body every one of them with ease.
So how does Master Hand scale to (or more likely downscale) Galeem? Well through the fighters who are capable of defeating Galeem. Master Hand goes even with the Smash Fighters in almost every game he’s in and even implies he’s sometimes not trying very hard as shown in his Brawl description. These fighters can beat both Galeem and Dharkon at the same time. You may rightfully be confused as at the start of the game all of the fighters got beat with relative ease from Galeem but there is some context to this.
First off, everyone but Shulk (thanks to a small dose of precognition) was not aware of what Galeem was capable of, they were expecting to fight a group of Master Hands when suddenly they came out as spirit snatching beams. Most of the fighters had no idea how to match the attacks being sent their way and were overwhelmed. Most of the fighters were still overpowered and one shot but that leads to number 2.
The fighters get stronger as World of Light progresses. The fighters regain their bodies and train against spirits and other fighters. It really is simple as characters get stronger throughout the course of World of Light. Characters literally train and level of Spirits throughout World of Light to make themselves stronger. This all provides a pretty simple explanation as to how characters can lose the initial battle but win against both of the main guys at once.
There is also the Septhiroth reveal trailer but like… how did Galeem come back and why does he get one shot when Master Hand and other bosses put up a solid fight against Sephiroth? You could maybe argue that since Sephiroth (and the other DLC for that matter) are from a different dimension, maybe this Galeem is? It would make sense that it takes place sometime after the original WoL events since it takes place in a different place from the original WoL cutscene and other DLC characters are in the scene. It would also give an explanation on how this Galeem may be weaker than the one from WoL. However, that gets into heavy speculation that doesn’t have much basis. The trailer is also clearly just meant to hype up Sephiroth as a powerful character. It’s a weird mess that still overall supports the argument that Master Hand has ways to scale to Galeem.
So Smash is solidly Universal in AP. What about speed? Remember Galeem’s light? Ends vary based on if you go directly based on visuals or you use the ending text for how far the light reaches in the 13 second timeframe Galeem takes to expand their light. However, it still gets at least 473.32 billion and at best gets 20 quadrillion times the speed of light. Now you may be wondering how we scale everyone to these incredible speeds.
We simply have to look back to the WoL cutscene again. In this scene we see plenty of characters react to Galeem’s initial light blast before getting overwhelmed. This includes Link, Bayonetta, Lucario, Greninja and of course Kirby. Again, while most characters do get caught it’s important to remember they were caught off guard and overwhelmed. Most characters also couldn’t escape no matter how much they dodged due to Galeem’s range and no ability to travel off planet. Sakurai himself said this played a huge factor in determining who survived the blast. It helps the argument further that the Warp Star is an item anyone can use and anyone can react to in Smash. So even if it may not seem like anyone could match Galeem’s light, plenty of characters were able to but simply didn’t have the ability to make it out of the galaxy safely.
PSASBR Cosmology / Polygon Man’s Merger
In most franchises figuring out if the main bad guy merged a bunch of universes together would be easy. PlayStation All Stars Battle Royale is not like most franchises. However, using the subtext given in the game we may be able to form a timeline that explains what happens during the merger.
First, we need to confirm the merge is Polygon Man’s doing. Which we should be able to confirm based on two main sources. Zeus says that a self-proclaimed god lays claim to all of creation (Obviously referring to Polygon Man as shown by the final monologue where Zeus says he has stripped the false god of his pretenses). We then know that it’s all done by one source via Issac Clark, who, after observing Polygon Man’s boss stage, says all the energy comes from one source.
Now one could attempt to argue that maybe all the characters simply exist in the same universe and that Polygon Man called them all together. Nathan’s story mode would seem to imply this as he not only had a map to the gathering but had also stolen pages from the Thievius Raccoonus. However, based on Spike's arcade mode we have two crucial details we can use. 1. The arrival of Polygon Man and the other fighters was very sudden and happened so quickly it was mistaken for an alien invasion. 2. If the fighters had existed in the same universe and planet the whole time there is no way Parappa and everyone else would have never known about the events of Ape Escape along with Specter’s attempts at taking over the planet. You can also say a merger took place because once Polygon Man is defeated, the All Stars are returned home, and no signs of any merger or even stage transitions exist.
But this is only one reason we can’t assume they all existed at the same time prior to the events of the game. For example, other stage transitions in PSASBR show different franchises mixing and matching by one franchise invading the other. Another piece of proof that universal merging took place is that neither Spike nor Isaac could be tracked/communicated with. This implies they went outside of the boundaries of what’s detectable in their universes as the professor was able to detect the effects of the merge as an alien invasion that could threaten the world, but not Spike. All of this is on top of the strongest point that can be made. See, In the XMB game manual for PSASBR we are told that the fight will have multi dimensional consequences and that items come from different PlayStation worlds. So based on all of this evidence we can safely conclude Polygon Man did some form of merging event with the different PlayStation universes.
This XMB statement also helps us gauge the scale of the merger. Based on the “multi dimensional consequences” statement and Zeus' statement about Polygon Man laying claim to all of creation allow us to make the assumption the merger was working on a massive cosmic scale. Thus, it should be safe to assume the merger brought in the larger universes of each world. These merges are then having fighters travel from across the merged universe Polygon Man has created as explained by Zeus. We have some smaller pieces of information about the mergers scope as we see all sorts of locations such as a Metal Gear city, Limbo City, Toa Valentus, Olympus, LittleBigPlanet, Helghan and potentially whole star quadrants from Ratchet and Clank. These of course only stand as supporting evidence to the scale of the merger but it is still important to note these instances. Since we can assume the scale of the merger is on a universal scale we then need to get the amount of universes affected by the merger. Luckily enough between characters and stages we can safely assume 34-35 different universes were merged into one. The uncertainty of the number comes from the classifications around Cole and Evil Cole but since it’s pretty impossible to say Good and Evil Cole can exist in the same universe naturally we will say 35 Universes were merged.
Now you may argue that Polygon Man is only capable of causing a merge on this level through hax abilities and not his raw stats. However, we believe Polygon Man is capable of scaling to his merge. As we have established, Polygon Man is the sole source of energy that’s causing the multi-dimensional shenanigans so his energy packs quite a punch. So much so that the PlayStation All Stars are given power by absorbing this energy. While not much is confirmed about the buff given to the All Stars it seems very likely it would be an increase to physical stats (Like Heihachi who only has physical attacks meaning his boost has to be physical or boosting the physical speed of a vehicle). This would be important because this would imply that the energy Polygon Man uses to physically give himself power would be on par with that of his hax energy.
You can also just use the fact that Polygon Man’s form behind the face is just a ball of energy which should probably scale to the energy it’s outputting to cause the merge because… it is the energy.
A final note in this section before the TLDR is that you could potentially get Polygon Man to the same levels as the Merger through Zeus' statement about laying claim to the creation of all. While it’s way more dubious and could be interpreted many ways, the one that makes the most sense (in my/Tru’s opinion) is that Polygon Man is claiming that he created all. All could just mean the universe but it can also imply that he created every universe in PlayStation All Stars Battle Royale. To me the way it’s written implies it’s not just Polygon Man claiming the universe like someone would claim a mountain with a flag. If that was the case it would have been worded more like “Laid claim to all of creation”. This is much more dubious than the existence of the merger but is also much more direct so do with that as you will.
Full TLDR….
We believe the Polygon Man initiated some kind of merging event. This event brought in the universes of many PlayStation worlds and due to the fact Polygon Man sustained this merge with his energy that makes up his main form we can assume along with other evidence he scales to this physically. This merge likely contained 35 different PlayStation worlds making Polygon Man 35 X Universal.
Of course there is one aspect that hasn’t been talked about…
The Immeasurable Arguments
Now that you understand the basics of Galeem’s light and Polygon Man’s merge you may ask about speed.
While we have given you the calcable side of Galeem’s light there is an argument for it being immeasurable. However, we believe it’s not very good. The argument assumes Galeem’s light affected multiple space times due to there being multiple timeline incarnations of Link hit by the blast. This would make sense in canonical Zelda but, this is Smash. The Smash World is its own separate timeline not affected by other timelines. While Young Link himself is an alternate version of Link from a different timeline, he clearly is in the singular Smash Universe as he was affected by Galeem’s blast, which was stated only to have affected the singular Smash universe. So unless the Smash universe is some super universe with multiple timelines in its one span (which wouldn’t make sense as they are treated as a separate thing in Young Links guidance), there is no way Galeem’s light is immeasurable. This also debunks the idea that Galeem’s light scales to any larger Smash cosmology elements so no multiversal Smash scaling I’m afraid.
Things then get dicey when we move over to the side of Polygon Man and his merger. The argument here is that Polygon Man is merging different spacetimes but like Galeem’s light, it has many pitfalls. For one, we have no idea if Spacetimes are included as part of the merger. All we know is that the multiple universes are colliding together due to Polygon Man’s power sustaining it. Spacetimes may not be included in the merger. If we have to struggle to even prove a merger exists it’s very hard to get the actual specifics of what is being merged outside of vaguely universe merging. This interpretation also requires different spacetimes to even exist between universes which we can’t confirm. You can use outside information like Evil Cole and Good Cole being from different timelines. Same with Big Daddy and the Columbia stage but none of it’s ever confirmed In PSASBR specifically and is thus running on a slippery slope. The idea of it being based around simple dimensionality and not timeline/spacetime based is also somewhat backed up by the events of PSASBR being described as multi-dimensional and having no mention of spacetime in the description talking about the consequences of the game (Polygon Man’s merger).
So can you get speed out of the merger at all? We know Polygon Man’s energy affects physical stats like speed so you could at least calculate the speed of merging the 34-35 universes right? Well without a solid timeframe or even anything that close you really can’t. A lot of it would be vaguely assuming things that we can’t give any actual evidence behind. You can’t make a good assumption on the merger speed based on anything in PlayStation All-Stars Battle Royale so you can’t assume a good timeframe. Any assumption could be wildly inaccurate and even making an assumption would likely be far too charitable. We can’t even prove how the merger works let alone the speed at which everything happens. You could also just chalk it up to Polygon Man’s AoE which would hamper the feat heavily but again we can’t confirm anything about the speed at all. Ergo we cannot get any speed for the feat because the factors at play are far too vague for any calculation to be accurate.
Verdict
Stats
With a fight like this, one of the biggest factors going in is naturally going to be the matter of how Master Hand and Polygon Man compare in terms of raw stats. Both of them are known for their immense power in the worlds that they have created or threatened, so how would they fare? Well, in terms of power, Polygon Man appears to have the edge. Master Hand, of course, should upscale quite reliably off of some impressive feats that occur throughout the Super Smash Bros. series as a whole. Feats like Sephiroth’s Supernova, for instance, can garner an impressive yield, clocking in at 550 kiloFOE, certainly an impressive performance to say the least.
Pairing the Smash Fighters against the Playstation All-Stars, Smash Bros. actually has the edge in power thanks to Sephiroth’s feat. But ultimately, the real comparison lies in Master Hand’s creation of the world of Smash against Polygon Man’s universe merging. And unfortunately for Master Hand, the universe merge is much stronger. Creating a universe is nothing to scoff at, and certainly crushes the majority of fictional fighters, but Polygon Man merged roughly 34 to 35 different universes with his power. That is a dramatic difference in power that Master Hand is not able to compete with. Even comparing Master Hand to Galeem likely wouldn’t split the difference, and all things considered, Sony’s forgotten mascot is likely the safer pick in terms of raw power, and he could reliably crush Master Hand and his forces in terms of raw strength.
However, that situation flips very quickly on its head the second you bring the subject of speed into the conversation. Given the various problems in measuring a speed for the universe merging, such as a lack of timeframe, lack of clarity if it was an AOE feat, whether Polygon Man can apply that speed in battle, and more, we can’t really use that feat for an actual speed figure. Fortunately, he should be superior to Raiden, who can deflect EM waves in the game. This feat manages to glean a result of about 30c, putting Polygon Man and his forces quite safely in the FTL range. Not bad!
But it’s ultimately just drastically outclassed by the kind of speed Super Smash Bros. is playing with, by a jaw-dropping margin. Smash fighters are already capable of rather consistently dealing with light speed attacks and the like, such as dodging Pit’s arrows. That alone already puts Master Hand and his fighters in a roughly similar range as Polygon Man’s all-stars, but this goes without addressing the matter of Galeem.
Unlike with Polygon Man’s merge, we can get a pretty good estimate on Galeem’s attack wiping out the universe. Even taking it at the lowest figure, this feat still gets 473 billion c, a figure that just completely blows Raiden’s EMP deflecting out of the water. And remember, this is the lowest figure, Galeem’s attack could likely get dramatically higher, only increasing the size of the blitz. And on top of that, given Kirby was able to successfully escape Galeem’s attack with the Warp Star (an item that can be reacted to and dodged in-game as well), the regular Smash Bros. fighters should also be capable of similar speed and reactions. There’s just not really a contest to be had here.
Ultimately, both Polygon Man and Master Hand have dramatic advantages in different categories. Polygon Man and his fighters are a good deal stronger than the fighters of Smash, but Master Hand and his allies will be capable of blitzing the Playstation All-Stars millions of times over. It is worth pointing out that the gap in speed is dramatically larger than the gap in power is, so this would likely overall be an advantage for Master Hand. That said, it would be best to take this information into the next section, to see how these advantages both sides have can play in-tandem with their abilities and arsenals.
Arsenal & Abilities
So, Polygon Man is stronger, but Master Hand is faster. As such, both need to figure out a way to score the win despite a specific disadvantage. Polygon Man needs to find a way to reliably score hits on Master Hand before he gets blitzed to death, while Master Hand needs to find a way to circumvent the power gap and score a kill. While this might sound tricky for both, this is where the battle generally begins to tilt in Master Hand’s favor. First off, given Master Hand’s dramatically higher speed, he is free to pull out as many bizarre abilities as he wants, and has all the time in the world to get creative with his approach or craft a game plan. On top of that, his speed also means it will be dramatically easier to dodge or counter any oncoming hax Polygon Man might try throwing out. But what sort of tricks are both sides playing with?
Polygon Man has a lot of forms of options to play with. With things like flight and his ability to shapeshift into various beings from throughout Playstation history, it’s only natural that he has a pretty wide array of moves and powers to fight with. That said, most of these tend to be rather standard powers, such as firing missiles, streams of fire, throwing spears, etc. All great things to have, but they don’t really solve the problem of bypassing Master Hand’s speed, and Polygon Man tends not to be especially creative with these forms and powers. That said, he does have a few winners in his arsenal. Most prevalent is his ability to corrupt those he defeats, an extremely great power to have in a battle like this. Master Hand is consistently shown to be vulnerable to things like corruption, so in the event that Polygon Man pulls it off, he should have this battle pretty safely in the can.
That said, there is still the caveat of Polygon Man needing to actually beat Master Hand before he can trigger this power. While it is a good way to stop Master Hand from regenerating after defeat, it doesn’t really help defeat Master Hand to begin with. And beyond that, things like reality warping won’t really help too much, as Master Hand is just as good, if not better, at controlling reality to his own whims. He is the creator of his universe, after all, and such tricks won’t be anything that can really get an edge over him.
So for all his power, Polygon Man doesn’t have anything especially great for taking down Master Hand directly, so he needs to hope he can catch Master Hand off-guard and land a solid killing shot before the hand manages to bypass his power. At that point, the question shifts over to Master Hand, and the matter of figuring out if the creator of Smash has the tools to whittle Polygon Man down. Given his vastly superior speed and creativity, if he has the means to do so, he’s likely to figure out his win-conditions before Polygon Man figures out his, so it just comes down to if he actually has options to begin with. Fortunately for Master Hand, he very much does.
Master Hand is capable of crafting a wide variety of status effects, buffs, nerfs, and a wide assortment of other bizarre things into a battle whenever he so pleases. First off, Master Hand has a sizable edge in that he has access to the majority of his powers whenever he pleases. He doesn’t need to shapeshift into different forms to use different attacks, outside of those possessed by Master Core, and as such he is free to tap into his wide arsenal of powers at will without needing to change forms. Armed with things like flight and teleportation, Master Hand is free to get around the battlefield just as well as Polygon Man, if not better, and while Polygon Man needs to transform to use things like fire or missile attacks, Master Hand has access to these sorts of special attacks out the gate and whenever he wants. But much more important is his ability to debilitate Polygon Man and cripple him immediately.
As the master (heh) of Smash Bros., Master Hand is capable of assigning pretty much any kind of status to anybody he pleases. And unfortunately for Polygon Man, this list of powers is rather substantial. The hand is capable of shrinking his enemies to make them dramatically weaker and easier to crush, or even increase the size of his allies to make them much stronger. He can enhance the launch rate of enemies to make them weaker, slow them down to a crawl, or make himself and his allies even faster than before. Polygon Man can summon one or two fighters to assist him at a time, but Master Hand can casually generate enormous hordes of fighters to help him whenever he wants, dramatically outnumbering Polygon Man and being capable of quickly flooding the battlefield with his allies. And of course, Master Hand has the ability to stun Polygon Man with a snap or put him to sleep, leaving him wide open for free damage or powerful hits and hax without the large face being able to put up any sort of resistance. Even worse, Master Hand can perform these techniques over and over again, potentially locking Polygon Man in an unbreaking chain of stun or sleep while the hand applies hax, damage, or figures out another plan to take him down without any chance of being punished for it.
And of course, Master Hand has the ability to passively apply damage to Polygon Man, regardless of any sort of power gap. The Flower status effect will passively eat at Polygon Man’s health throughout the battle at a constant rate, ignoring power or durability and steadily gnawing at the face’s dwindling life bar. On top of that, the Flower effect can be stacked, so if Master Hand is feeling cheeky, he can apply the status multiple times on his enemies and their health will drain away rapidly, to the point that they could be killed in seconds. And with Polygon Man still being vulnerable to being put to sleep or a stunlock while this is active, he could potentially be left with damage stacking up indefinitely until Master Hand ultimately puts him out of his misery. As if that wasn’t bad enough, Master Hand can just decide to apply massive blocks of damage onto fighters at will regardless of power or durability, so he can just decide to apply enormous chunks of damage himself without throwing out any kind of attack, and it will promptly be taken from Polygon Man’s health, let alone with the continuing passive damage from the flower. The power and durability gap may be notable, but it’s not big enough to save Polygon Man from just having his health eaten away passively or if Master Hand just decides to take his health away because he said so, and at that point, Polygon Man can be dispatched in basically a single hit, still powerless to do anything to stop the damage rapidly applying itself to him.
In short, this category isn’t really much of a competition. While both of them have options to play with, everything Polygon Man has in his transformations is something Master Hand can do in his base powerkit, let alone bringing Master Core into the equation. And Master Hand has ways to subvert the power gap by dramatically weakening Polygon Man through shrinking him or increasing his launch rate, taking the formerly noteworthy power gap into something that still exists, but is suddenly much more manageable for Master Hand and his forces. Master Hand is free to just continuously lock Polygon Man into sleep or stun conditions and deal free damage, and worst of all, Polygon Man is just constantly going to be losing enormous blocks of health every second the battle goes on due to the Flower status and Master Hand’s ability to just grant huge amounts of damage to fighters at will. Of the two, Master Hand is the only one with a way to circumvent his existing stat disadvantage, with stat buffs and debuffs, stun locks, and constant passive damage making it substantially easier to land the killing blow on Polygon Man than vice-versa. Abilities very dominantly goes to Master Hand.
Armies
While Master Hand has a pretty clear edge in terms of abilities and the like against Polygon Man, the fact of the matter is that neither of these two are exactly alone. Joining the battle comes the casts of Super Smash Bros. and Playstation All-Stars, and as such it is imperative that we analyze what the hordes of fighters are capable of in this battle. That said, while there are a lot of factors to go over, at the end of the day, Nintendo’s super stars manage to claim the edge in this battle.
First off, and perhaps most obviously, the Smash Bros. hold an absolutely enormous advantage in terms of raw numbers. Not only can Master Hand deploy dramatically more fighters at a time than Polygon Man, his forces are just dramatically larger and more diverse. Of course, this is somewhat obvious, the roster of Smash Bros. is just significantly larger than that of All-Stars, let alone when one accounts for other forces like the Master Fortress summons and the Fighting Polygon hordes. On top of that, Master Hand has the ability to summon hordes of the same fighter at once, so he isn’t even capped at the number of playable fighters, being fully capable of duplicating them basically as much as he wants. Coupled with his absurdly higher speed, Master Hand is fully capable of flooding the field with his allies in a matter of seconds, while Polygon Man is stuck playing catch-up with his much smaller line-up of fighters.
Of course, that’s not to say Polygon Man’s forces are completely outgunned. If one doesn’t scale the allies to their leaders in this battle, Smash characters being able to survive Sephiroth’s Supernova dramatically outclasses anything the All-Stars can do, let alone fighting Galeem. But the All-Stars can fight and defeat Polygon Man, so one can certainly argue that they will also be much more powerful than Master Hand’s allies. That said, in this scenario we also must give the same leeway to the Smash roster, at which point the enormous speed edge Master Hand possesses also goes to his fighters. As such, this scenario is largely the same, albeit with a dramatic numbers advantage for Smash. That said, the All-Stars unfortunately don’t have too much else in terms of advantages.
Master Hand doesn’t just have a lot of fighters on his side, he also has the ability to grant them items and tools to aid in the battle, and these can come with a lot of useful perks. While there are a few useful items that can help Polygon Man’s forces, such as defensive shields and the ability to try and petrify foes with Medusa’s Head, that’s only going to get so far against the Smash roster, and the latter side does have a few counters. Items like Mr. Saturn and various moves such as Marth’s Shield Breaker, Jigglypuff’s Pound, or Donkey Kong’s Headbutt all specialize in shattering shields quickly, diminishing the threat of Polygon Man or his allies trying to use shields to their advantage. And while Smash characters would be vulnerable to petrification, Master Hand can bring life back to them with ease thanks to his creative abilities, such as how he gave life to their trophies. Conversely, the fighters of Smash have a lot of options to make absolute havoc of their enemies.
First off, the Flower status effect previously mentioned can be applied to all enemies on the field immediately by Master Hand, let alone passive damage. This can also be stacked by the fighters thanks to Lip’s Stick, making use of the item to ensure foes are always taking passive damage courtesy of the wand of the Queen of Popples. On top of that, the fighters have the ability to immediately drag enemy summons out of the battle thanks to both the Beetle and Boss Galaga items, capturing foes and removing them from the fight in a single shot. Things like Pitfall Seeds and Deku Nuts help cripple enemy mobility, while Death’s Scythe can be used to immediately kill any adversary caught by it with a little luck and high damage. The Clock item can dramatically slow down all enemies on the field, massively enhancing the already blistering speed gap, while Lightning can shrink all enemies on the field to cripple their power. The Special Flag can add an extra life to any fighter who uses it, making it extremely difficult to eliminate fighters for good. And of course, this all goes without mentioning powerful attacking items like Spiny Shells, Ore Clubs, Bob-ombs, or the Home Run Bat, tools that can deal devastating damage and make dealing with a potential power gap a lot easier.
Of course, this all goes without mentioning the fact that the Smash Bros. fighters aren’t exactly the only ones who are joining the battle to aid Master Hand. Also coming into the brawl are a truckload of Assist Trophies and Pokemon, all of which come with their own powers and abilities to make the job easier. Pokemon like Arceus can help cripple enemy mobility by constantly knocking them out of the air, also putting the brakes on Polygon Man’s flight. Manaphy can swap the souls of two characters to help in a pinch, and Gardevoir’s massive reflective barriers create a massive problem for any ranged attacks or projectiles Polygon Man’s forces might try. Darkrai can put numerous enemies to sleep with ease, while the likes of Victini or Xerneas can grant huge buffs to fighters, giving them Final Smashes or rendering them extremely difficult to knock away. And if Master Hand really needs to borrow some enemy power, Ditto can always transform into one and copy their abilities.
Alongside Pokemon, Assist Trophies are also worth mentioning, which create enormous problems of their own to go with the Pokemon. Shadow the Hedgehog is capable of using Chaos Control to freeze all enemies for a good several seconds, guaranteeing Master Hand and his allies can put a pounding on them, while forces like Latios & Latias or Kat & Ana can zip across the stage rapidly to hit all enemies in the area with little room to escape. Skull Kid, Ashley, Palkia, Nightmare Wizard, and Riki can create status effects that massively hinder enemies caught in their powers, while forces like Vincent can deal even more passive damage on a consistent basis. And there are also a variety of Assist Trophies that can directly join the battle for a bit to help deal more damage, such as Waluigi, Zero, or Shovel Knight.
This is already a lot of options for Master Hand and his forces to claim an advantage, let alone discussing the abilities of the fighters themselves. And, of course, they too possess numerous advantages to help take down the Playstation All-Stars. Fighters like Peach and Daisy can put all enemies to sleep with their Final Smash, or Jigglypuff can with her up special as well. Sephiroth’s Final Smash is capable of applying a number of status effects to enemies, and the Hero can do the same with numerous spells. In fact, in tandem with the amount of damage Master Hand and his forces can deal rapidly with their powers, the Hero has the ability to swiftly end the battle with powers like Whack and Thwack, which, should they land successfully, have the ability to immediately kill Polygon Man and put an end to things then and there. That might not sound likely at first, but given the enormous speed gap and the fact that Master Hand can bring multiple Heroes onto the field, this is actually an enormous threat that Polygon Man has no real answer for.
Now, that’s not to say it’s all bad. All-Stars do have the ability to one-shot enemies with their super moves if they use them, and with items that can leech away the Final Smash meter, this isn’t entirely out of the realm of possibility. Parappa’s super move in particular can defeat all enemies on screen if done successfully. But with that same line of logic, numerous Final Smashes are capable of immediately killing as well, such as Sephiroth or Sora’s Final Smashes. And coupled with the speed advantage and items that can immediately grant Final Smashes like Xerneas or Smash Balls, it will overall just be more reliable for the Smash cast to get off their trump cards, even with the threat of the All-Stars leeching the Final Smash Meter. Even if the fighters were instantly defeated by one of these moves, not much stops Master Hand from just recreating them and continuing the fight immediately. As such, it unfortunately isn’t all that reliable a win-condition, and one that would be absurdly difficult to pull off.
And this doesn’t account for the fact that Master Hand can buff his fighters further by turning them mega, speeding them up, or giving them useful items like the Franklin Badge to automatically reflect all projectiles without any manual activation. Add on to that the fact that Master Hand can always just summon in new items whenever he pleases, and the battle between the armies is rather clear-cut. Polygon Man’s forces might be stronger, but Master Hand’s fighters are equipped with far greater speed, and an enormous arsenal of tools and items that can cripple, one-shot, or shut down anything Polygon Man’s fighters can throw at them, and some of them even have the ability to immediately kill or disable Polygon Man himself in their own rights, let alone the enormous wave of damage that will be dealt by them all attacking him at the same time. Polygon Man is stronger, but not by such a degree that he can no-sell being jumped by such a massive wave of fighters, Pokemon, and Assist Trophies all uniting to take him down once they’re done mopping up his fighters. Ultimately, Master Hand is just armed with a vastly superior army that has the tools to claim the game in this melee.
Tertiary Factors
By this point, a lot has been going on with this fight, with so many variables, items, and powers coming from both sides to try and claim the victory. Fortunately, tertiary factors are actually relatively simple and clear-cut. Unfortunately (for Polygon Man at least), Master Hand wins pretty much all of them.
Skill and experience don’t really require too much discussion. Polygon Man has apparently never been bested by a foe up until he is defeated in-game, but his fighting style is relatively basic, largely trying to brute force his way through fighters. Conversely, Master Hand has a lot more battles under his non-existent belt, doing battle with basically all of the Smash fighters at some point and even cleaning out an entire army all on his own. Unlike Polygon Man, Master Hand has developed and honed his abilities quite well, to the point that he can be a legitimate threat against his opponents even while holding back for his own amusement. It’s a pretty clear-cut difference between the two.
On top of that, there’s the matter of using their powers. As previously mentioned, Polygon Man isn’t really all that terribly creative with his abilities. Some of his shapeshifting forms are pretty good, but they all tend to come with the same idea of beating his opponent down through brute force to claim the edge. Conversely, Master Hand is, according to Masahiro Sakurai himself, the “manifestation of creative spirit” in the world of Smash. He is the creator of all things in Smash, and is dramatically more willing to dip into his bag of tricks to make things more interesting or fun. Master Orders is a great example of this, with the hand just constantly applying all manner of wild scenarios to the fight to shake things up for his fighters. Master Hand is just the far more creative fighter, by every sense of the word.
Now, some might point out that for all his powers, Master Hand doesn’t tend to use at least some of them in his duels with the fighters. However, this is actually a relatively simple issue to figure out. It is important to note that in his typical duels, Master Hand is always holding back and is just playing around to test his abilities and have fun. Unlike Polygon Man, Master Hand isn’t out to do permanent damage or truly hurt his creations, he just wants a good, fun fight, and as such typically isn’t going to unleash the full scope of his might. So, why is this a problem? Well, the matter is pretty clear-cut. Master Hand is going to know pretty early on that this isn’t just a fight to play. Polygon Man’s typical agenda to destroy or fuse realities isn’t really something that meshes with Master Hand’s own desire to create or interact with his handiwork, let alone the fact that this is just a battle to the death, plain and simple. Polygon Man doesn’t get the same privileges that the Smash fighters get, and Master Hand is likely to pull no punches to take the face down, and with his vast creativity, it will take no time at all for him to start pulling all the stops to win and using his greater powers.
Finally, there is the matter of the fighters themselves. Of the two sides, Master Hand’s side is the only one with any real experience of working together as a team. Throughout the Smash Bros. series, the fighters have come together to take down numerous powerful threats, such as Tabuu, Galeem, and Dharkon. While they obviously have their differences from time to time, the Smash fighters are historically capable of setting these aside when it matters and uniting to take down dangerous threats, of which Polygon Man would certainly qualify. They have even worked with Master Hand directly during the events of World of Light, so they are all a lot more experienced and united as a force with a past of bringing down enemies together compared to Polygon Man’s army having no such history.
Ultimately, the difference is clear. Master Hand is just a much more skilled fighter, has a more developed track record of battles and combat, is far more creative and willing to use his vast array of powers, and his army is dramatically better at working together to defeat a common foe. Master Hand sweeps the tertiary factors.
Summary
Master Hand
“ *Finger Noises* ”
Advantages:
Far faster
Status effects can close the power gap by a noteworthy amount and make the speed gap even worse
Numbers advantage that can be resummoned if defeated
More equipment and items to pull from and summon
Has better abilities and even counters a lot of Polygon Man’s abilities
Army has numerous powers and abilities of their own that can be devastating
Far more skilled and experienced
Much more creative with his powers and willing to use them more
Leading a genuinely united army that is willing to follow him
Super Smash bros Ultimate
Disadvantages:
Much Weaker
Fighters could be OHKO’d if hit by a super move
Could be vulnerable to corruption if it ever landed
May or may not be a child we aren’t sure
Polygon Man
“Power is an illusion. Absolute power is a seamless illusion.”
Advantages:
Way stronger
Certain items and powers could be useful
Super moves could potentially OHKO some of Master Hand’s fighters
Corruption could be an instant win if it landed…
Somehow got multiple universes that aren’t even PlayStation
PSASBR is the best Smash-like we’ve had out of all of them
Disadvantages:
Much slower
Less fighters, items and abilities to throw out
Vulnerable to status effects and debuffs
Most of his Abilities are countered hard by Master Hand
Will likely be taking damage at all times and can be automatically killed by certain abilities
…But it will almost never connect
Much less skilled
Drastically inferior army
PSASBR is never getting a sequel
VA is still unknown to this day
Conclusion
Ultimately, there is a lot going on in this battle that may make it difficult to keep track of things. But at the end of the day, Master Hand just has the advantages he needs to win the battle. While he is a good deal weaker than Polygon Man at first, he has the tools to shut down this power gap with his status effects, can always be dealing constant damage every second the fight goes on no matter what, and has a vastly superior army that will make mincemeat of the Playstation All-Stars. He is more skilled, creative, smarter, and is leading a genuinely united force that will be doing everything in their power to defeat the threat of Polygon Man, bringing together a massive and diverse buffet of powers and abilities that just spell the forgotten mascot’s doom.
While Polygon Man’s power and ruthlessness are nothing to scoff at, he just did not have the might he needed to bring down Nintendo’s all-stars. He may not like it, but in the end, Polygon Man is forced to hand over the victory to the true master of this battle.
The winner is Master Hand.
Votes
Team Master Hand [10]: (Tru, Riley, Soundwave, Cryotechnics, Saul, ishi_yuki, Iceking, MKF4, Ghosthost, TheRealGnomeChompski)
Team Polygon Man [1]: (door-kun)
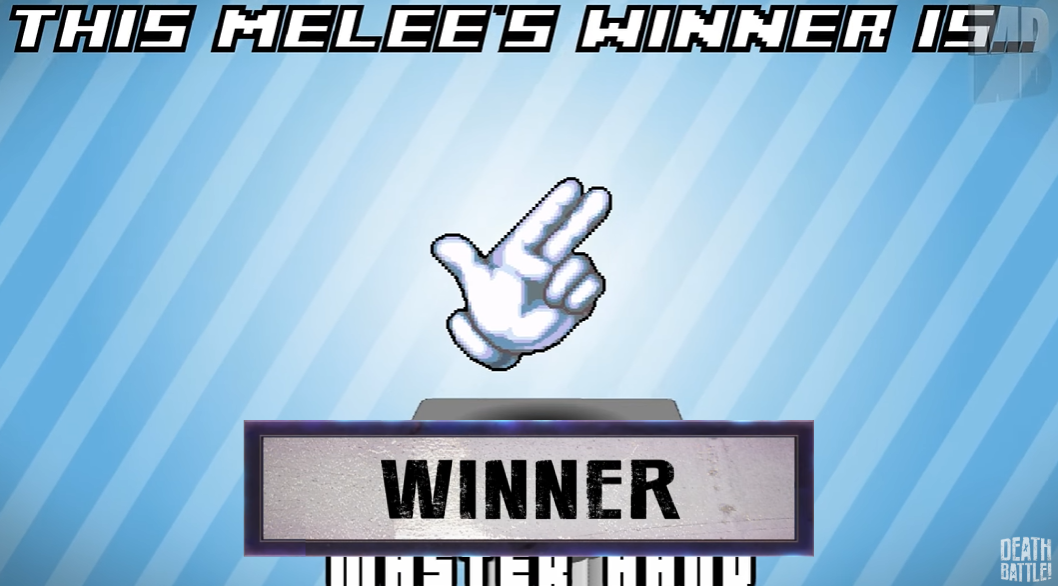
“The One Minute Melee was pretty baller.” - Cryotechnics
“Easily one of my favorite OMM episodes.” - MKF4
“It was alright ig” -Soundwave
Thank You/Next Time
Usually I don’t have much to talk about here but I do have a decent amount of stuff I wanna talk about. 1. Thank you for reading, y’all’s views and support are what keeps me making my blogs. 2. Thank you to everyone involved in this blog. Special shoutouts to Soundwave, MKF4 and especially Riley, who came in late and did so much work, he’s the goat. I can’t be thankful enough to work with the awesome people I do. 3. We passed 1 year of blog making a few months back with Dave King releasing last February so that’s cool? Might need to do something special soon. 4. If you aren’t aware Megatron VS Skeletor has been cancelled. The blog was struggling to be done despite its simplicity and its existence was kind of meaningless all things considered. Sucks that it happened this way but it is what it is. 5. One of my good friends, Yerm is starting up his own blog series and needs some help. His first blog will be Shang Tsung VS Kefka (Mortal Kombat VS Final Fantasy) so if you want to help him find him in a VS server near you or lmk and I can add you to his blogs myself. He’s a great guy and I hope some of yall can give him a hand.
Finally what you have actually been waiting for. The next time…
Booster Gold VS Agent Jones (DC VS Fortnite)
I announced this publicly not too long ago but just so it’s more widespread this is the next blog of mine. If you want in DM me on Discord at tru#2678 and I’ll see about getting you in. See you next blog!


Super interesting blog. Sad to see Megs Skeletor get cancelled, would have been nice to see someone else weigh in on IDW (assuming you weren't sticking to just the classics).
ReplyDeleteIt was just going to be the classic cartoons lol.
DeleteThis is legit one of my favorite matchups. Great job, it was well with the wait!
ReplyDelete